The seat map builder in Seat Booking for Gravity Forms is where you draw your venue: the stage, rows of seats, tables, aisles, exits and any artwork your visitors need to find their way. This guide and the video below walk through every tool and keyboard shortcut, from a blank canvas to a saved map.
New to the plugin? Start with Getting Started with Seat Booking for Gravity Forms, which covers events, prices and adding the seat picker to a form.
Seat map builder keyboard shortcuts
Single-key shortcuts work whenever you are not typing in a field. On Windows, use Ctrl in place of ⌘ and Alt in place of Option.
| Shortcut | What it does |
|---|---|
| V | Select tool |
| H | Pan tool |
| Space + drag | Pan while any tool is active |
| S | Single seat |
| B | Seat block generator |
| R | Rectangle |
| O | Circle or ellipse |
| L | Line |
| T | Text label |
| Shift + click | With the seat tool: keep placing seats. With the select tool: add to or remove from the selection |
| Option + drag | Copy the selection as you move it |
| Arrow keys | Nudge the selection by 1 pixel |
| Shift + arrow keys | Nudge by 10 pixels |
| ⌘ + D | Duplicate |
| Delete or Backspace | Delete the selection (seats with bookings are kept) |
| ⌘ + Z | Undo |
| ⌘ + Shift + Z or ⌘ + Y | Redo |
| ⌘ + Shift + G | Ungroup a seat block or table |
| Esc | Stop the current tool, deselect, or close an open panel |
| ⌘ + scroll, or pinch | Zoom |
Step 1: Create a map and pick a starting layout
- Go to Events → Seat Maps and click Add New Seat Map.
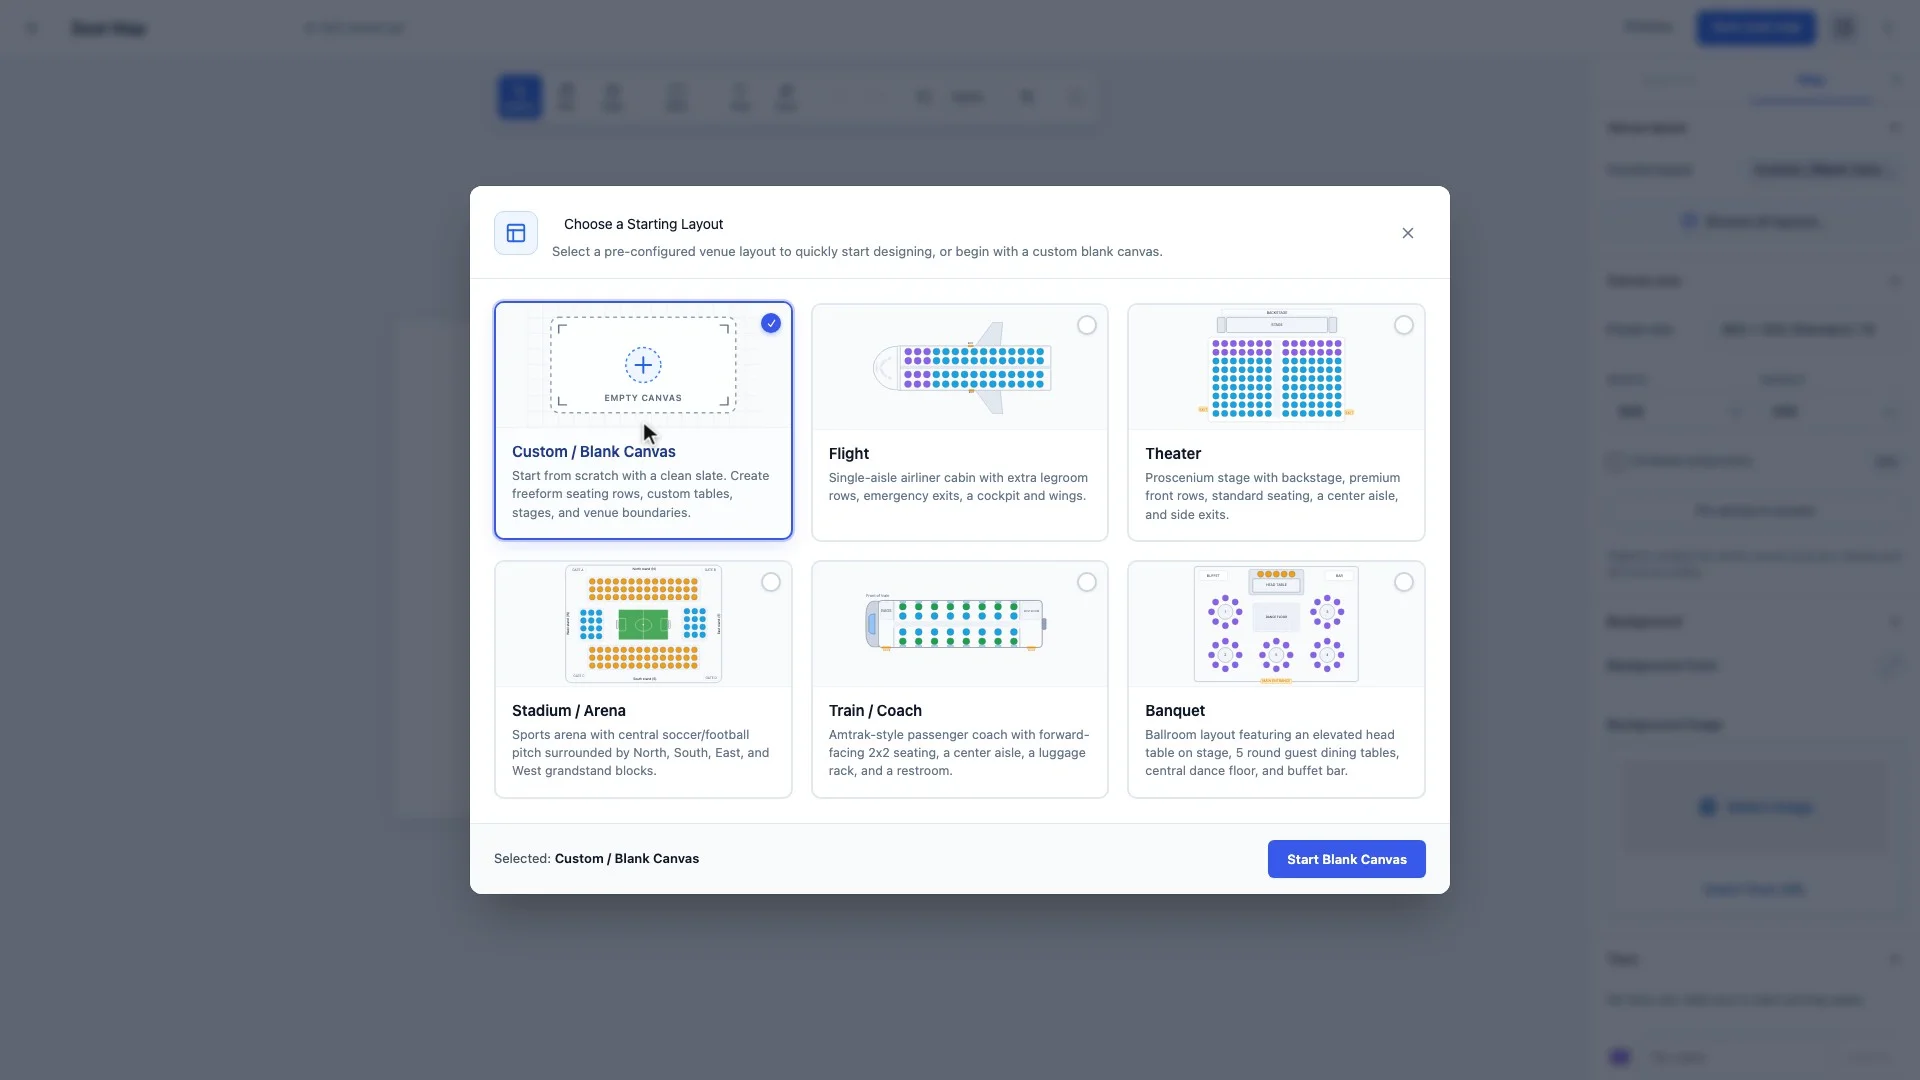
- The Choose a Starting Layout window lists ready-made layouts: theater, stadium or arena, flight, train or coach, and banquet. Pick the one closest to your venue, or choose Custom / Blank Canvas to draw everything yourself.
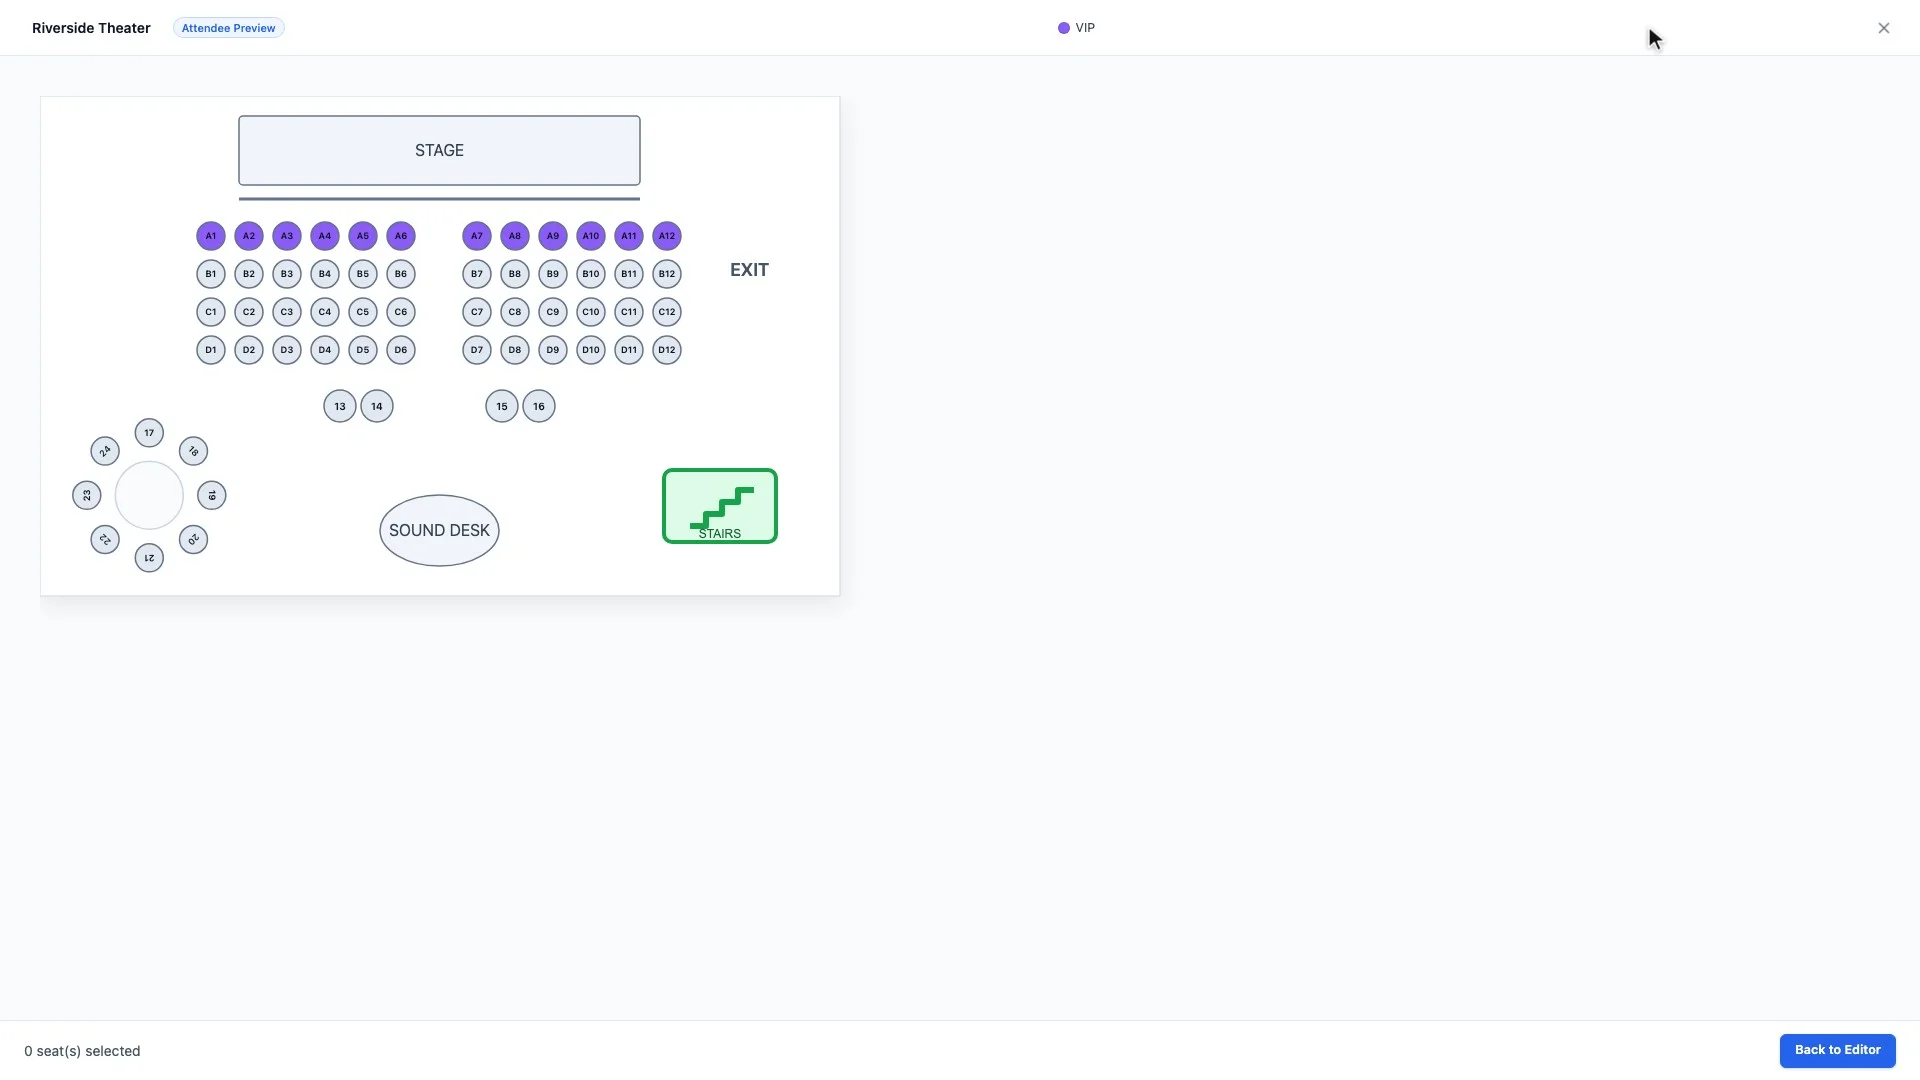
- Give the map a name in the title field at the top left, for example Riverside Theater.
The toolbar above the canvas holds every tool. The inspector on the right shows the settings of whatever is selected; with nothing selected, its Map tab holds the canvas size, background and pricing tiers.
Step 2: Draw shapes, lines and text
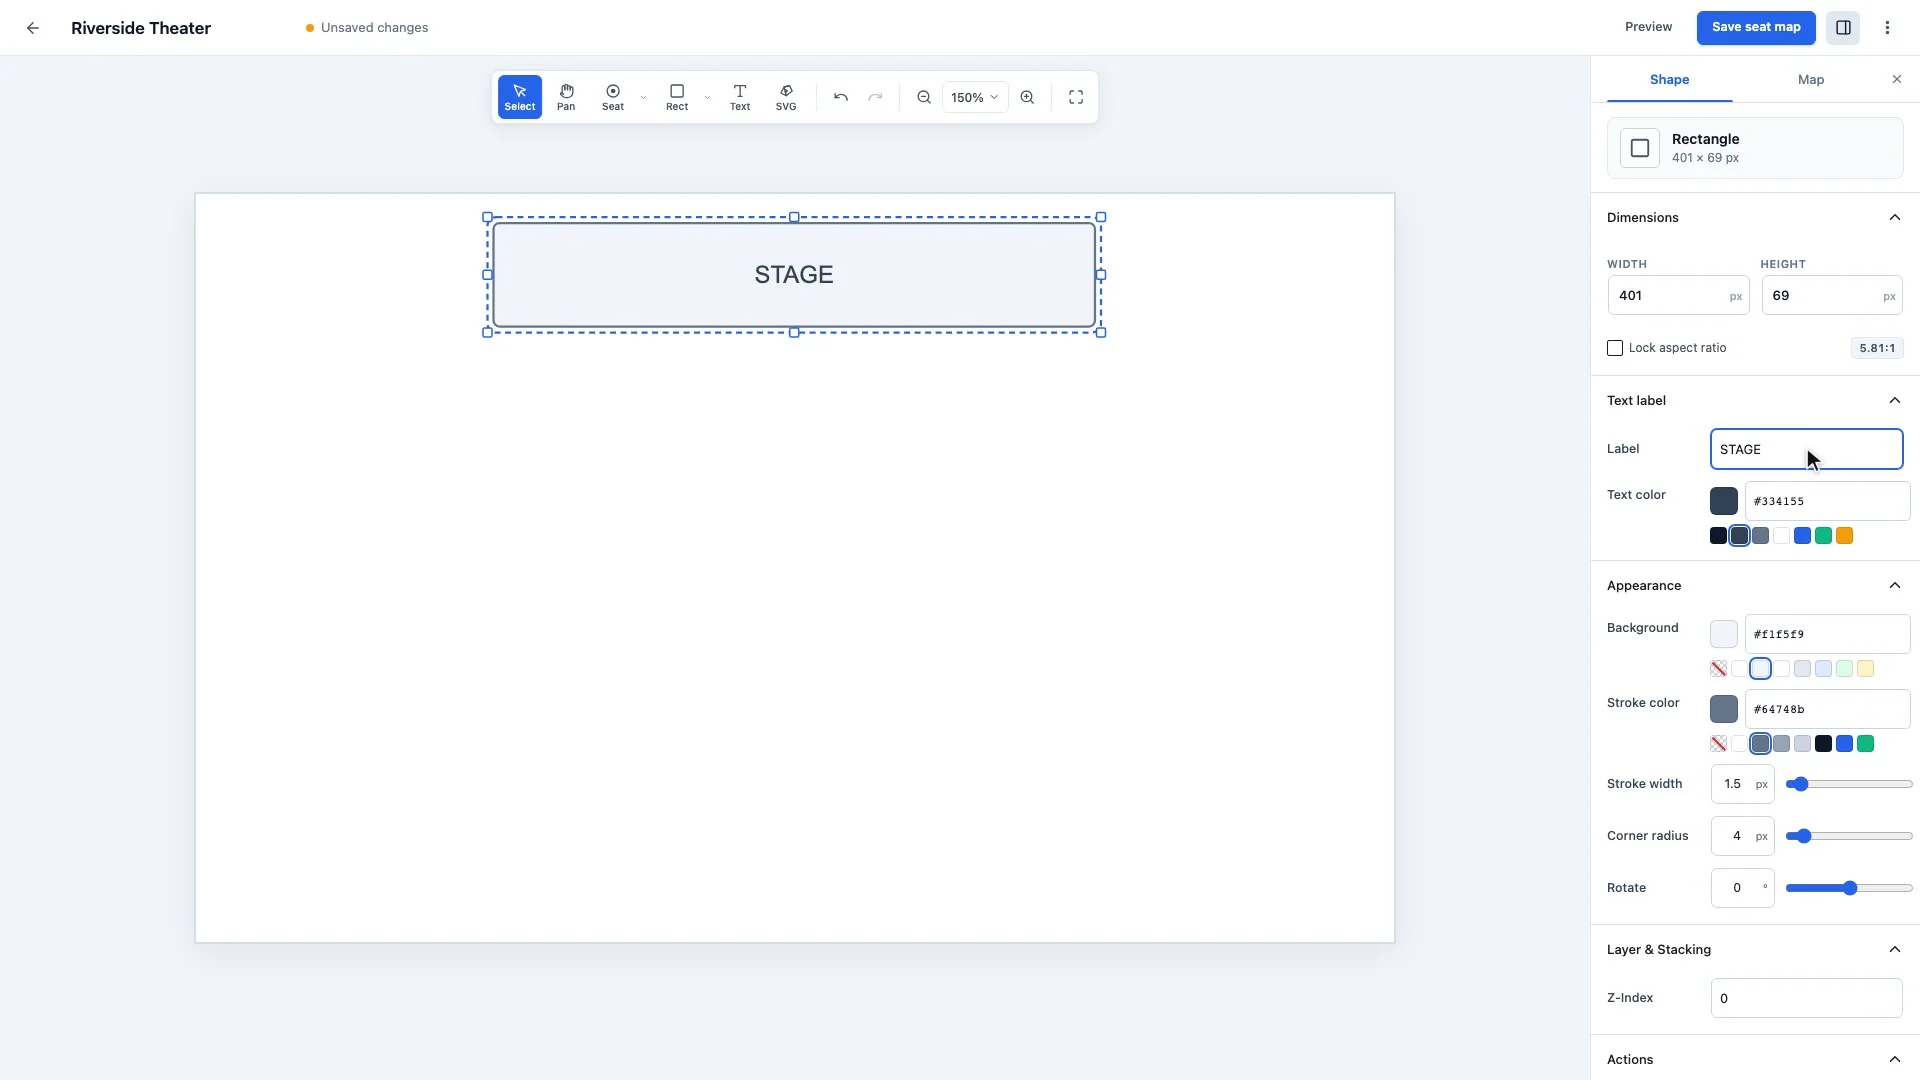
- Rectangle (R): drag on the canvas to draw it. Use it for the stage, a bar or a dance floor. In the inspector you can add a label, and set the fill and border colours, border width, corner radius and rotation.
- Line (L): drag to draw walls, the edge of a stage or a barrier.
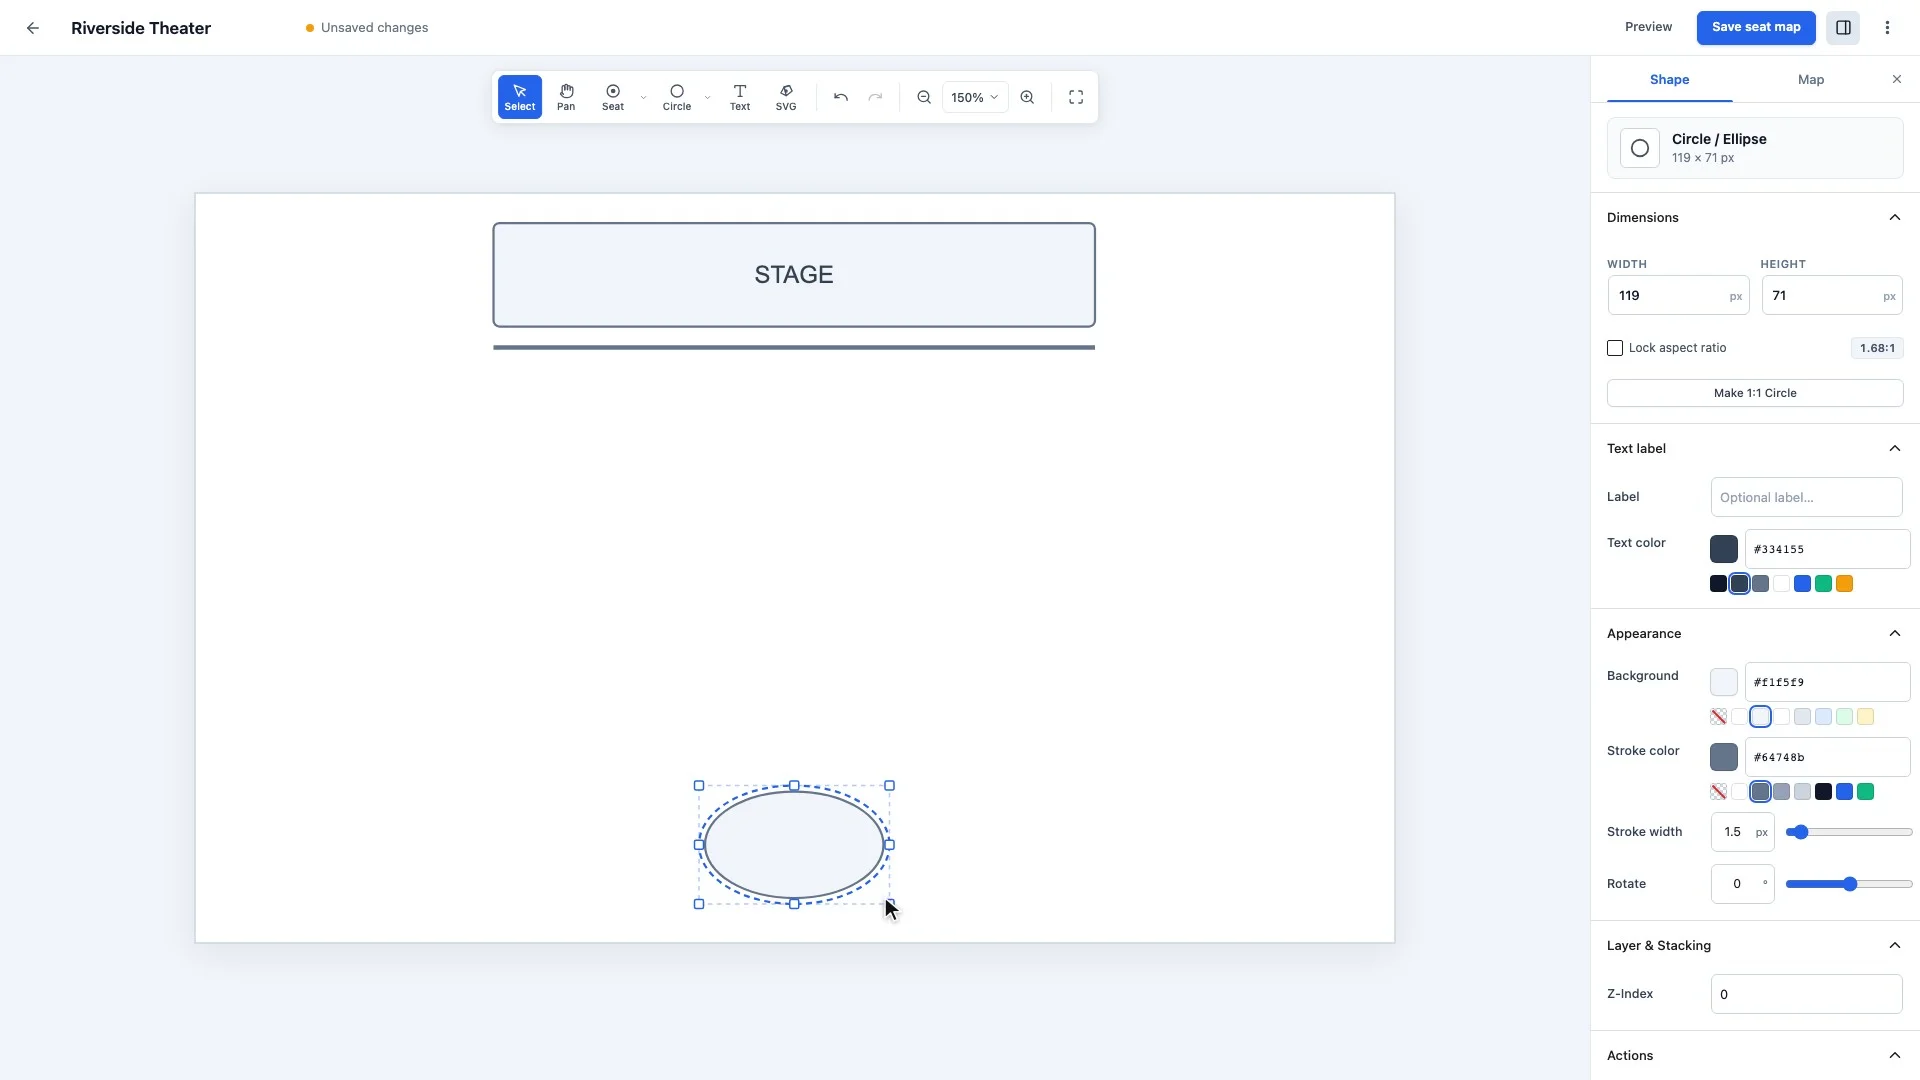
- Circle or ellipse (O): drag to draw an oval. Hold Shift while resizing to keep its proportions, or click Make 1:1 Circle in the inspector.
- Text (T): click where the label should go, then type the text in the inspector. Use it for exits, entrances and section names.
Step 3: Add rows of seats with the seat block generator
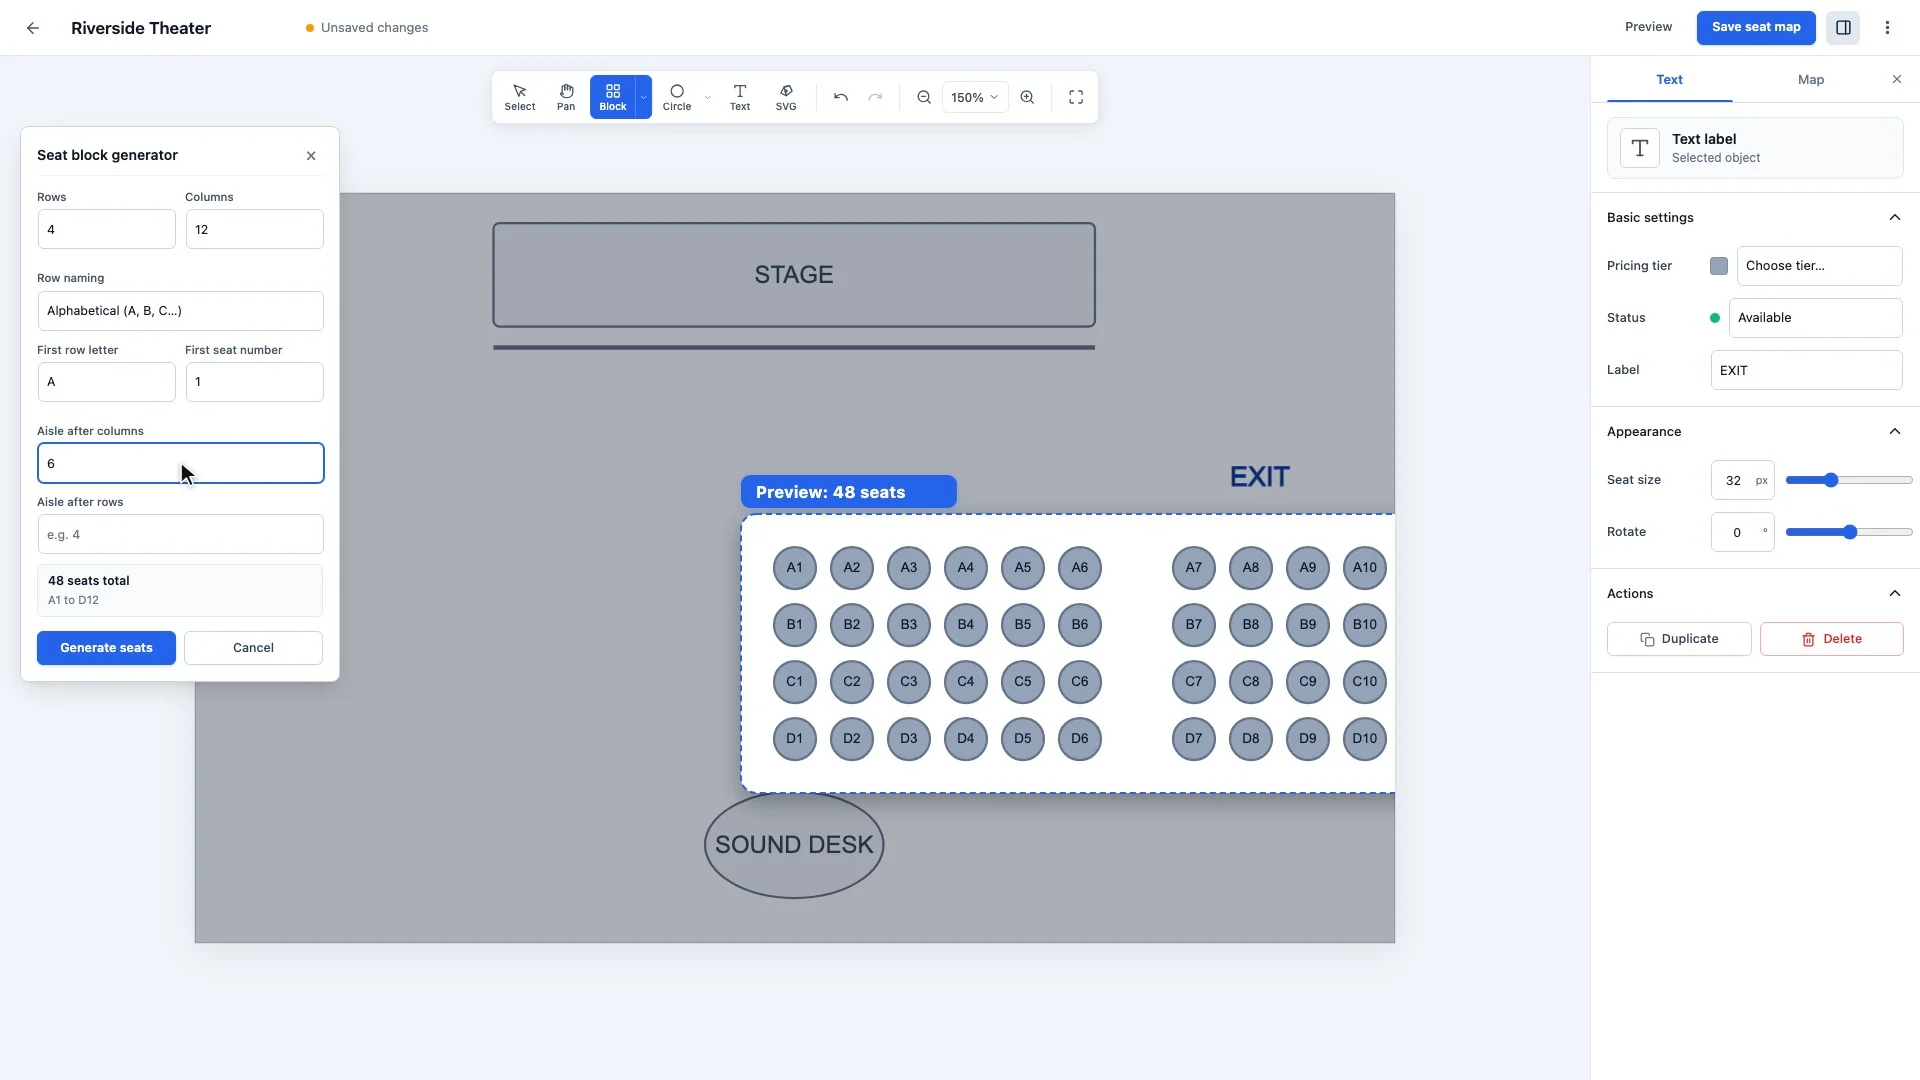
- Press B to open the Seat block generator. A preview of the block follows your pointer on the canvas.
- Set the number of Rows and Columns (seats per row).
- Choose the row naming (A, B, C… or numbers), the first row letter and the first seat number.
- To leave an aisle, enter the seat numbers it comes after in Aisle after columns (for example
6, or3, 6for two aisles). Aisle after rows does the same between rows. - Click Generate seats. The block is placed as one group, so you can drag it into position in one go.
Step 4: Place single seats
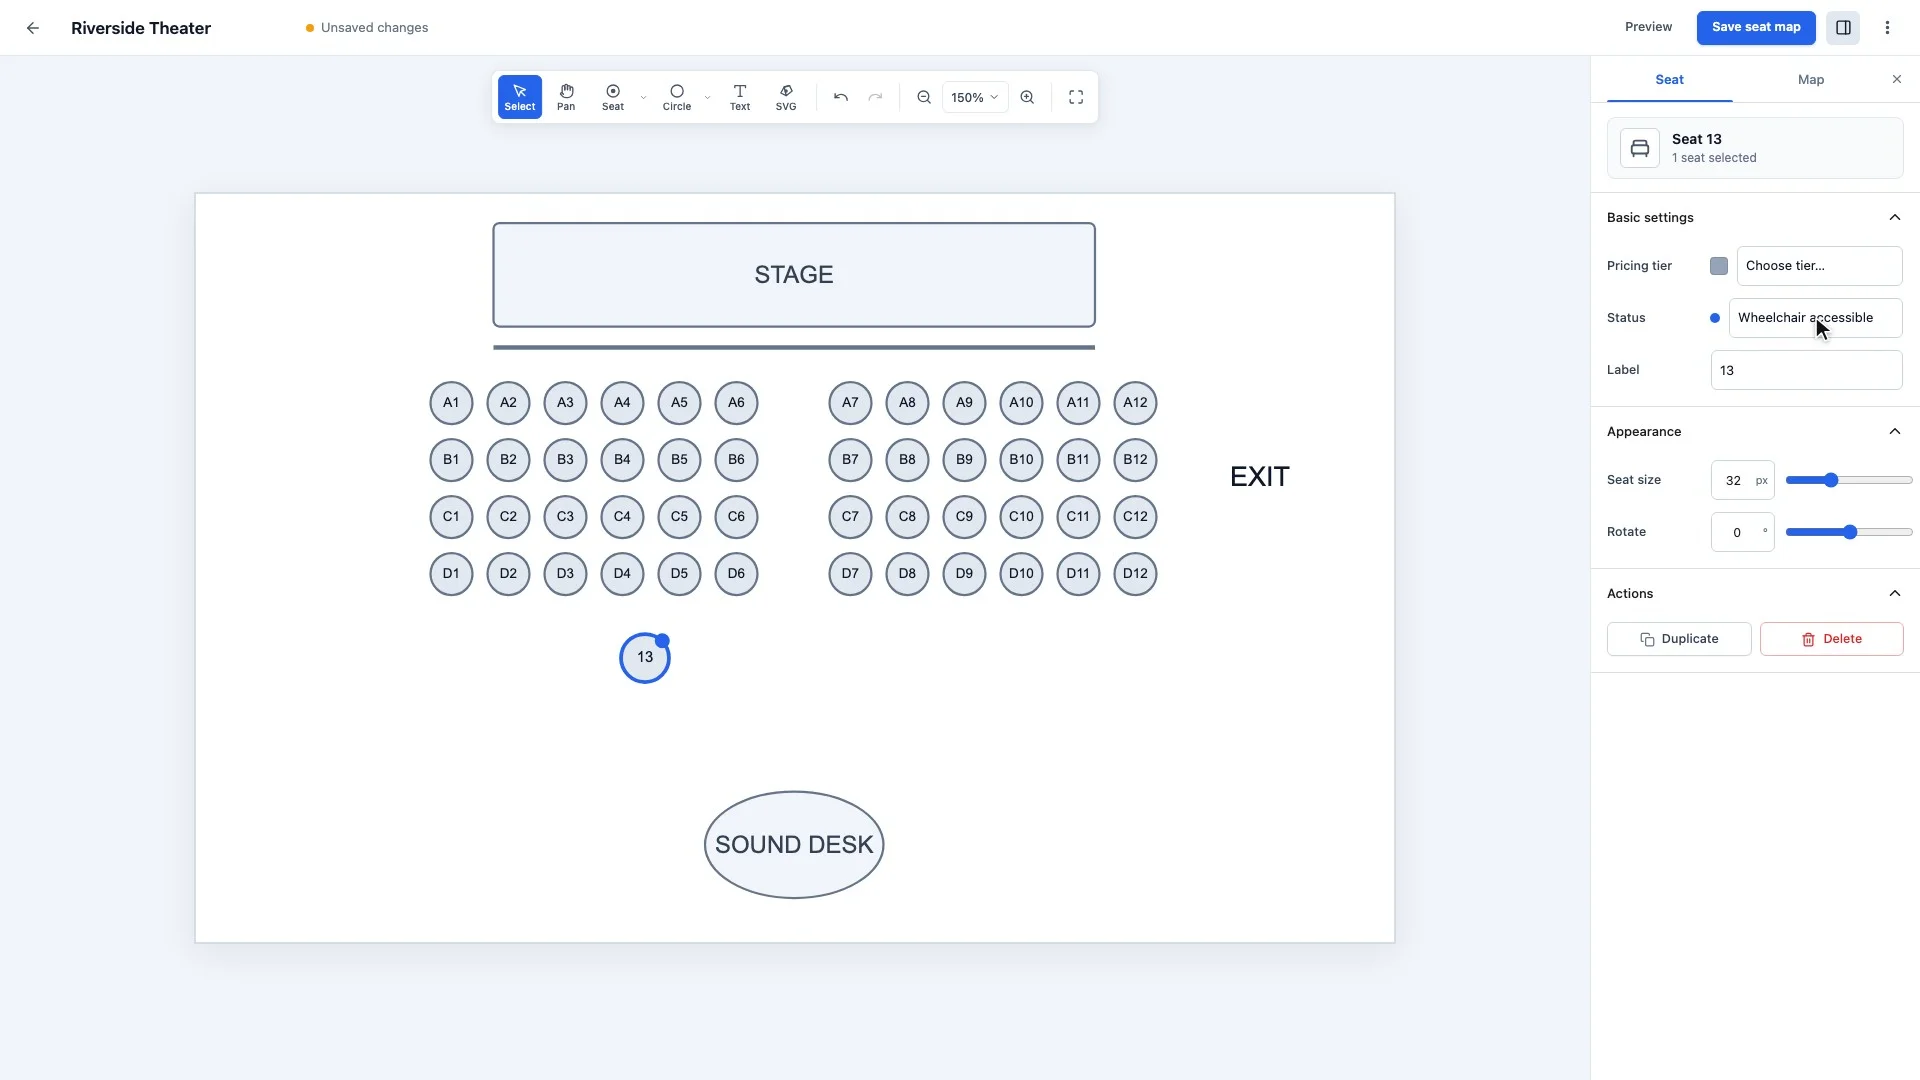
- Press S and click the canvas to place one seat. The tool then switches back to the pointer.
- Each seat has its own Label, Pricing tier and Status. Set Status to Wheelchair accessible for accessible spaces; they are marked on the map.
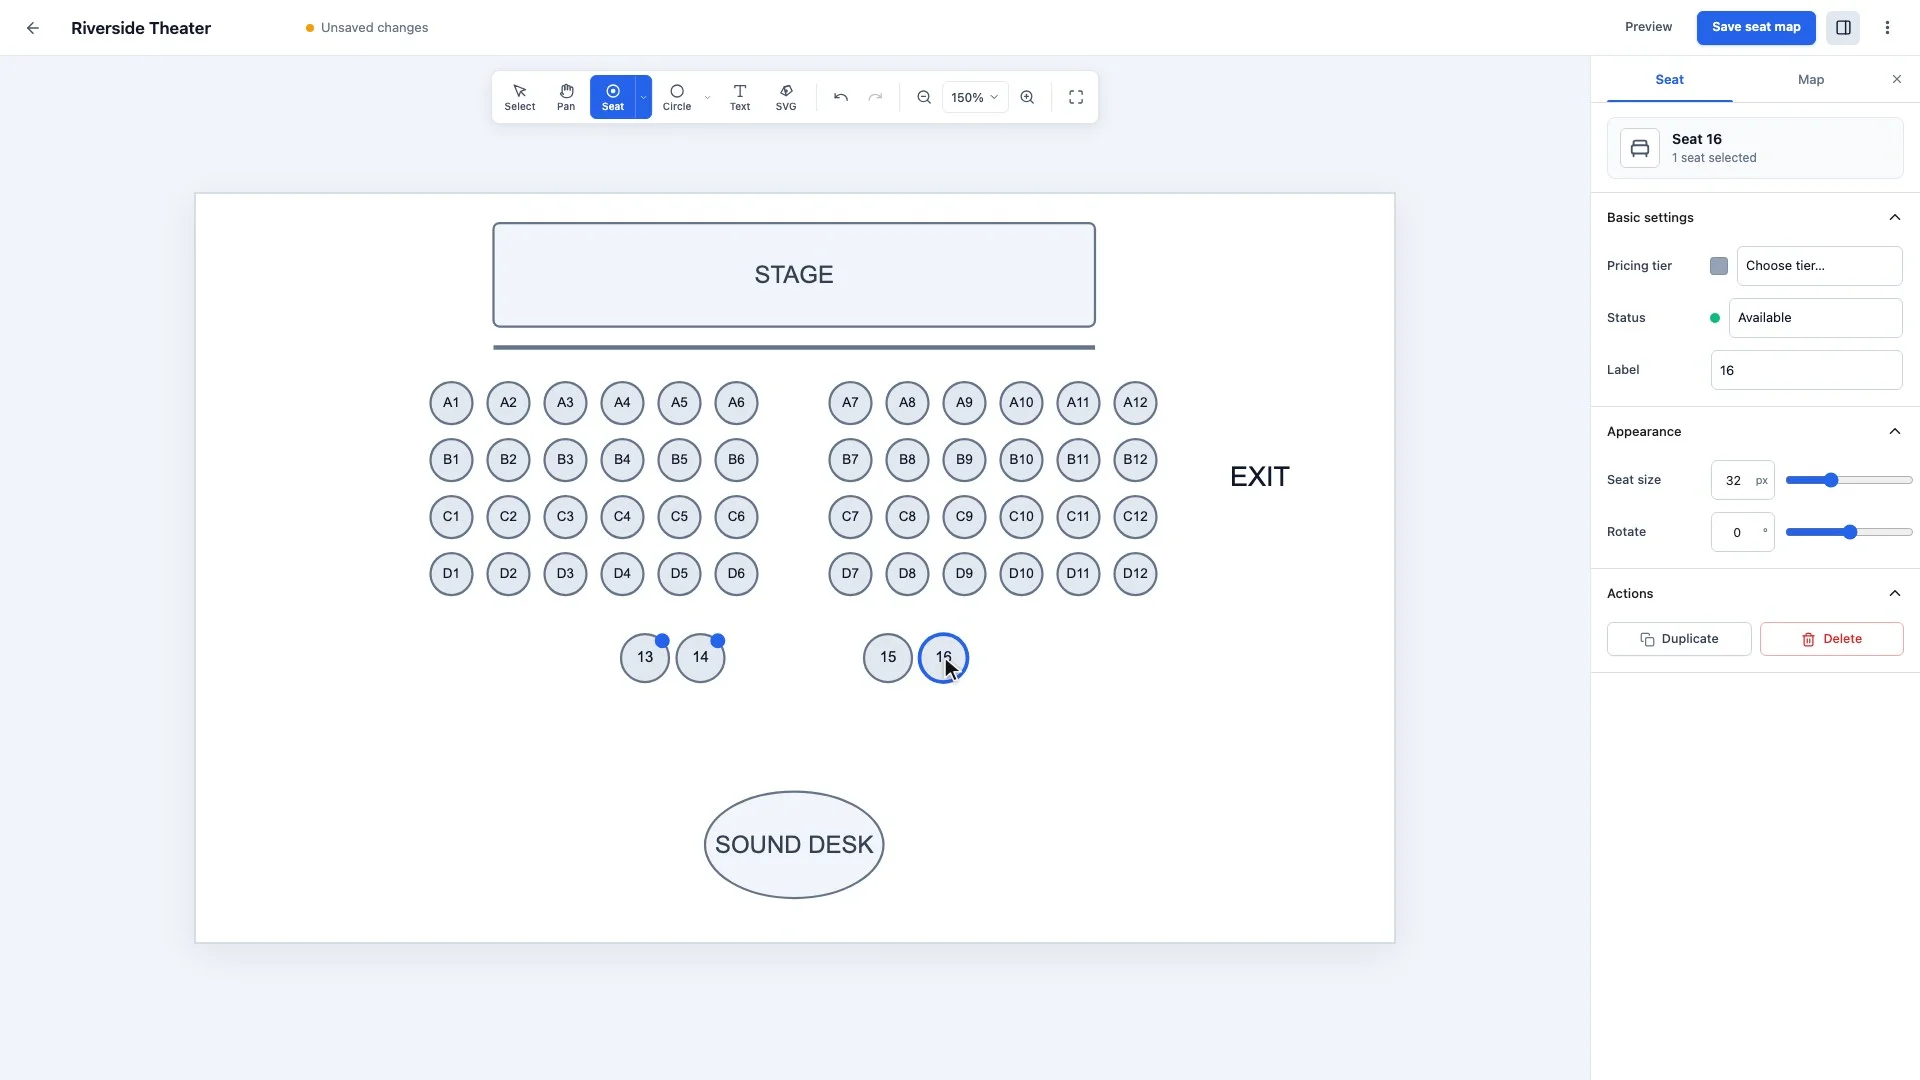
- To place several seats in a row, hold Shift while you click. The seat tool stays on until you press Esc.
- To copy a seat as you move it, hold Option (Alt on Windows) and drag. The copy keeps the same label, so give it its own number.
Step 5: Add tables with seats
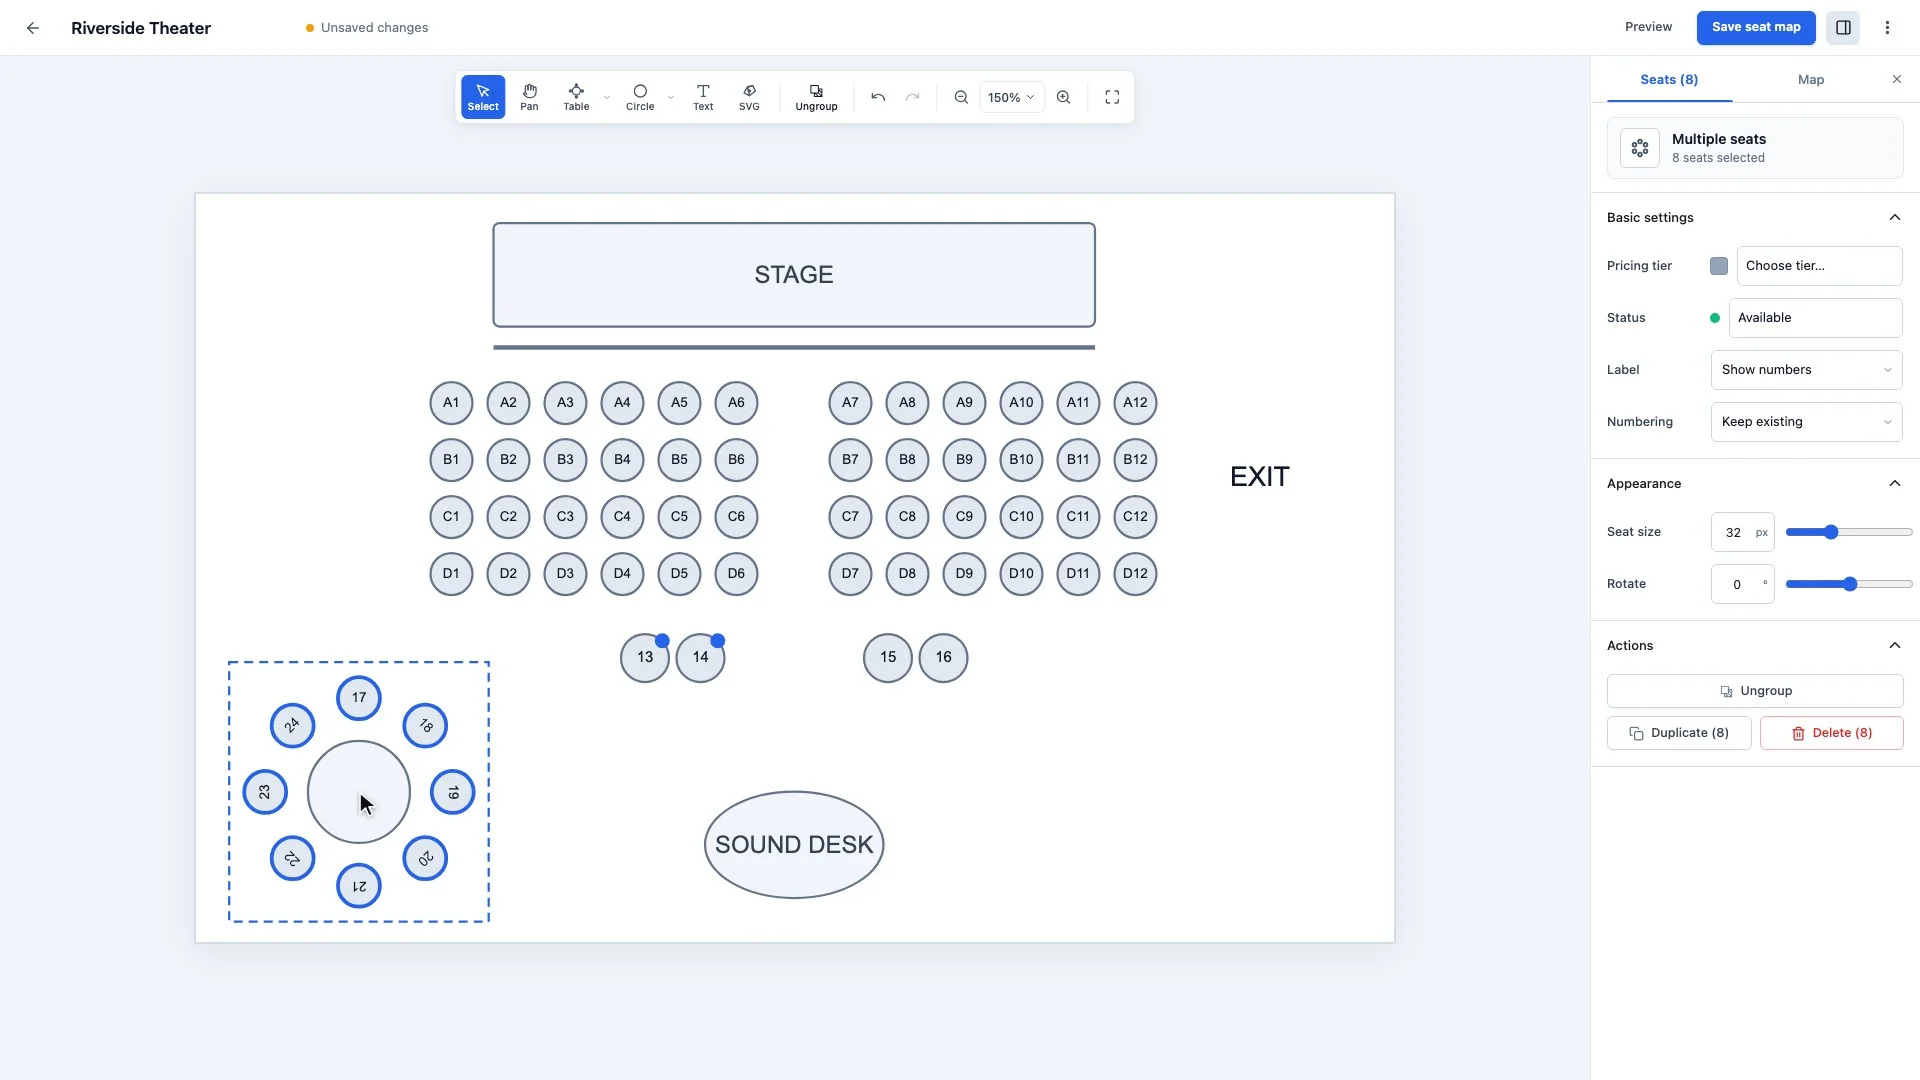
Click the small arrow next to the seat tool and choose Table with Seats. Pick a round or rectangular table and how many chairs go around it, then click the canvas to place it. The table and its chairs move together as a group.
Step 6: Add SVG artwork
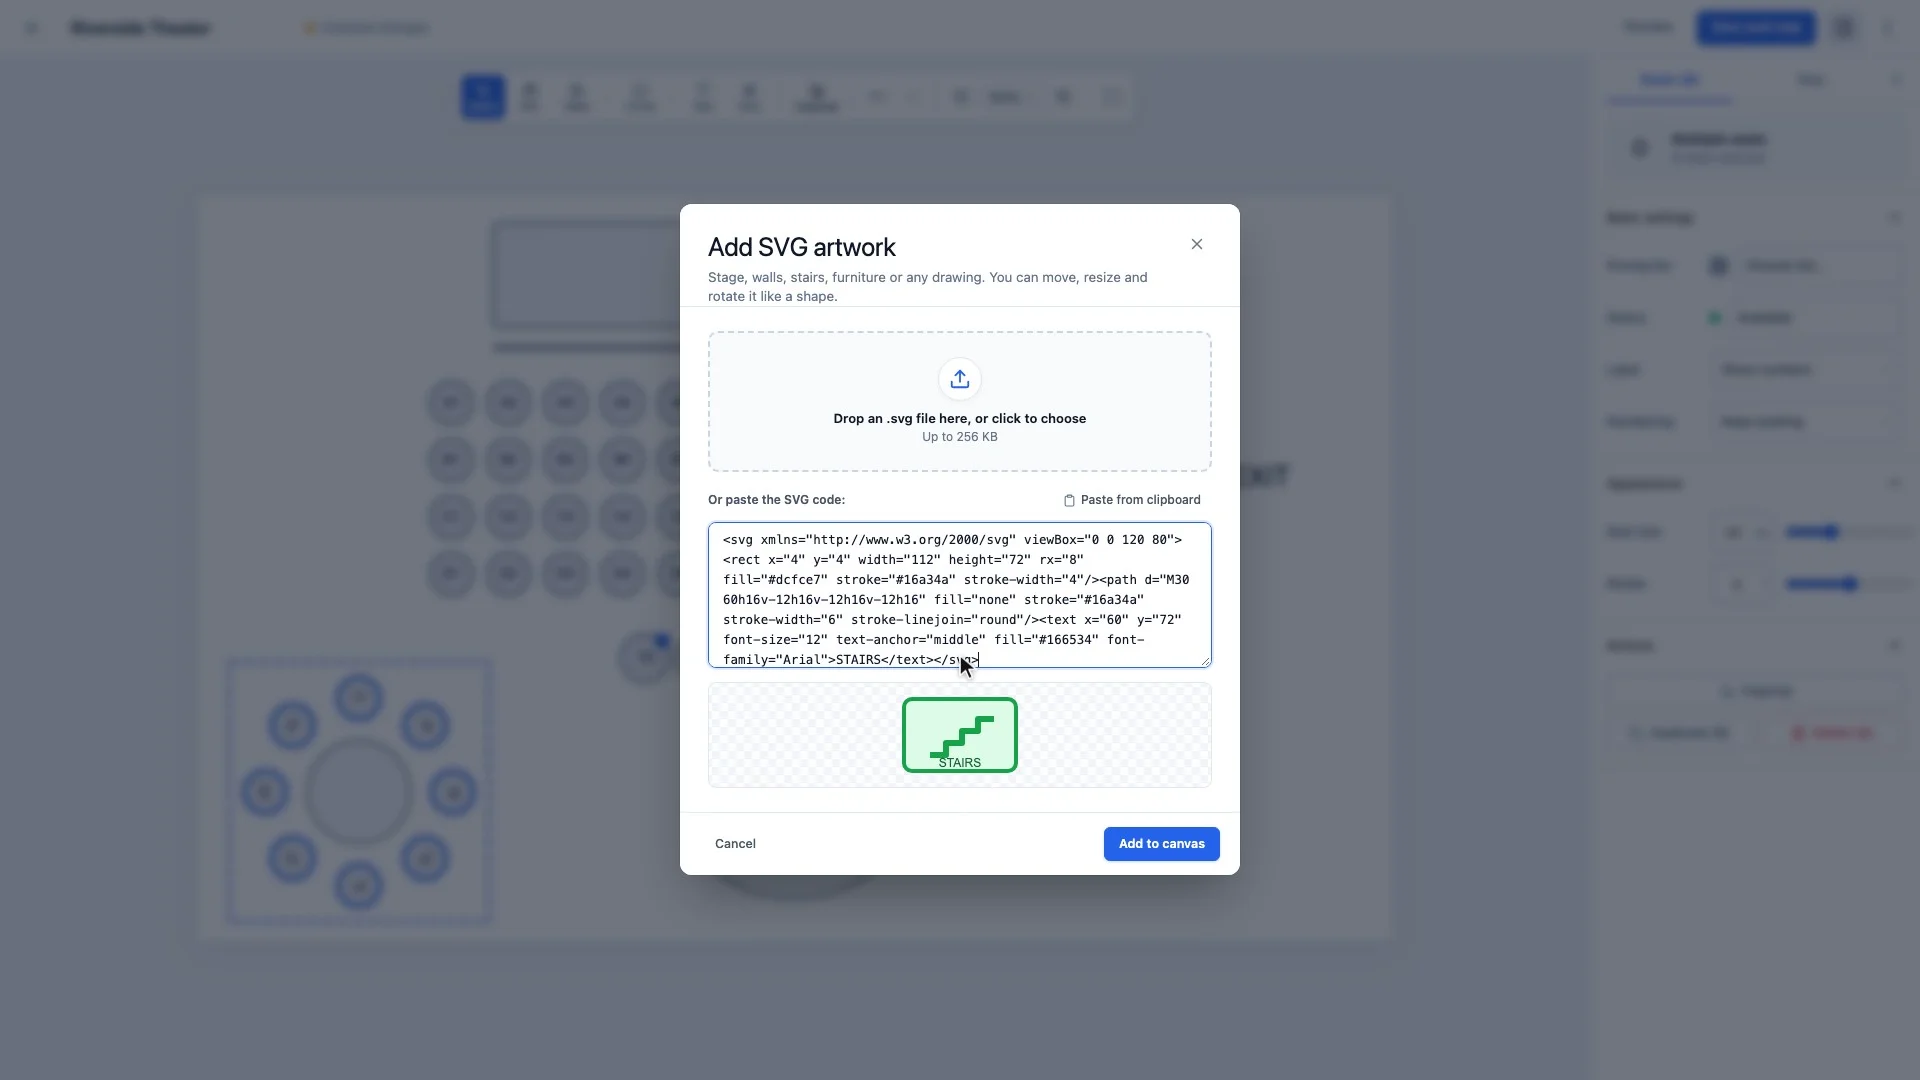
- Click SVG in the toolbar to open Add SVG artwork.
- Drop in an
.svgfile (up to 256 KB), or paste SVG code. A preview appears below the code. - Click Add to canvas. Move, resize and rotate it like any shape. It keeps its proportions unless you hold Shift or untick Lock aspect ratio.
Use artwork for stairs, doors, toilets, furniture, or your own venue drawings.
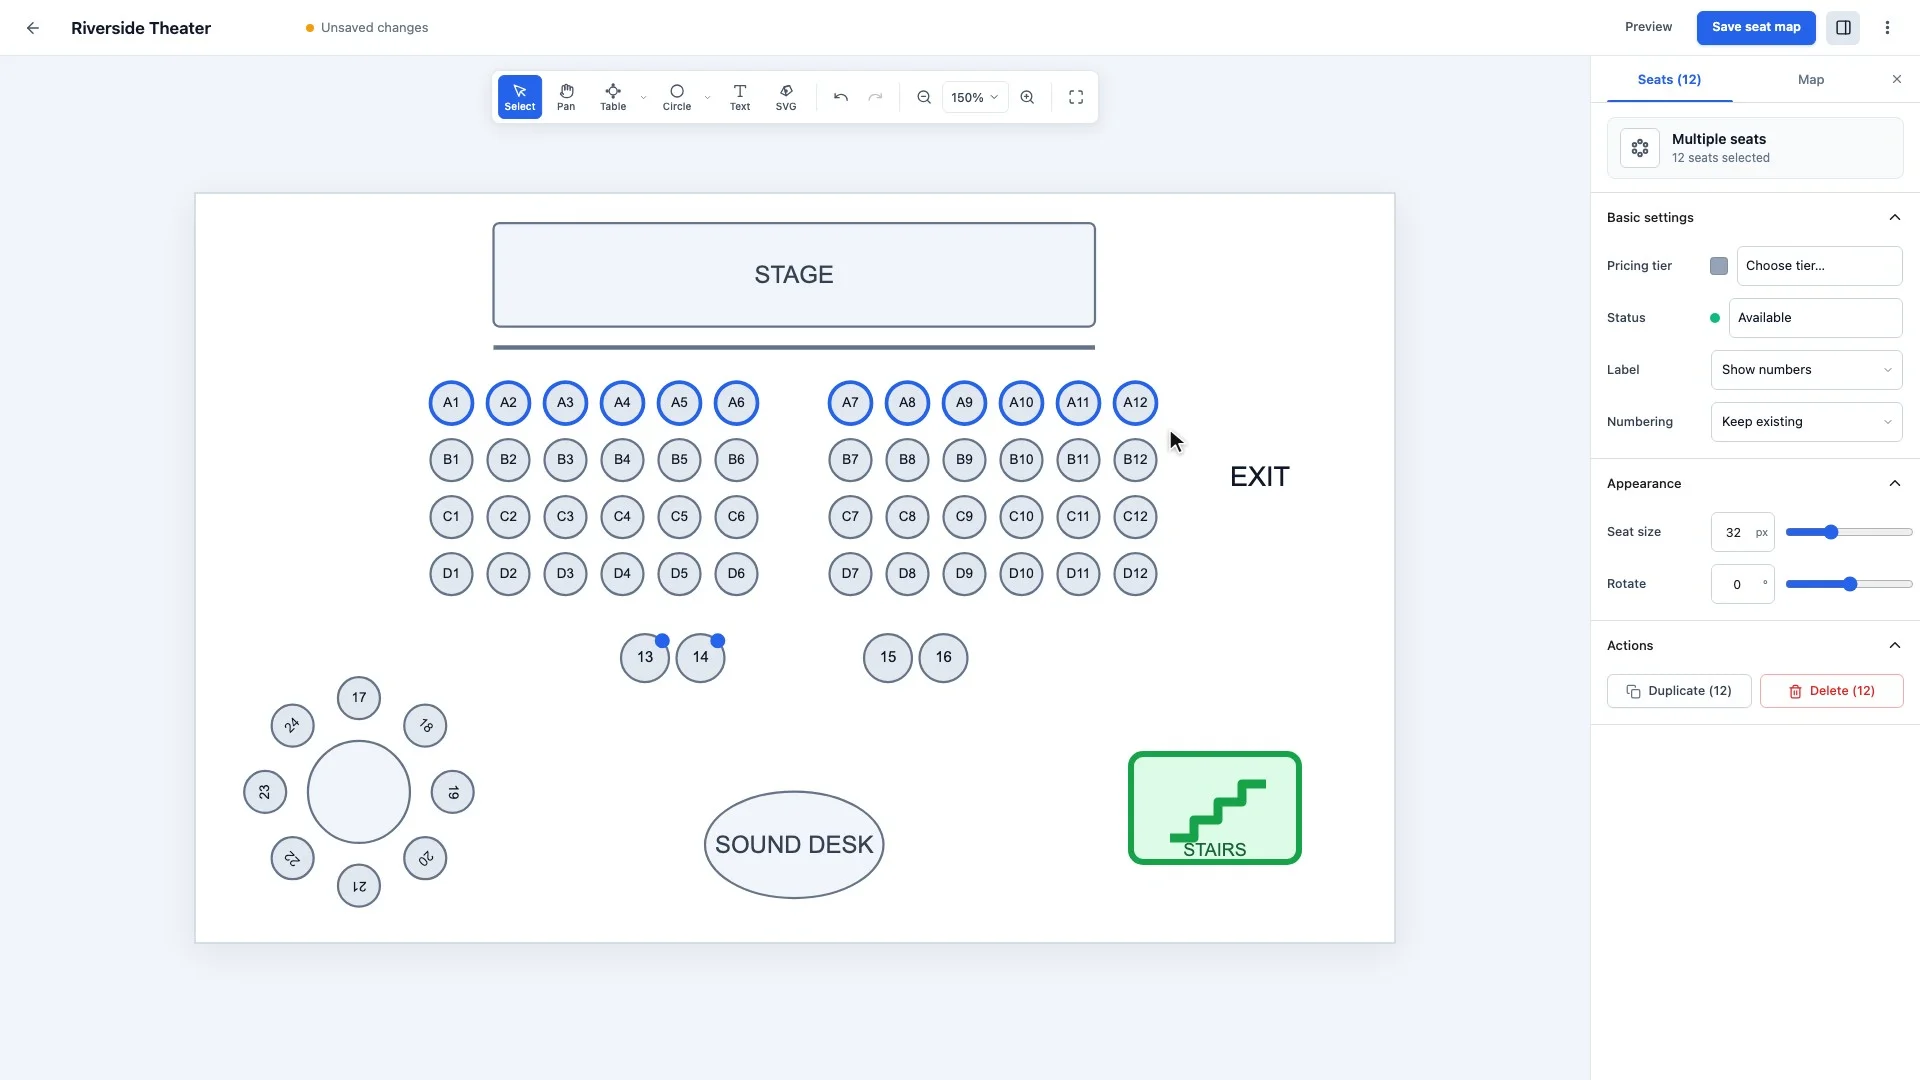
Step 7: Select, ungroup and move
- Click an object to select it. Clicking a seat block or table selects the whole group.
- Press ⌘ + Shift + G (Ctrl + Shift + G on Windows) to ungroup it, so you can pick individual seats.
- Shift + click adds objects to the selection or removes them.
- Drag a box across empty canvas to select everything inside it, such as a whole row.
- Nudge the selection with the arrow keys by 1 pixel, or by 10 pixels with Shift held.
Step 8: Set pricing tiers
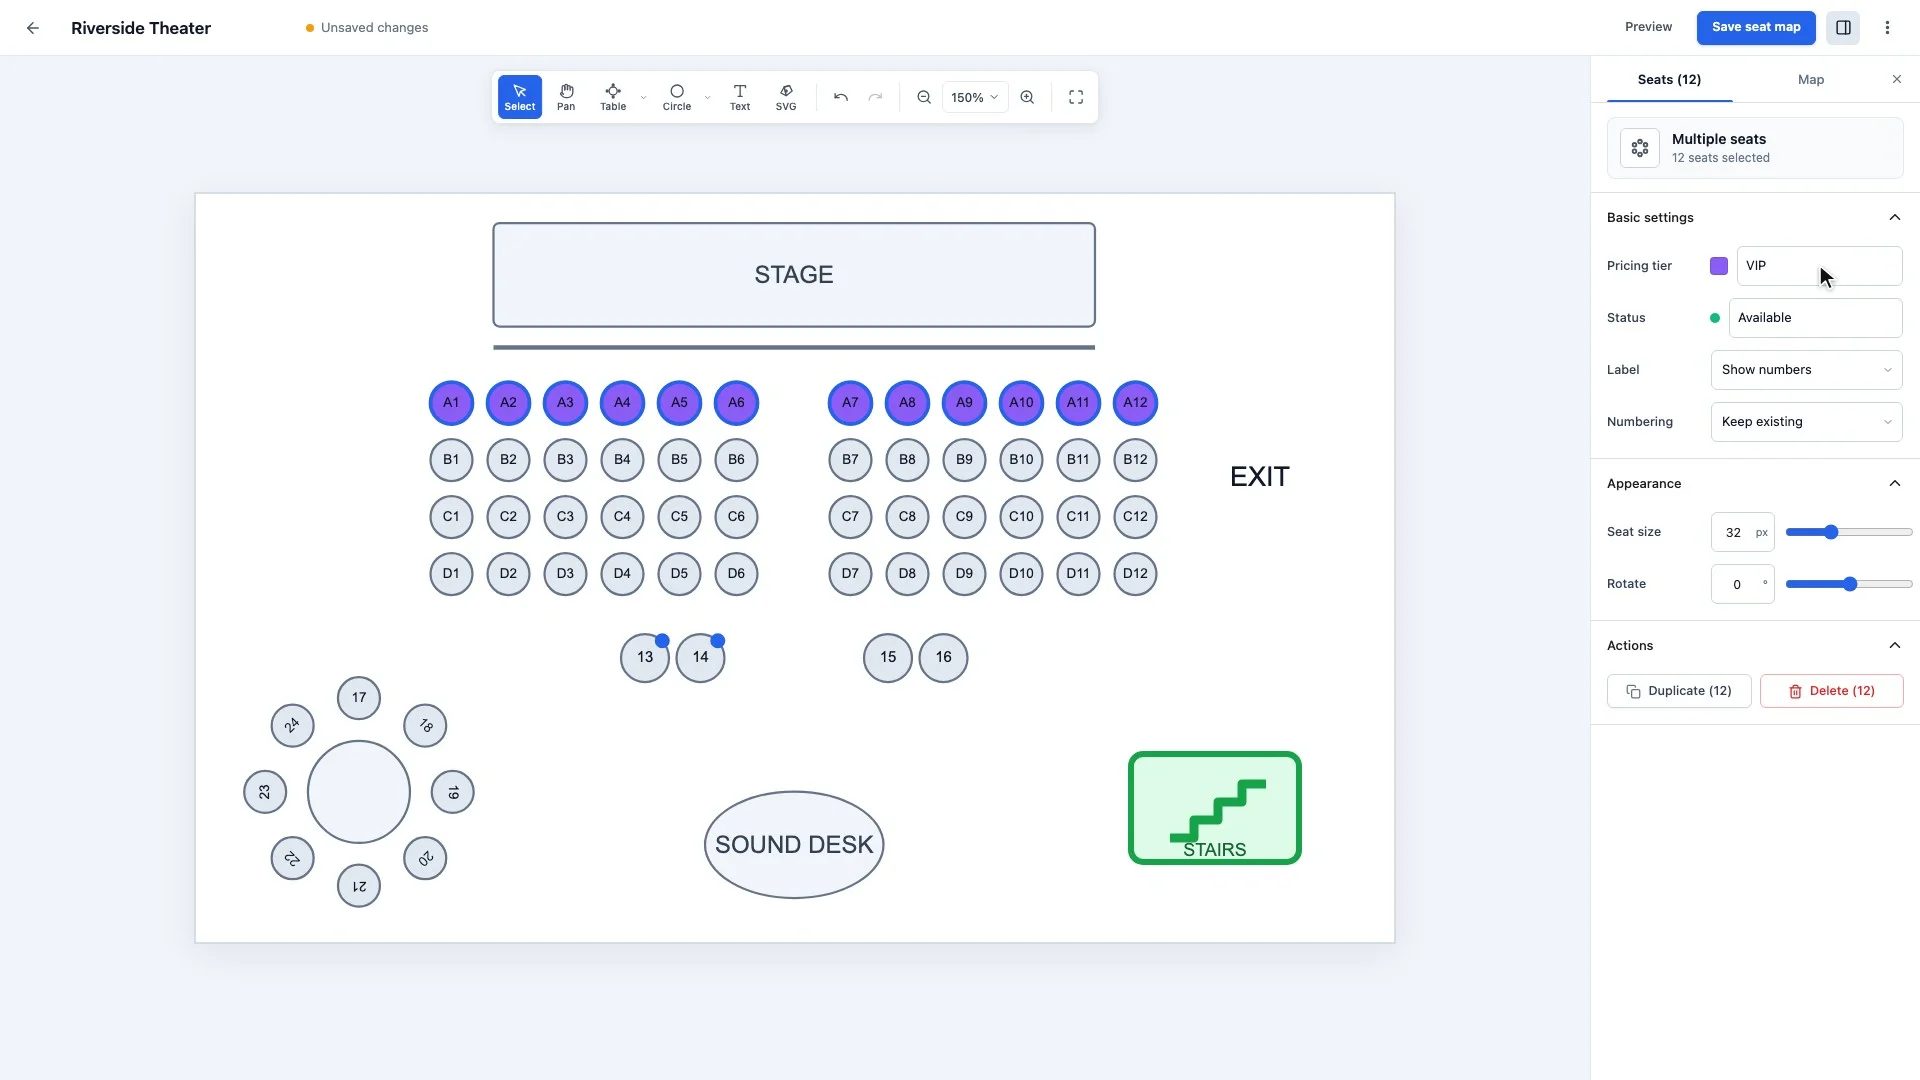
- With nothing selected, open the Map tab of the inspector.
- Under Tiers, type a tier name (for example VIP), pick a colour and click Add tier.
- Select the seats, switch back to the selection tab, and choose the tier in Pricing tier. The seats take the tier’s colour.
You set each tier’s price on the event, so the same map can be reused with different prices.
Step 9: Duplicate, delete, undo and redo
- ⌘ + D duplicates the selection.
- Delete or Backspace removes it. Seats that already have bookings are protected and are not deleted.
- ⌘ + Z undoes, and ⌘ + Shift + Z or ⌘ + Y redoes.
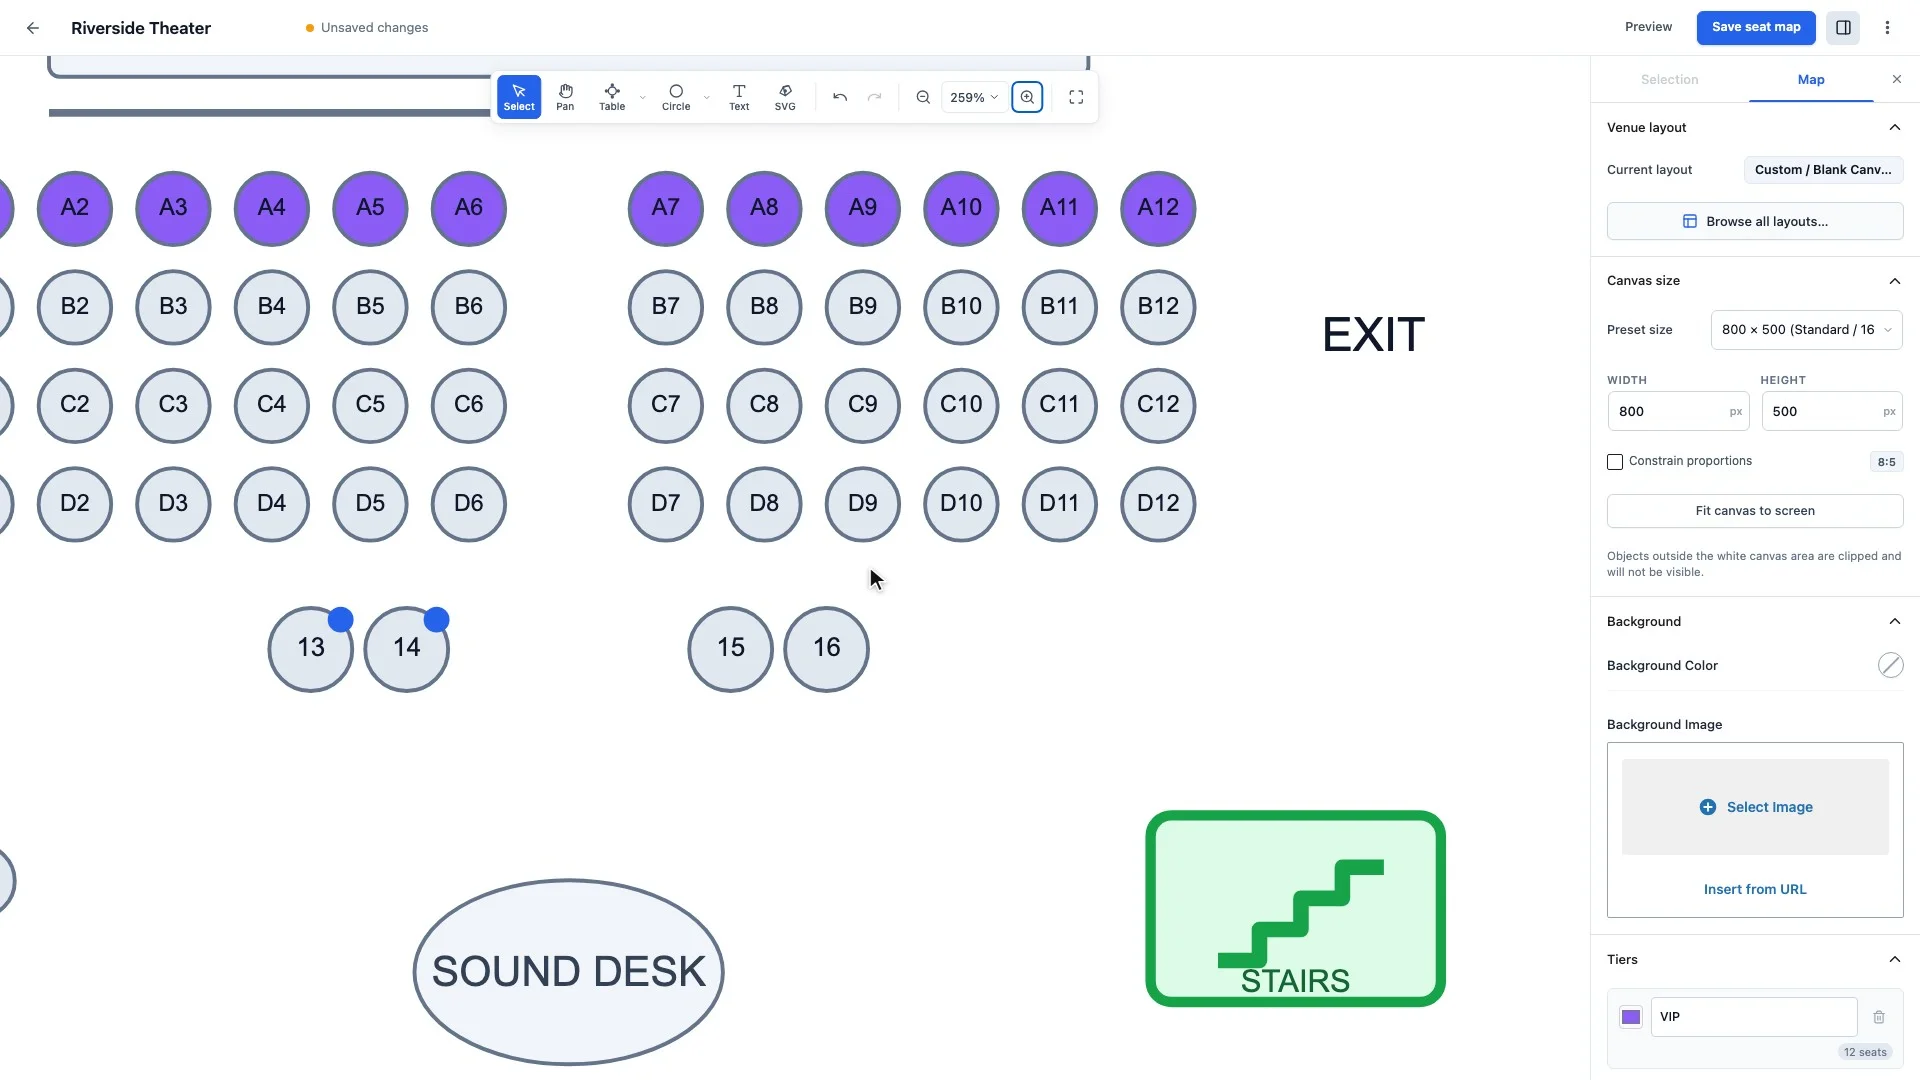
Step 10: Zoom and pan
- Use the Zoom in and Zoom out buttons, hold ⌘ and scroll, or pinch on a trackpad.
- Once the map is bigger than the screen, hold Space and drag to pan. You can also press H for the pan tool, or drag with the middle mouse button.
- Fit to screen brings the whole map back into view.
Step 11: More options, preview and save
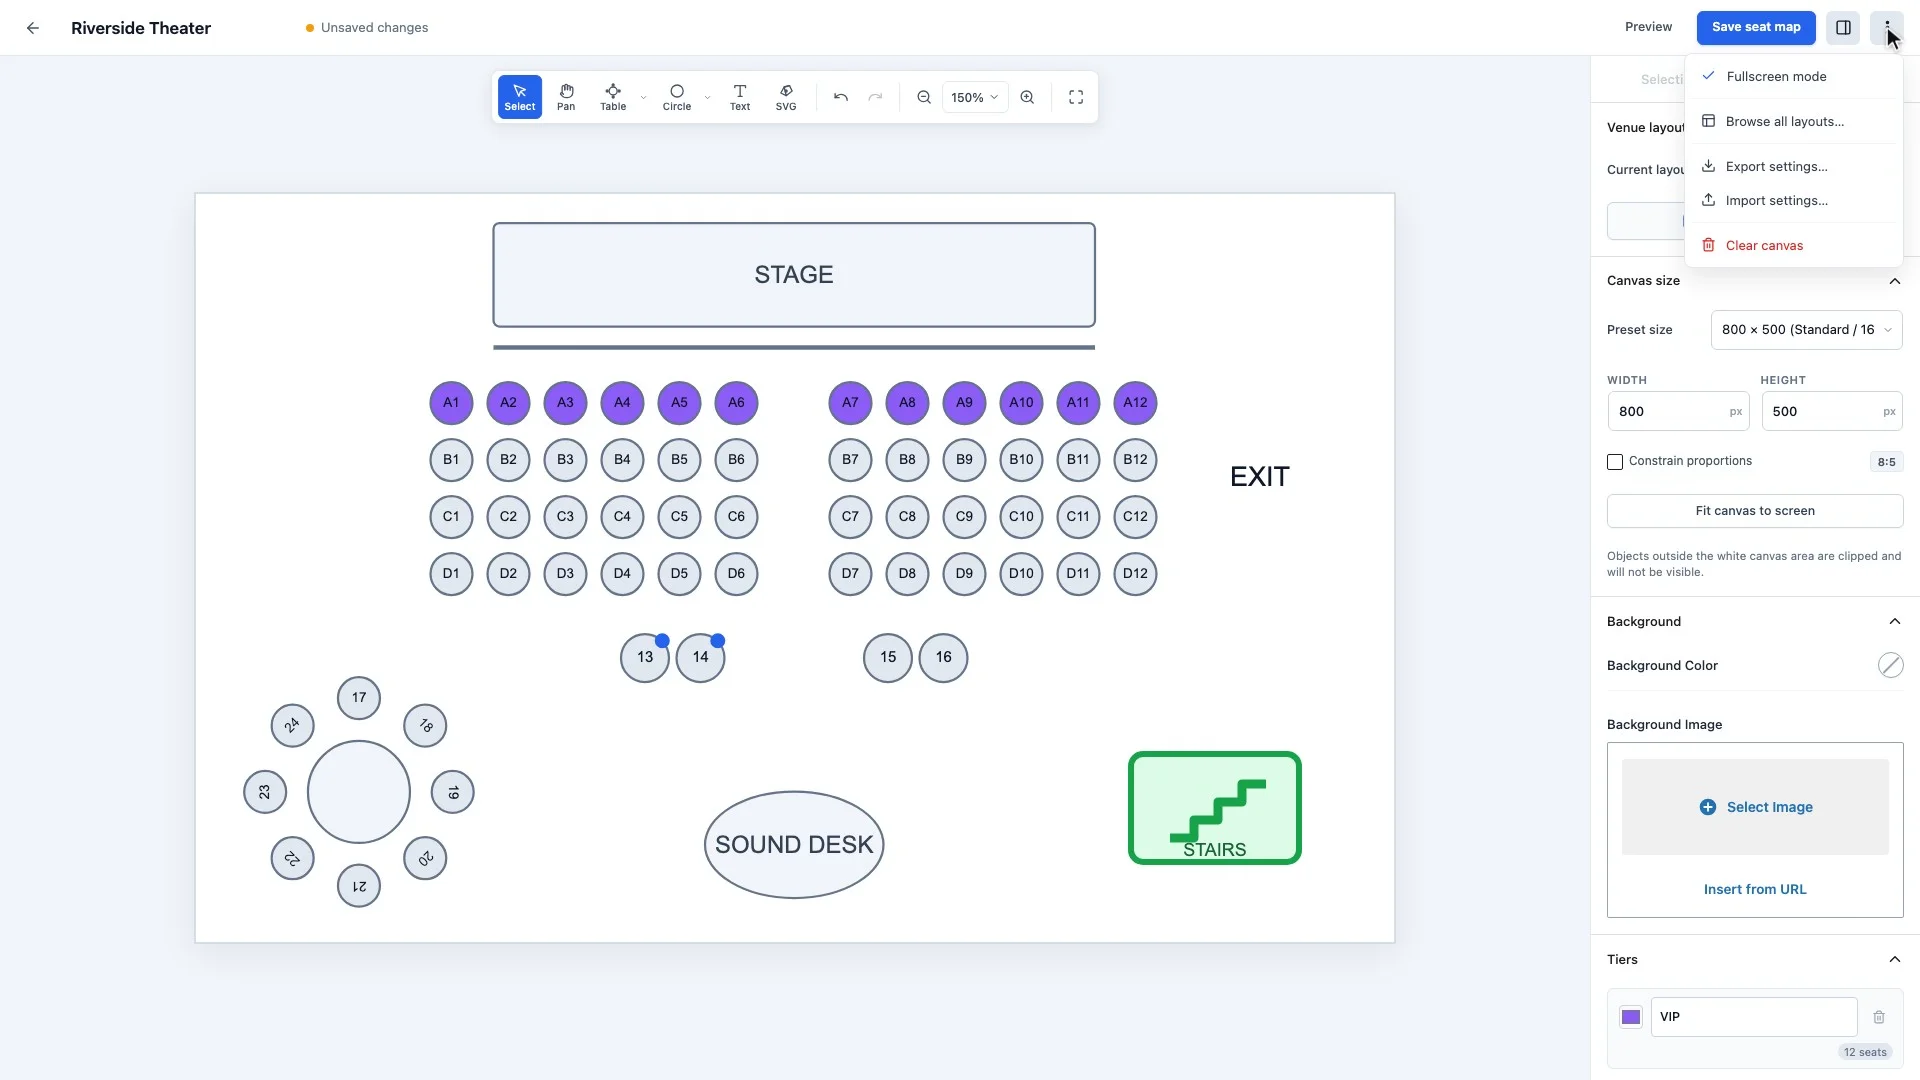
- The ⋮ menu at the top right has Fullscreen mode, Browse all layouts, Export and Import (to move a map between sites), and Clear canvas.
- Preview shows the map the way attendees will see it. Click Back to Editor to return.
- Click Save seat map.
Next: create an event
A seat map is only the layout. To sell seats, create an event that uses the map, set its dates and tier prices, then select that event in the Seat Booking field of your Gravity Form. How to Create an Event walks through it, including recurring schedules and exceptions.
Need help?
Try the live seat booking demo to see a finished map from the visitor’s side. If you get stuck, open a support request.