A seat booking event is what you sell. It takes a seat map, gives each seat tier a price, and sets the dates and times people can book. This guide walks through the Create Event wizard in Seat Booking for Gravity Forms, including recurring schedules and exceptions, then adds the event to a Gravity Forms form and follows a booking from the visitor’s side to your dashboard.
You need a seat map first. If you don’t have one yet, see How to Use the Seat Map Builder or the Getting Started guide.
The names, prices and dates in this guide are examples. Use your own.
Step 1: Event details
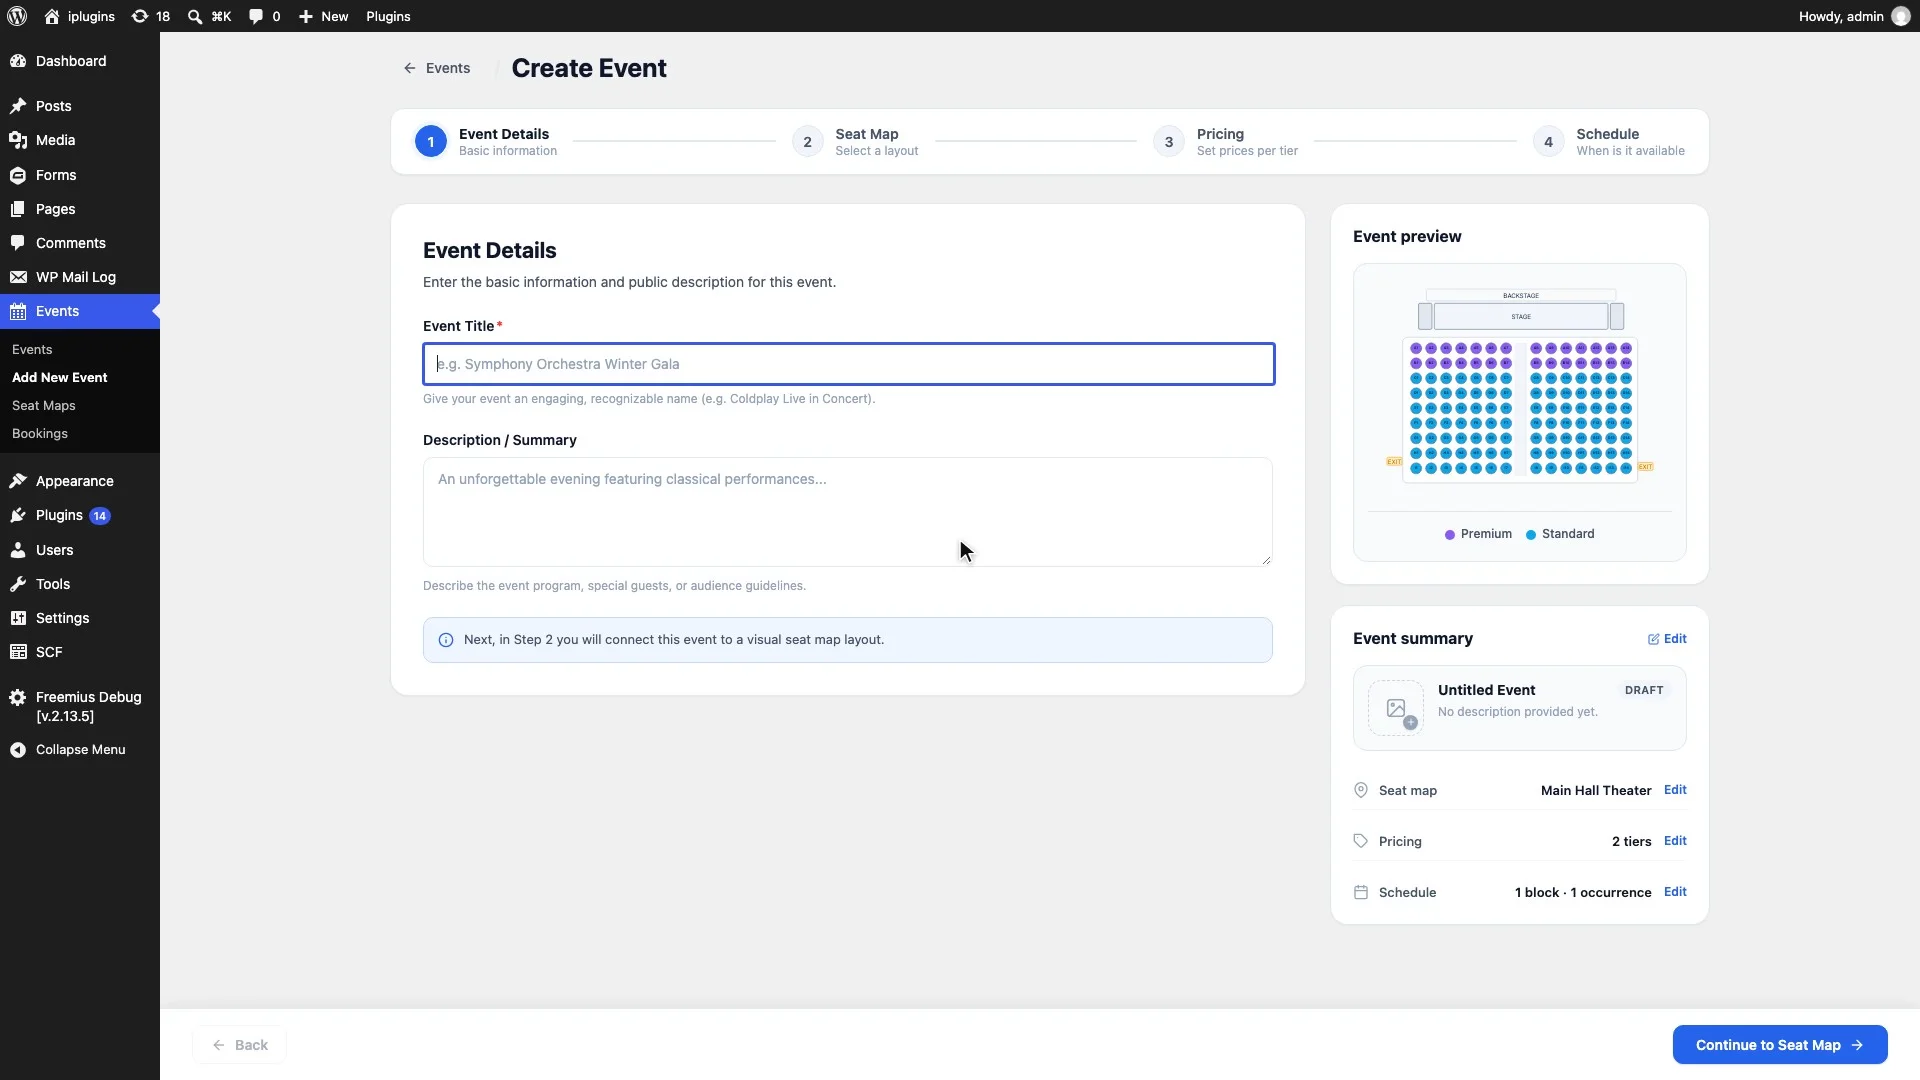
Go to Events → Add New Event. A four-step wizard opens: Event Details, Seat Map, Pricing and Schedule. The Event preview and Event summary on the right update as you go, and you can jump back to any step with its Edit link.
Enter the Event Title, such as “Winter Concert Series”, and an optional description. Click Continue to Seat Map.
Step 2: Choose the seat map
Click the map this event uses. The preview shows its layout and tiers. Need a new layout? Click Create New Seat Map. Then click Continue to Pricing.
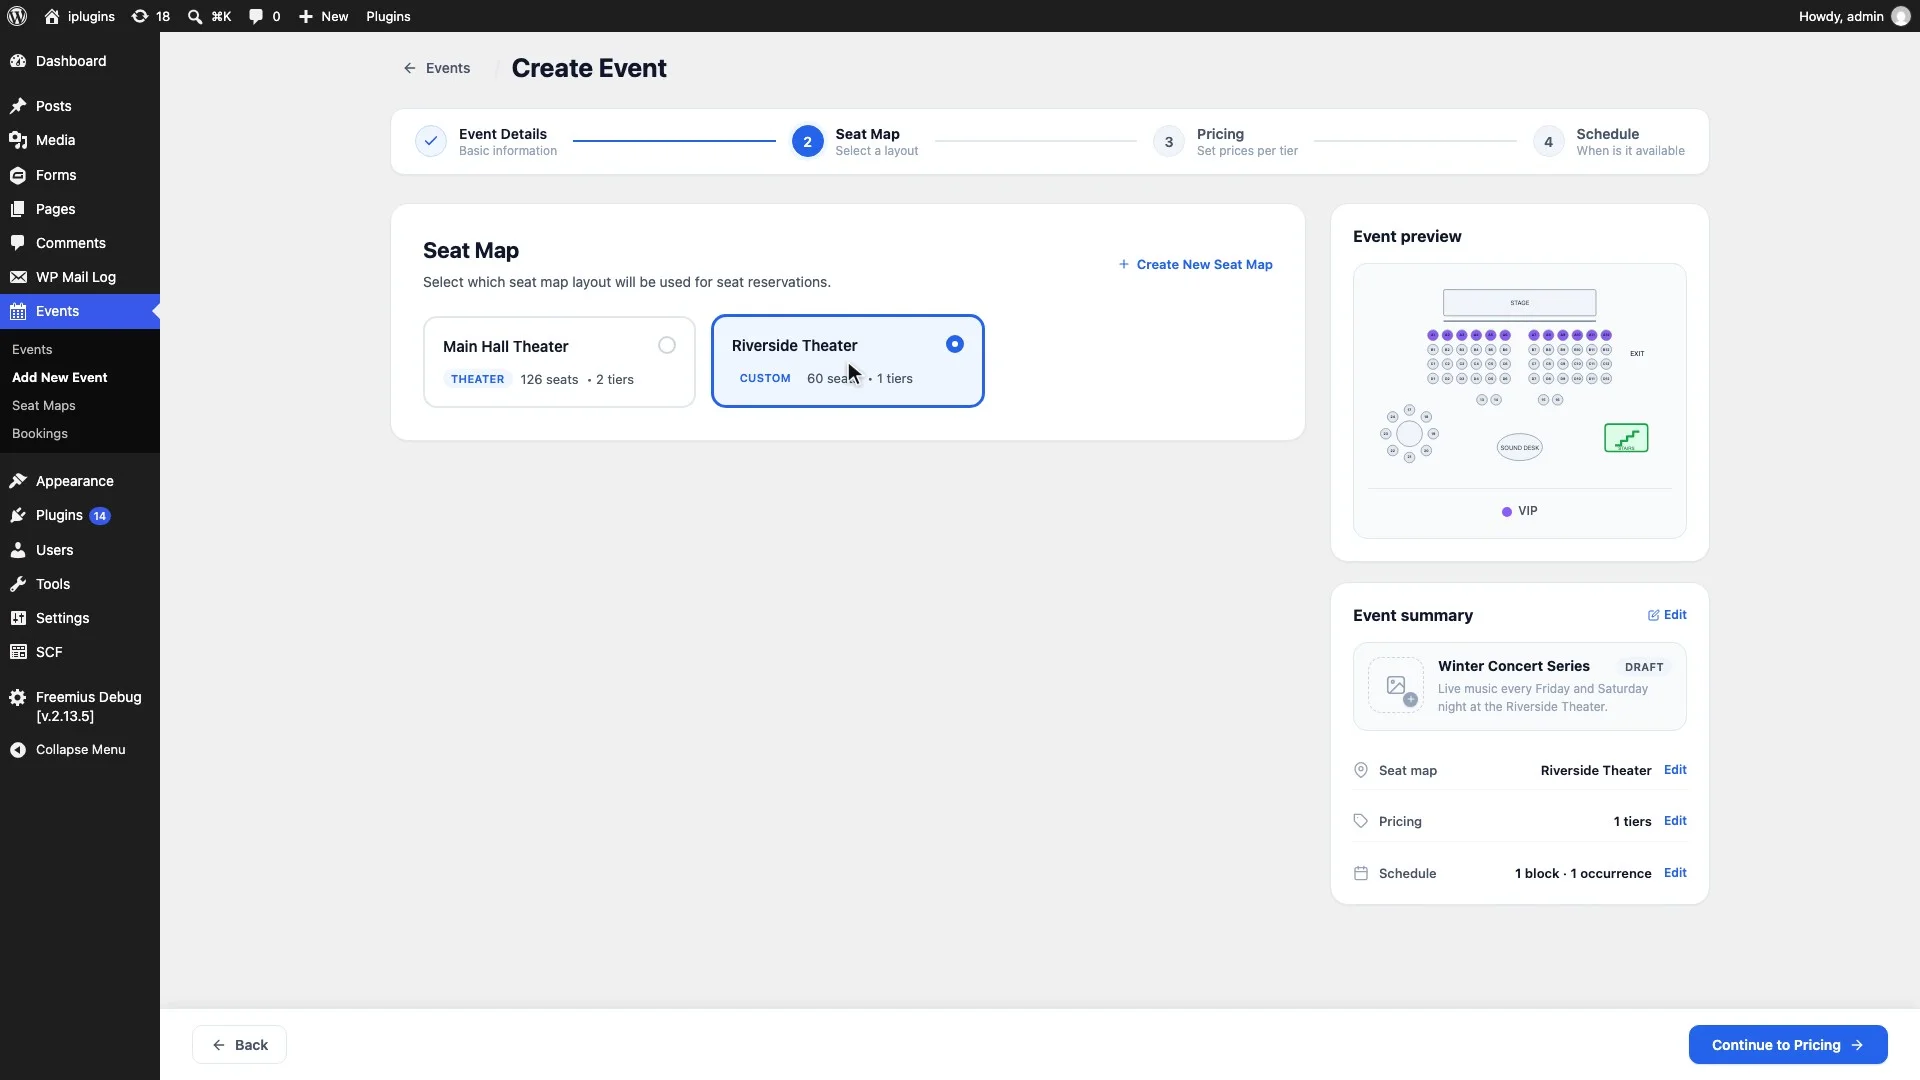
One map can serve many events, so you only draw a venue once.
Step 3: Set a price for each tier
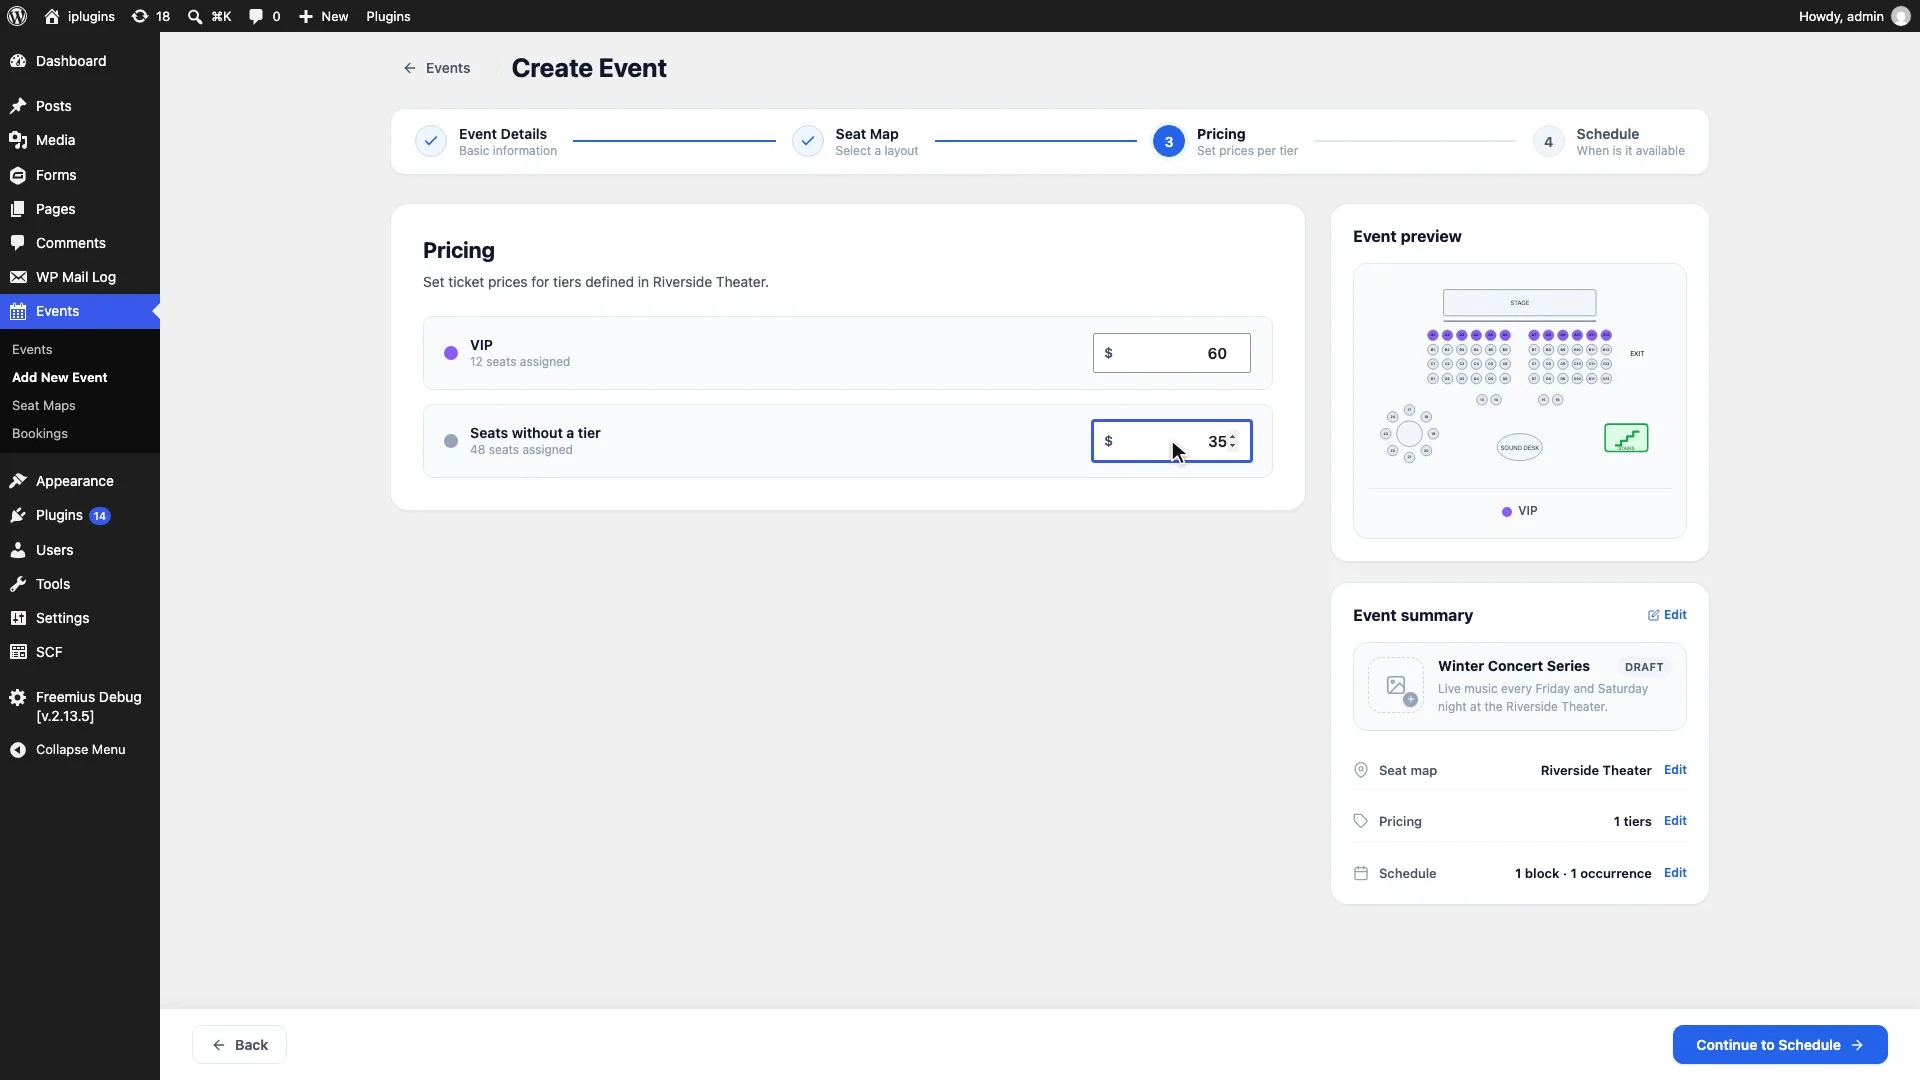
Every tier on the map gets its own price row. Seats you didn’t put in a tier share one row, Seats without a tier. In the example, VIP is $60 and the other seats are $35.
- Every tier that has seats needs a price before you can save the event.
- Enter 0 for free tickets.
- Prices belong to the event, not the map, so the same map can have different prices for different events.
Step 4: Dates and time slots
The Schedule step starts with one schedule block. A block is a set of dates that share the same time slots.
- Open the calendar next to Dates and click every date you need. Remove a date with its ×. Click Done.
- Under Time slots, enter the start time, such as 7:30 PM. Click + Add time slot for more than one show a day.
- For dates with different times, click + Add schedule block and set up a second block.
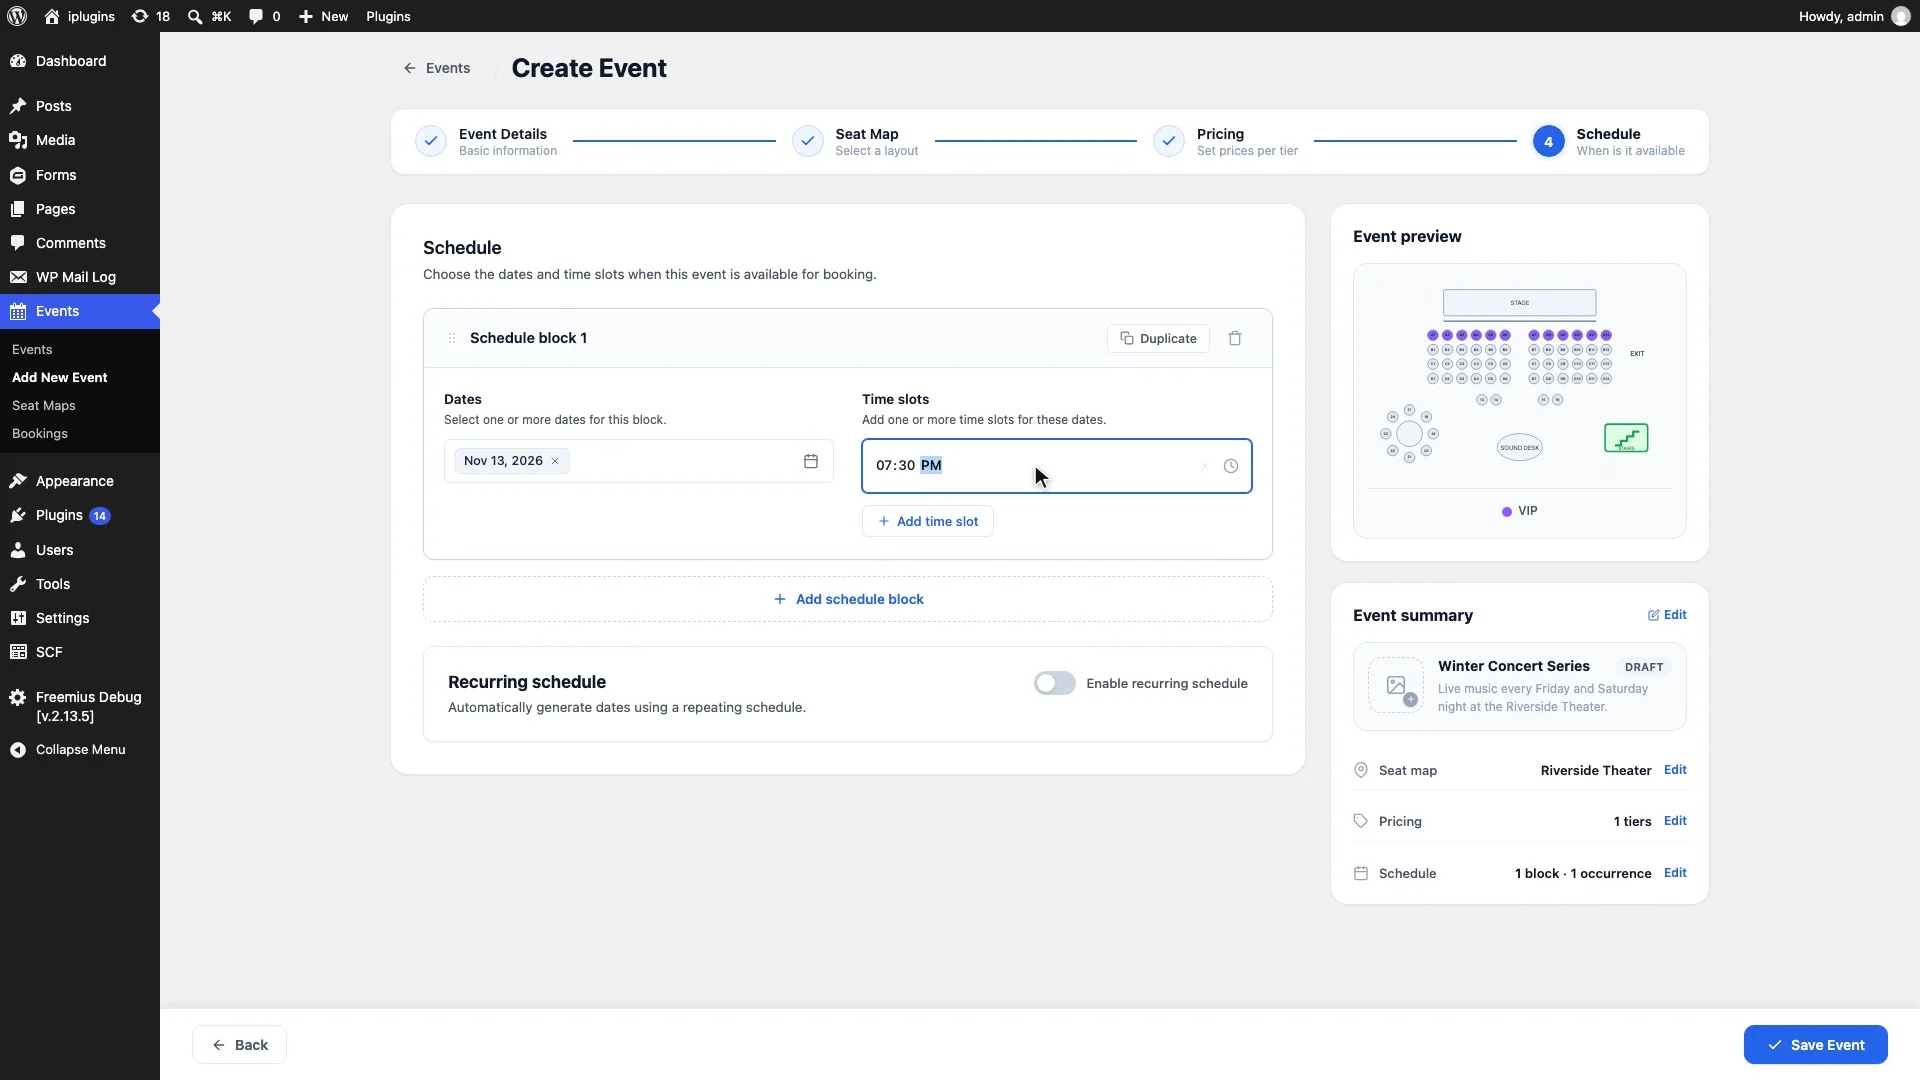
Each date and time is a separate occurrence with its own seats. Booking seat A1 for Friday doesn’t block A1 on Saturday.
Step 5: Recurring schedule (optional)
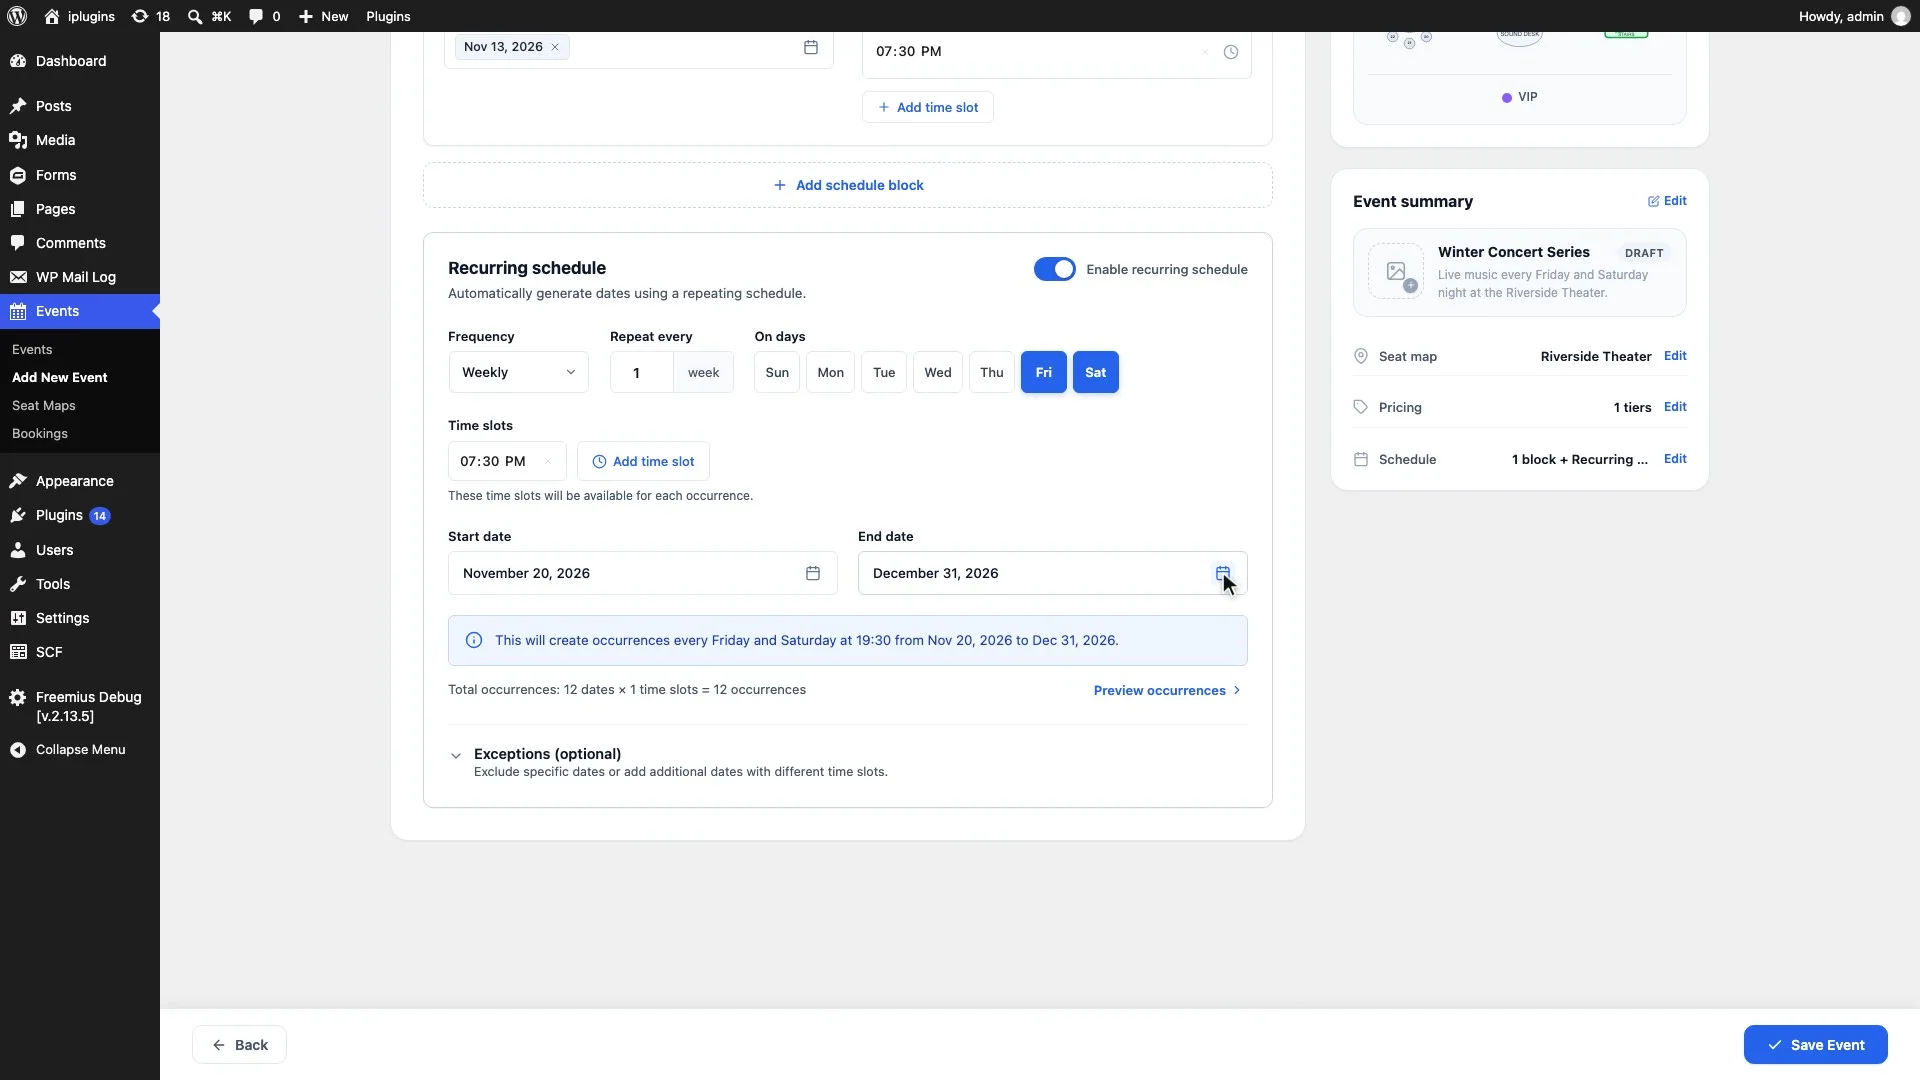
For shows that repeat, turn on Enable recurring schedule instead of clicking every date by hand.
- Frequency: daily, weekly or monthly.
- Repeat every: for example, every 2 weeks.
- On days: the weekdays it runs on. Click a day to turn it on or off.
- Time slots: the show times for every repeat.
- Start date and End date: when the series runs.
A line under the fields sums up the rule, for example “every Friday and Saturday at 19:30 from Nov 20, 2026 to Dec 31, 2026”, with the total number of occurrences.
Step 6: Exceptions and preview
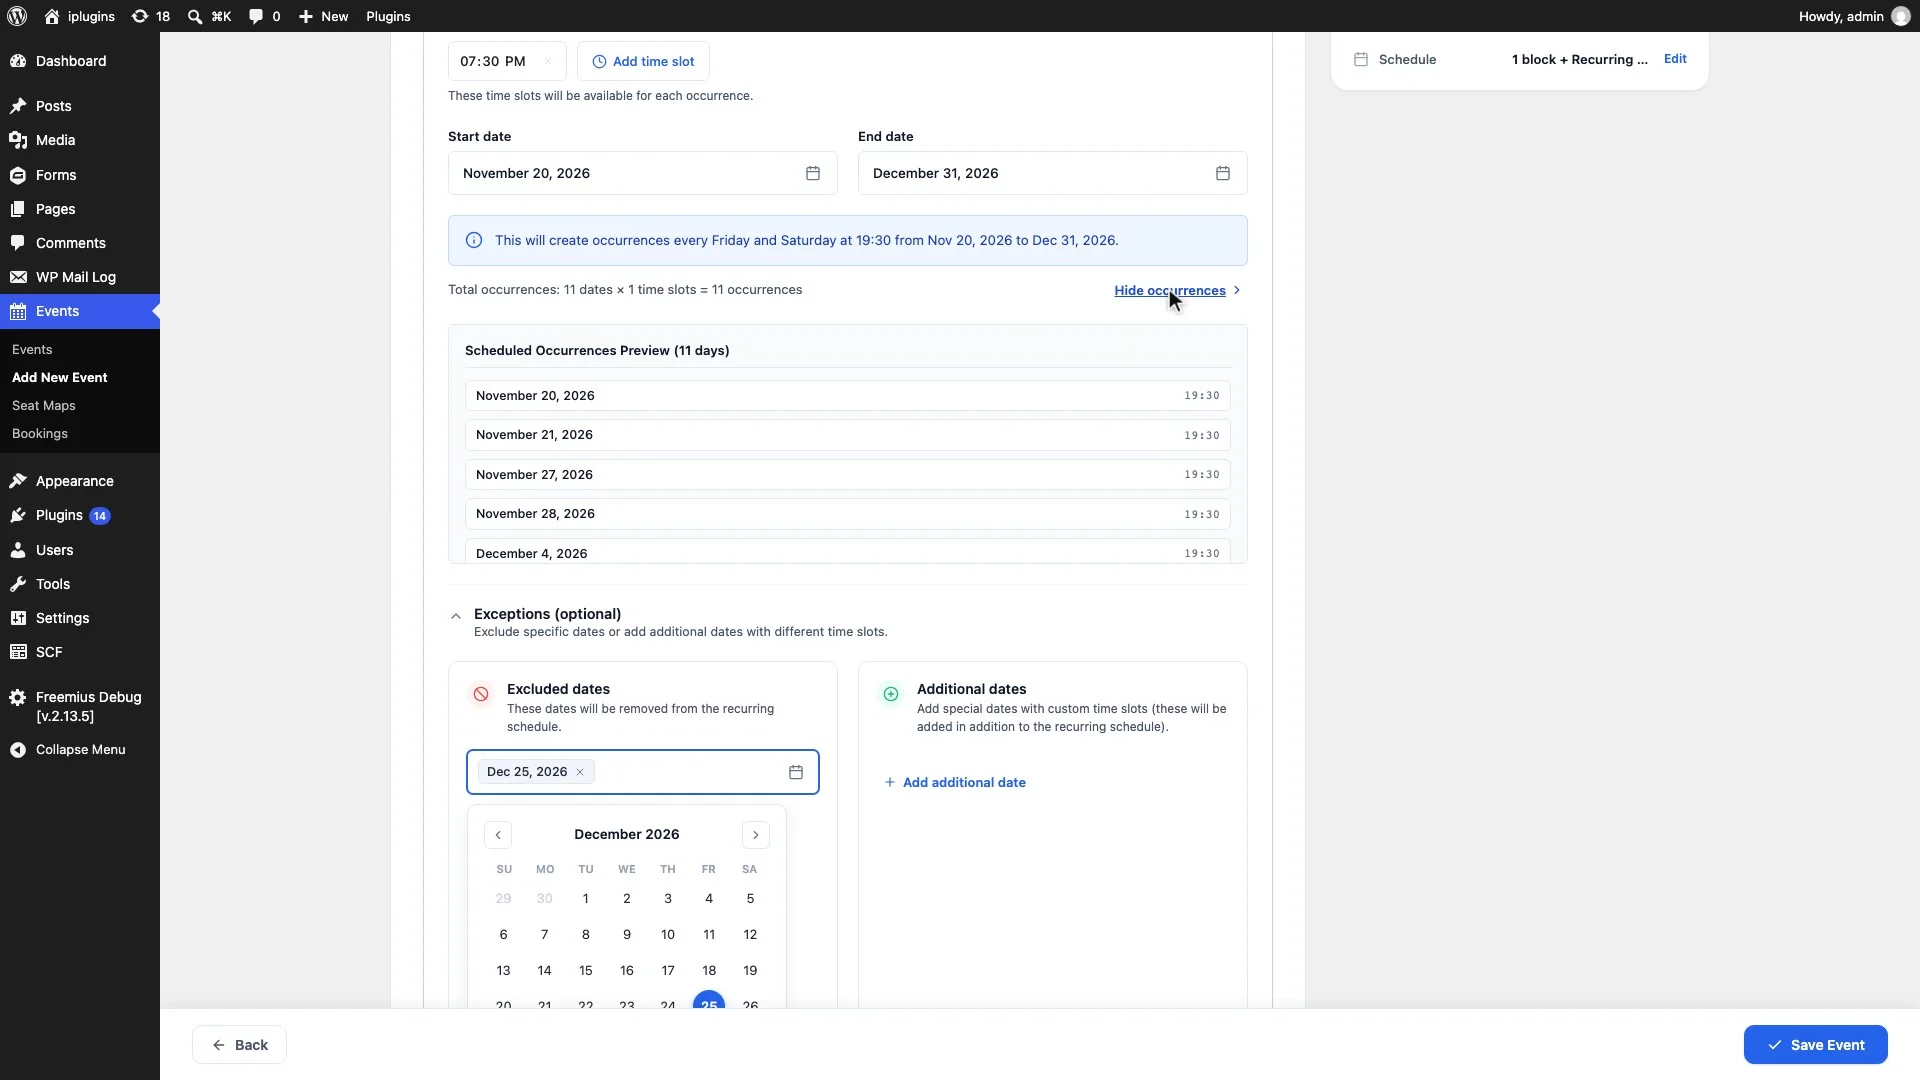
Open Exceptions (optional) to adjust the recurring schedule:
- Excluded dates: dates to skip, such as a holiday. Click Add excluded date and pick the date.
- Additional dates: one-off dates outside the pattern, each with its own times.
Click Preview occurrences to list every date and time the event will have. Check that excluded dates are gone, then click Save Event.
Step 7: Add the seat booking event to a form
- Go to Forms → New Form, choose Blank Form, name it and click Create Blank Form. You can also add the seat field to an existing form.
- Add the fields you need from the customer, such as Name and Email.
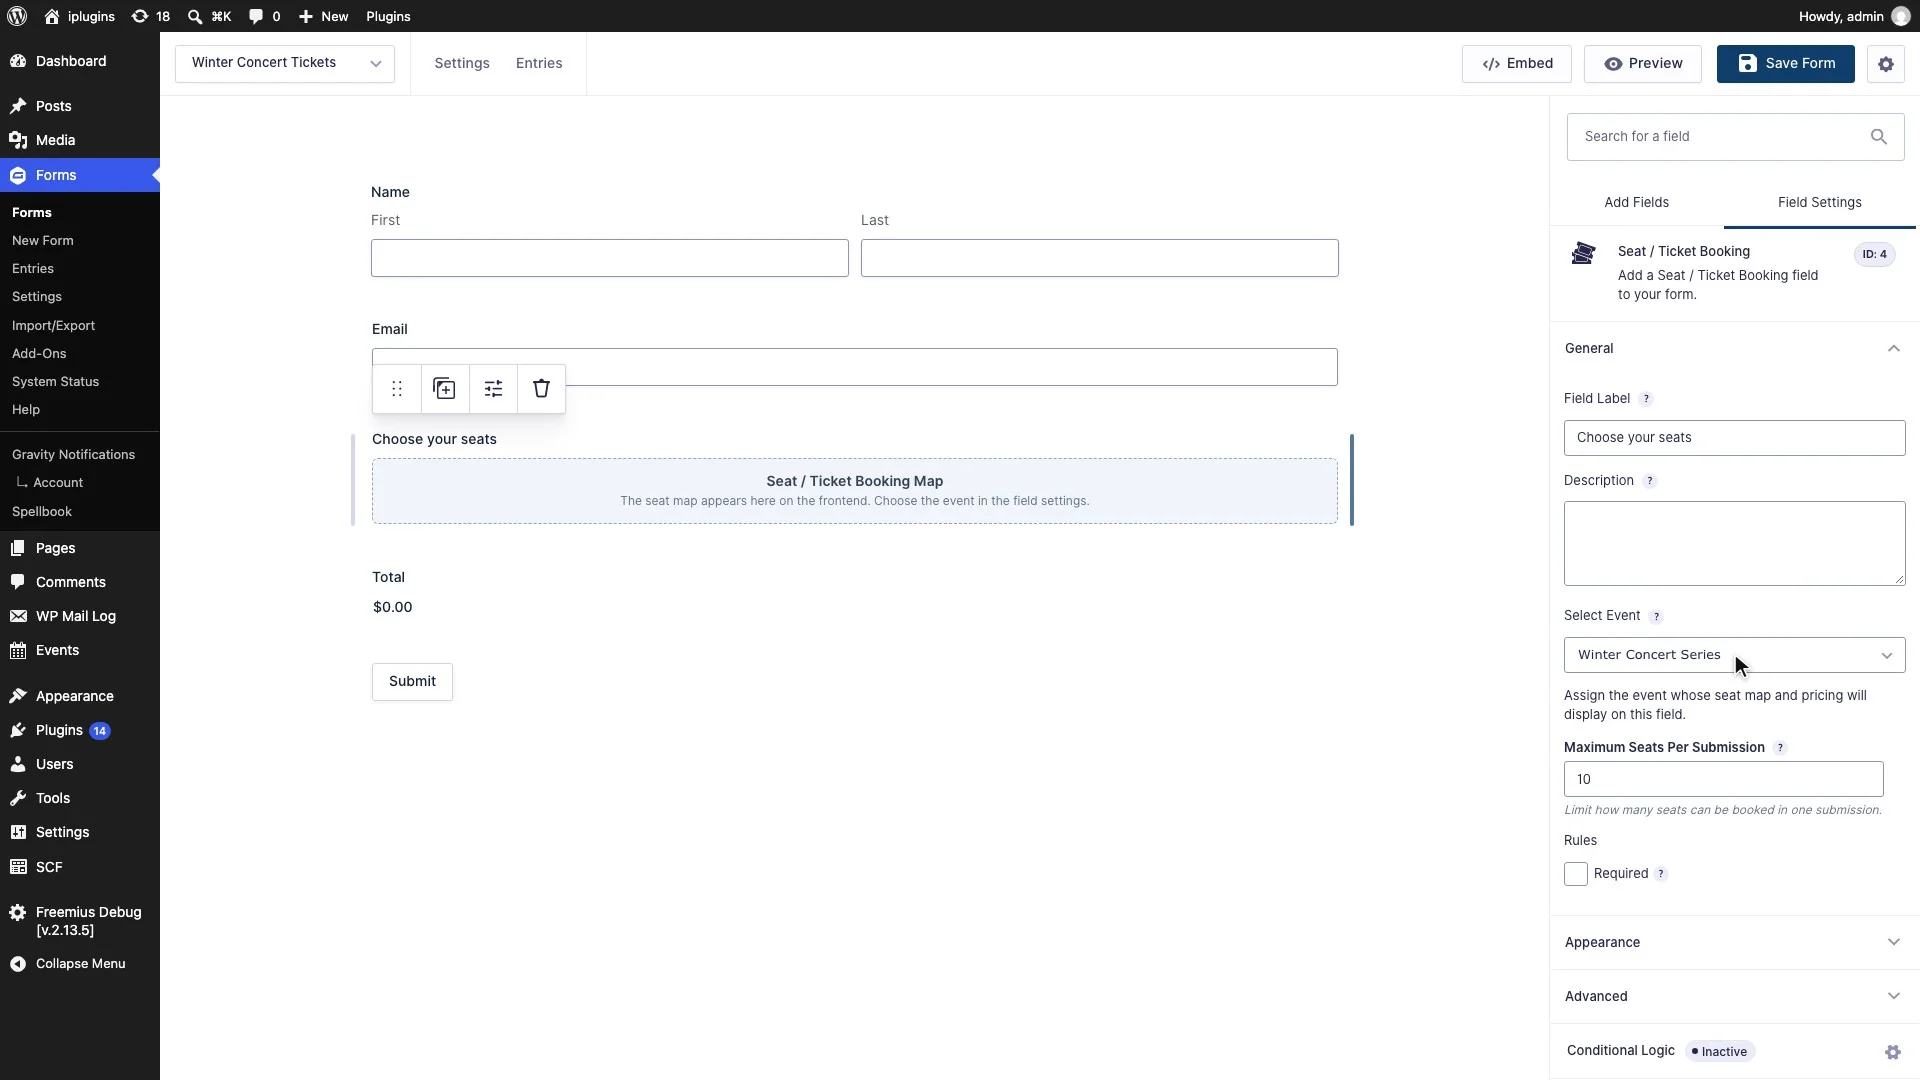
- Under Pricing Fields, add Seat / Ticket Booking. A form can have one seat field.
- Add a Total field so visitors see the price as they pick seats.
- Click the seat field. Under Select Event, choose your event. Its map, prices and dates now power the field.
- Optional: set Maximum Seats Per Submission to limit how many seats one visitor can book at a time.
- Click Save Form, then embed the form on a page with Embed or a Gravity Forms block.
To take payment, add a Gravity Forms payment add-on such as Stripe or PayPal. The seat total is charged with the rest of the form.
Step 8: Book seats as a visitor
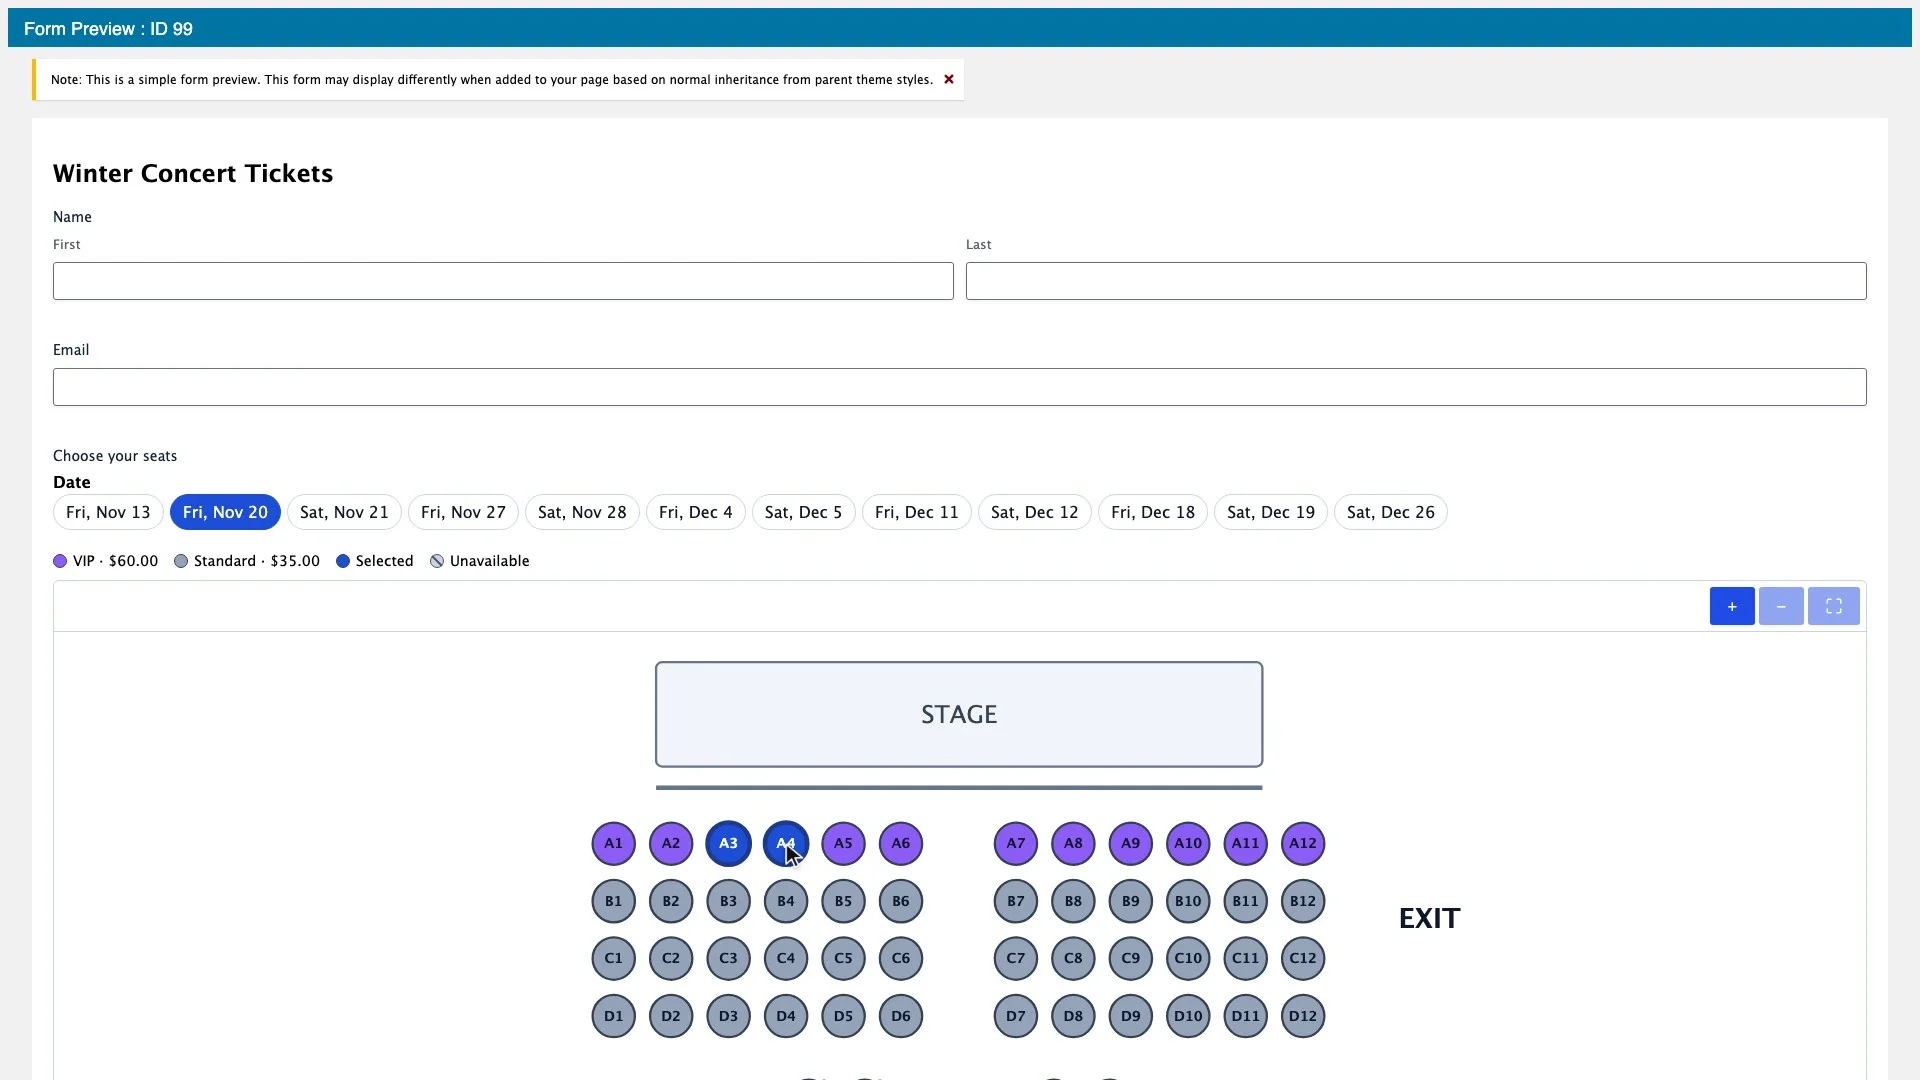
- The visitor picks a date and time first. Each one has its own seats. With a single showtime, it’s selected for them.
- They click seats on the map. The legend shows each tier’s color and price, and the Total updates.
- Picked seats are held for 10 minutes by default while the visitor finishes the form, so nobody else can take them. Change this with Seat Hold Duration (see Settings below).
- They fill in the form and click Submit. The seats are booked and shown as unavailable to everyone else.
Step 9: Manage bookings
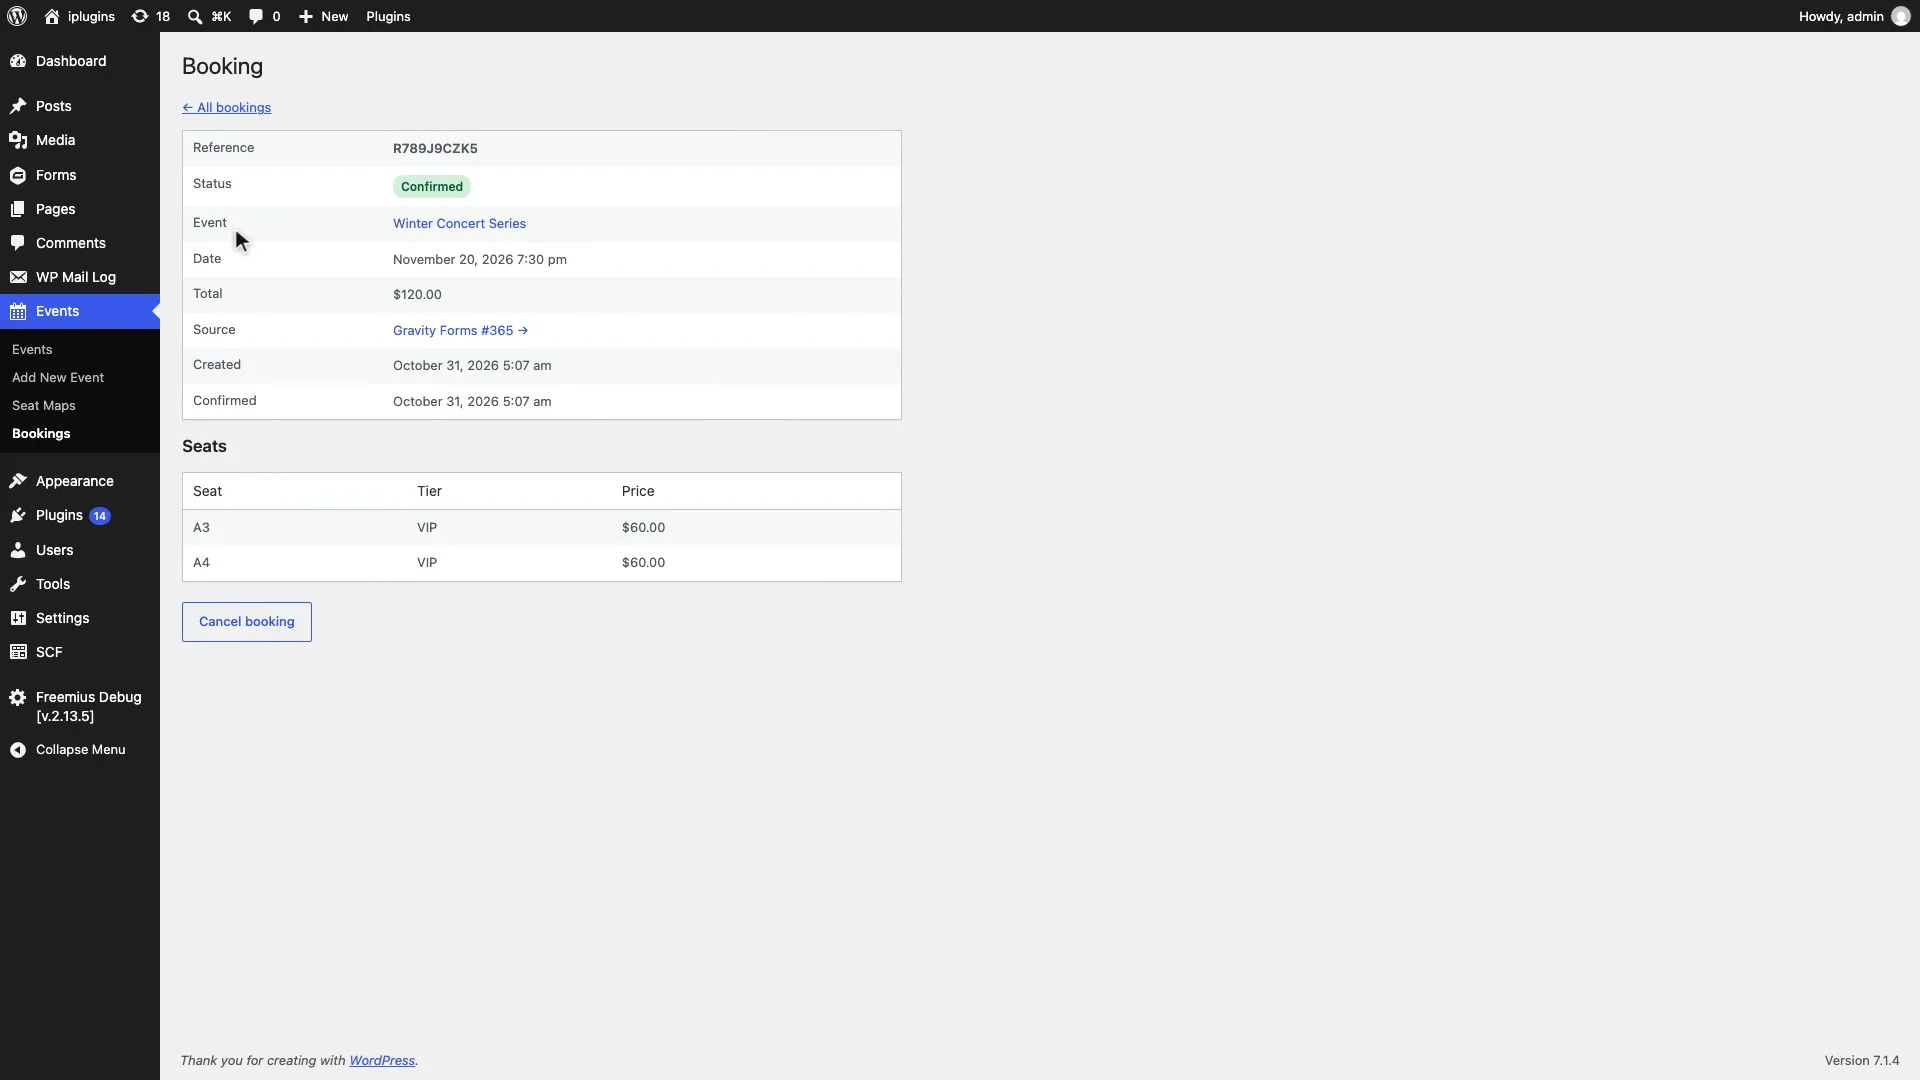
Every booking appears under Events → Bookings with its reference, event, date, seats and total. Filter by event, date or status, or search for a seat. Click a booking to see its details and the Gravity Forms entry it came from.
To cancel, open the booking and click Cancel booking. The seats become available again. Cancelling doesn’t refund a payment, so refund it in your payment gateway.
| Status | Meaning |
|---|---|
| Held | Seats picked on the form, not submitted yet. Released when the hold runs out. |
| Pending payment | Submitted and waiting for payment. Released if payment doesn’t arrive within the payment window. |
| Confirmed | Booked. The seats are taken. |
| Expired | The hold or payment window ran out and the seats were released. |
| Cancelled | Cancelled by an admin. The seats are available again. |
Seat details in notification emails
Notifications that use {all_fields} already include a booking summary under the seat field. To place details yourself, use these merge tags in any notification or confirmation. They are listed in the merge tag picker of forms that have a seat field.
| Merge tag | Shows |
|---|---|
{idea_gsb_seats} | The booked seats |
{idea_gsb_seat_count} | How many seats were booked |
{idea_gsb_seat_total} | The seat total |
{idea_gsb_occurrence} | The event date and time |
{idea_gsb_booking_ref} | The booking reference |
Want to send these by WhatsApp or SMS? Gravity Notifications accepts the same merge tags.
Settings
Go to Forms → Settings → Seat Booking.
| Setting | Default | What it does |
|---|---|---|
| Seat Hold Duration (Minutes) | 10 | How long picked seats stay locked for a visitor before they’re released. |
| Payment Window (Minutes) | 60 | How long seats stay reserved for a booking waiting for payment. |
| Booking Cutoff (Minutes) | 0 | Stop taking bookings this many minutes before a show starts. 0 allows bookings until it starts. |
| Delete All Data on Uninstall | Off | Delete bookings, settings and the booking tables when the plugin is deleted. This can’t be undone. |
Need help?
Watch all the Seat Booking video tutorials, or try the live demo. If you get stuck, open a support request.