Installation #
The installation of WooCommerce Lightning Deal is similar to any other WordPress plugin. But please make sure that you have already installed the WooCommerce plugin.
- Go to Dashboard> Plugins > Add new
- Click on ‘Upload Plugin’ button
- Browse and select the WooCommerce Lightning Deal plugin zip.
- Install and Activate
Setup #
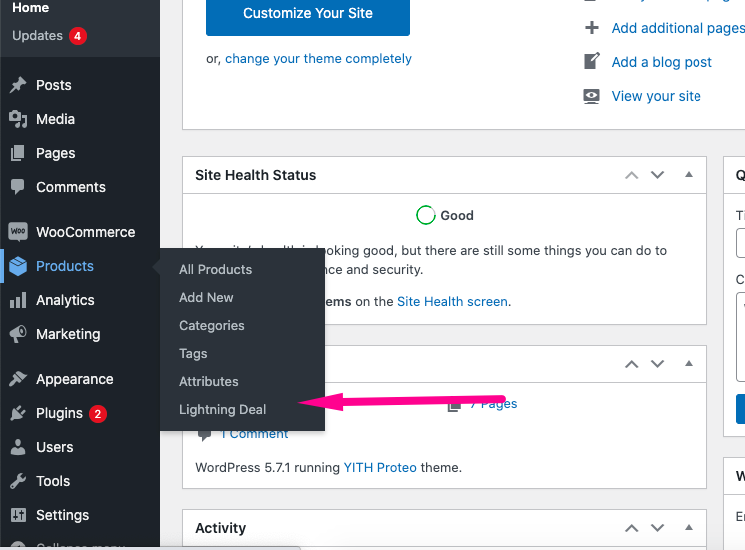
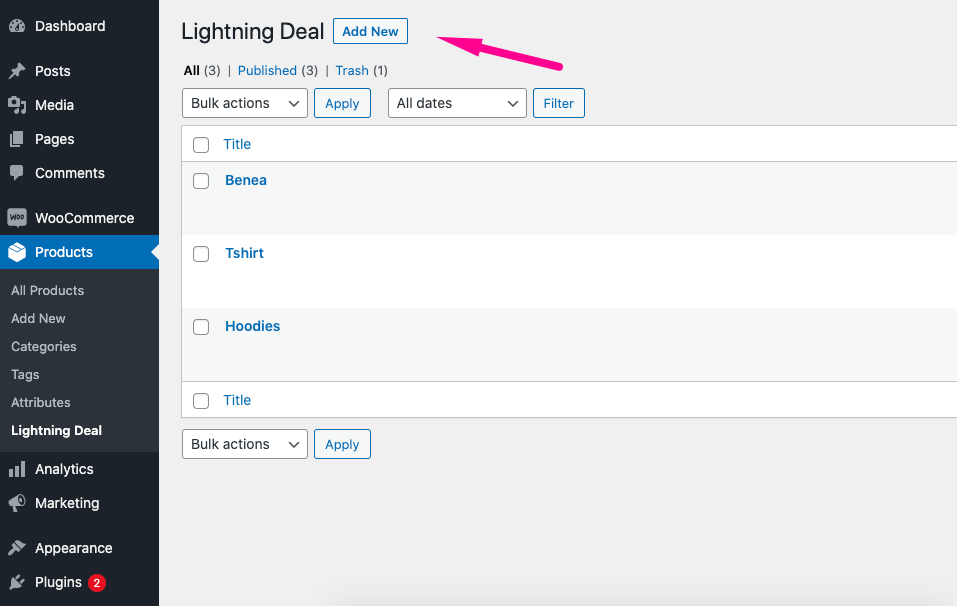
Click on Add New button to Create a new Deal
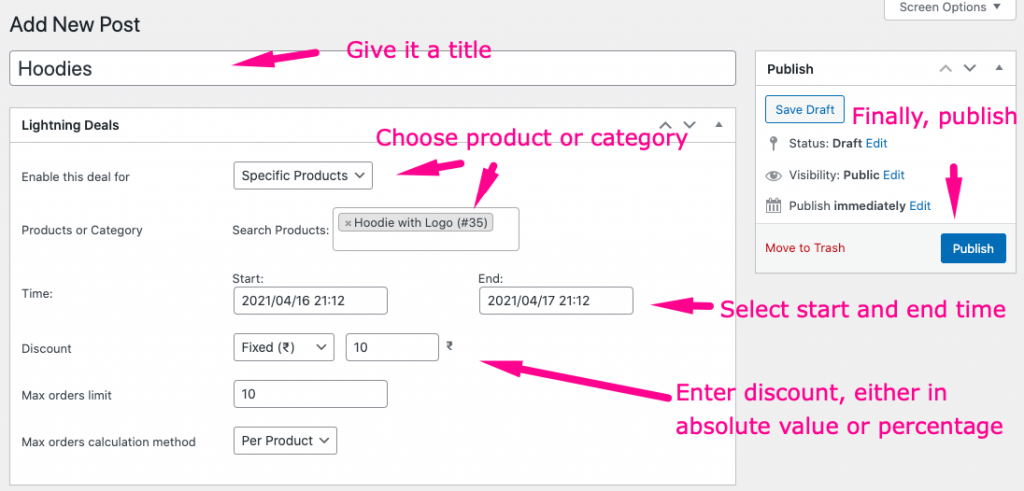
- Give a title, choose products or categories for which you want the deal to appear.
- Select a start and end date for the deal
- Select discount, either in absolute value or percentage
- Enter Max order limit. Deal will end after this number of products have been sold.
- Select max order calculation method. If you want the max order limit to be work collectively on all the products for this deal then select “Per deal”, else select “Per Product”. If you are not sure, then you would probably want “Per Product” to be selected.
Admin Settings #
General Settings: #
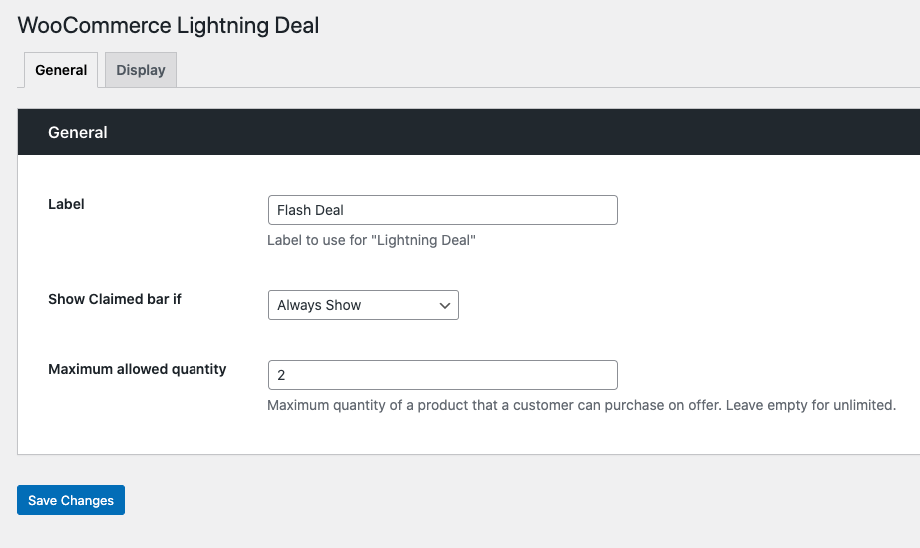
- Label: Enter label for Lightning Deal. You can be creative and call it Flash Deal, Deal of the day etc. This label will appear every where on the frontend.
- Show Claimed bar if: You can select when the claimed bar will appear on the archive and product page. There are three options: Always Show, Never Show, and and when More than x% are claimed. If you select the last option “More than x% is claimed”, then you will have enter the x% in Bar threshold percentage.
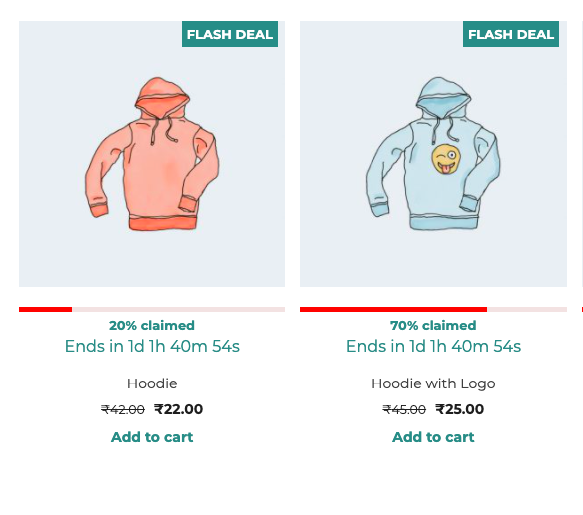
Maximum allowed quantity: Customer will not able to add more than this number of products to the cart.
Display Setting: #
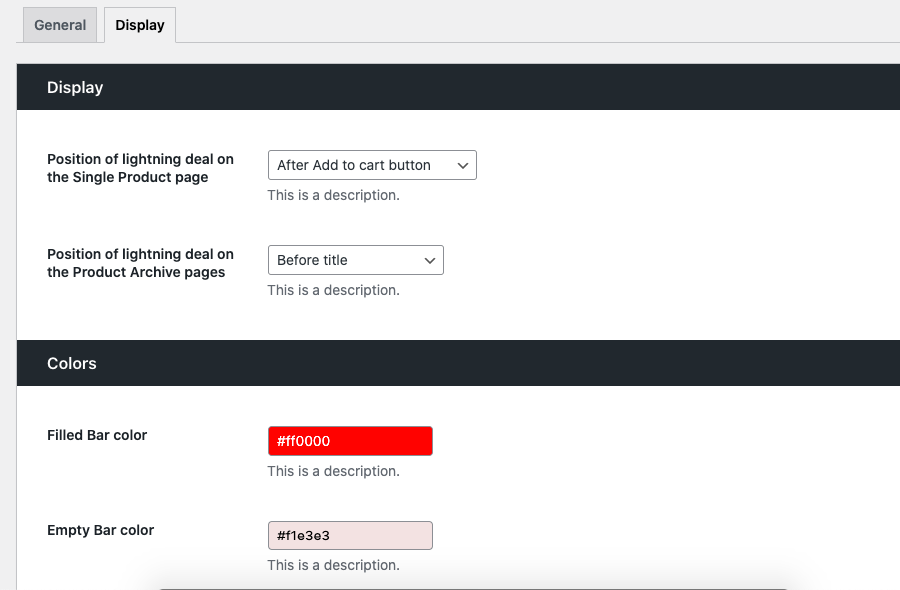
- Position of lightning deal on the single product page: Where would you want to show the lightning deal on single product page.
- Position of lightning deal on the Product Archive pages: Where would you want to show the lightning deal on archive page.
- Filled bar color: Color of the filled part of the claimed bar.
- Empty Bar color: Color of the empty part of the claimed bar.


