Setup Documentation for Gravity notifications addon #
Introduction #
Welcome to the setup documentation for Gravity Notifications , a Gravity Forms addon for sending Twilio and WhatsApp messages! This guide will assist you in installing, configuring, and utilizing our addon with Gravity Forms on your WordPress website.
Requirements #
- WordPress version 5.0 or higher.
- Gravity Forms plugin installed and activated.
- Twilio account credentials like API SID, Auth token, Phone number. you can refer this doc for all details.
- WhatsApp Business API credentials like Business ID, Phone ID and permanent access token. you can refer this doc for all details.
Installation #
- Download the Plugin
- Upload the Addon
- Log in to your WordPress admin dashboard.
- Navigate to Plugins > Add New.
- Click on the “Upload Plugin” button and choose the addon ZIP file you downloaded.
- Click “Install Now” and then “Activate” the addon.
Obtaining API Credentials #
Twilio API Details #
In order to use Gravity Notifications addon, you will need a Twilio account and Twilio API details. you can refer the Twilio API setup guide on how to add Twilio API details for Gravity notifications addon.
WhatsApp Business API Details #
In order to use Gravity Notifications addon, you will also need WhatsApp account and cloud API details. you can refer the WhatsApp cloud API setup guide on how to add WhatsApp cloud API details for Gravity notifications addon.
Configuration #
- Addon Settings
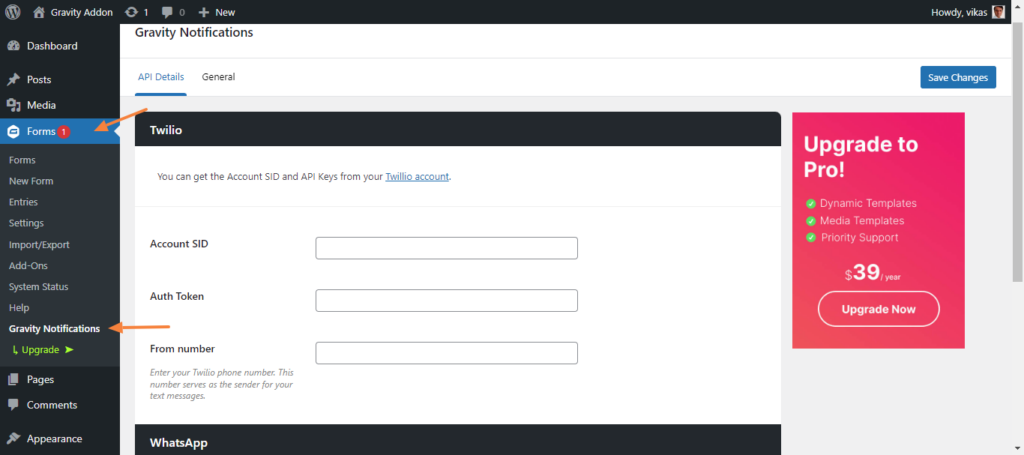
- After activation, go to Forms -> Gravity notifications in the WordPress admin menu.
- Enter your Twilio account credentials:
- API SID
- Auth Token
- Phone Number
- Enter your WhatsApp Business API credentials:
- Business ID
- Phone ID
- Permanent Access Token
- Save your changes.
Create a Gravity notification feed #
Two types of notifications can be created via this addon
- Twilio notification feed
- WhatsApp notification feed
Create a Twilio notification feed
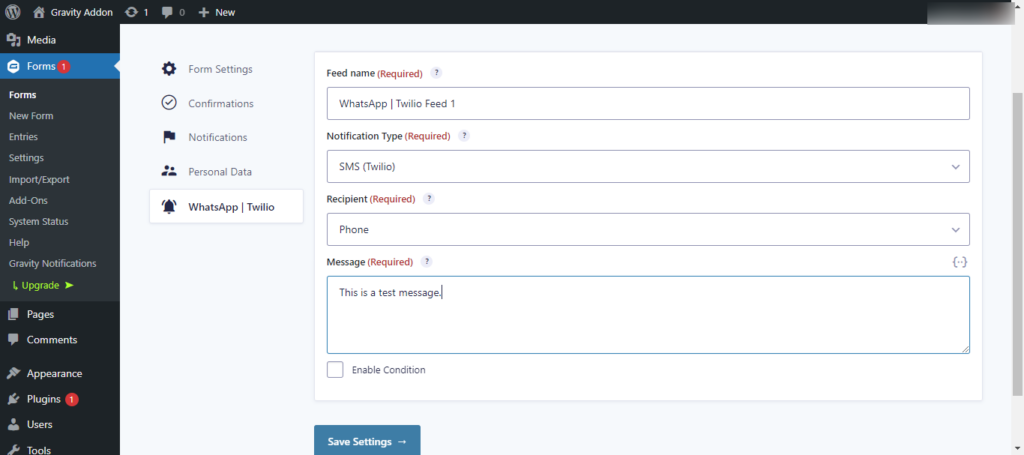
- Navigate to Forms > [Your Form] > Settings > WhatsApp | Twilio in the WordPress admin menu.
- Click on Add new.
- Enter a appropriate feed name.
- Select SMS(Twilio) as notification type.
- Select a Recipient for the notification. the possible values can be any phone type fields of your form or you can also add any custom phone number as recipient.
- Add the message content that needs to be send to recipient.
- Save the feed settings.
Create a WhatsApp notification feed ( Free version) #
- Navigate to Forms > [Your Form] > Settings > WhatsApp | Twilio in the WordPress admin menu.
- Click on Add new.
- Enter a appropriate feed name.
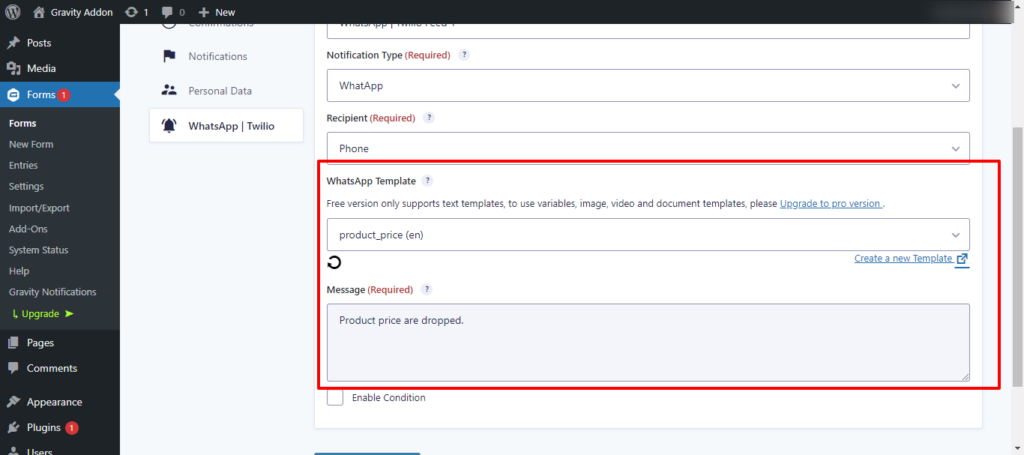
- Select WhatstApp as notification type.
- Select a Recipient for the notification. the possible values can be any phone type fields of your form or you can also add any custom phone number as recipient.
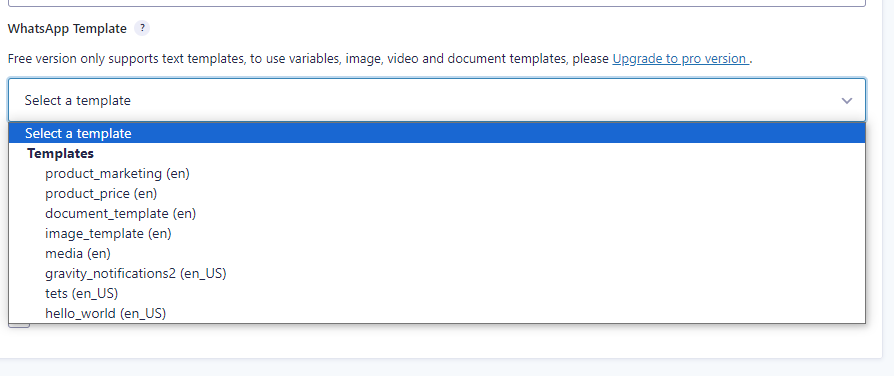
- Select the WhatsApp template , you want to send for this notifications. the lite version of gravity notifications addon only supports WhatsApp text templates, whereas the premium version supports all types of templates like text, variable and media templates.
- The message field will be auto populated with the content of the selected template.
- Save the feed settings.
Create a WhatsApp notification feed (Premium version) #
- Navigate to Forms -> [Your Form] -> Settings -> WhatsApp | Twilio in the WordPress admin menu.
- Click on Add new.
- Enter a appropriate feed name.
- Select WhatstApp as notification type.
- Select a Recipient for the notification. the possible values can be any phone type fields of your form or you can also add any custom phone number as recipient.
- Select the WhatsApp template , you want to send for this notification.
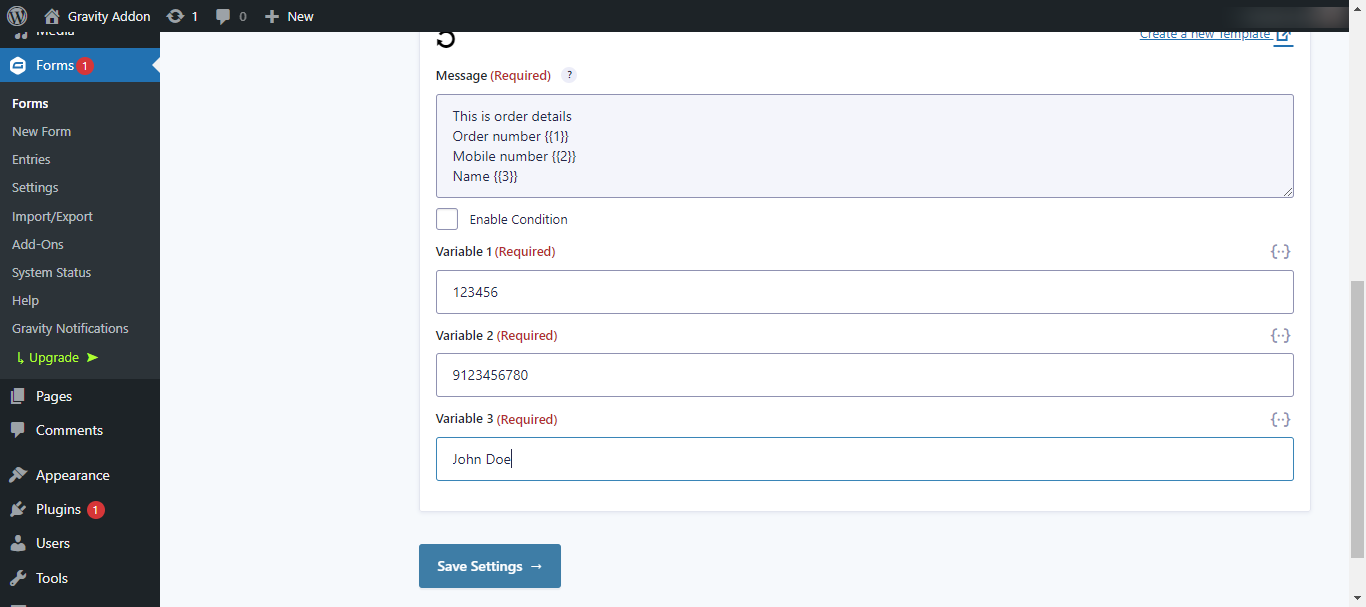
- If you select a variable template, some extra variables fields will be populated to feed, that you can use as a variable content to replace the variables in your WhatsApp template.
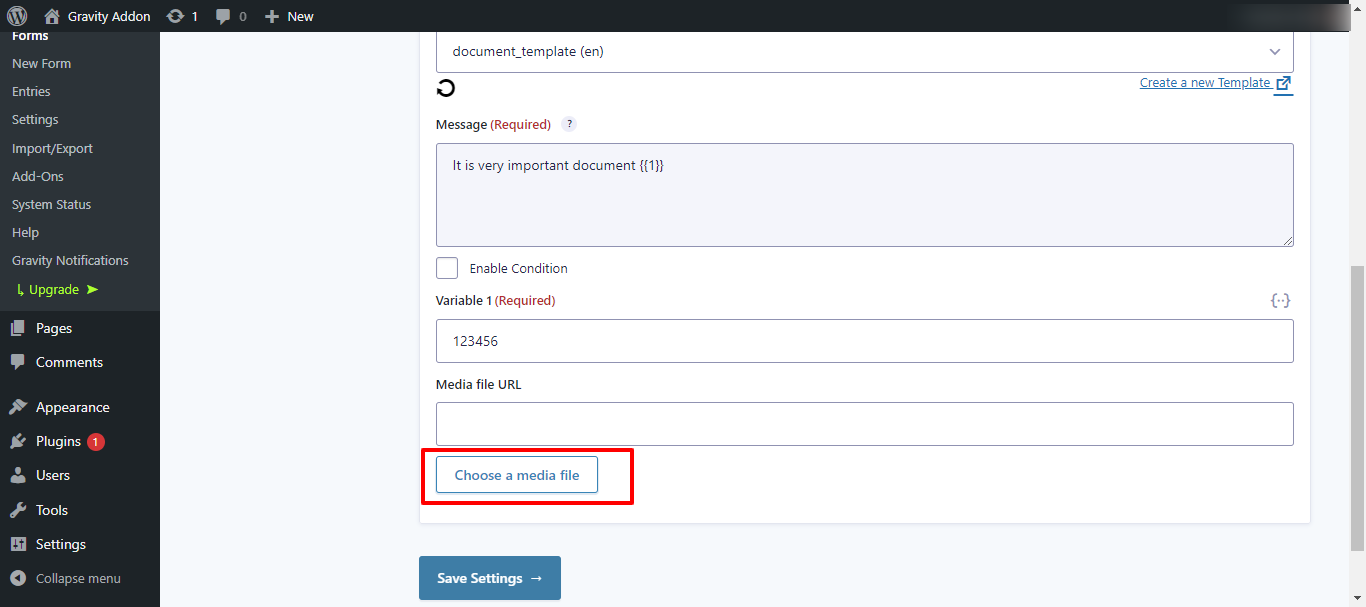
- The premium version also supports media templates. currently only image, video and document templates are supported.
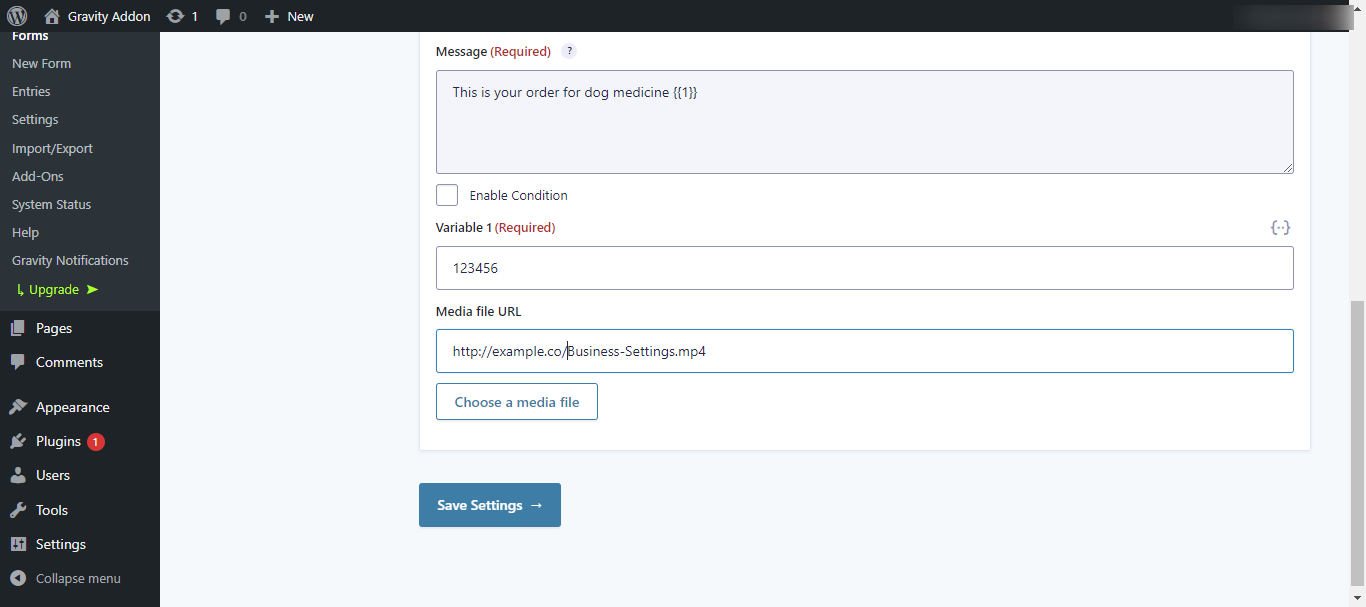
- When a media template is selected, a media URL field is populated.
- Enter any valid image, video or document url in media URL field. that will be sent as a header content with message.
- The message field will be auto populated with the content of the selected template.
- Save the feed settings.
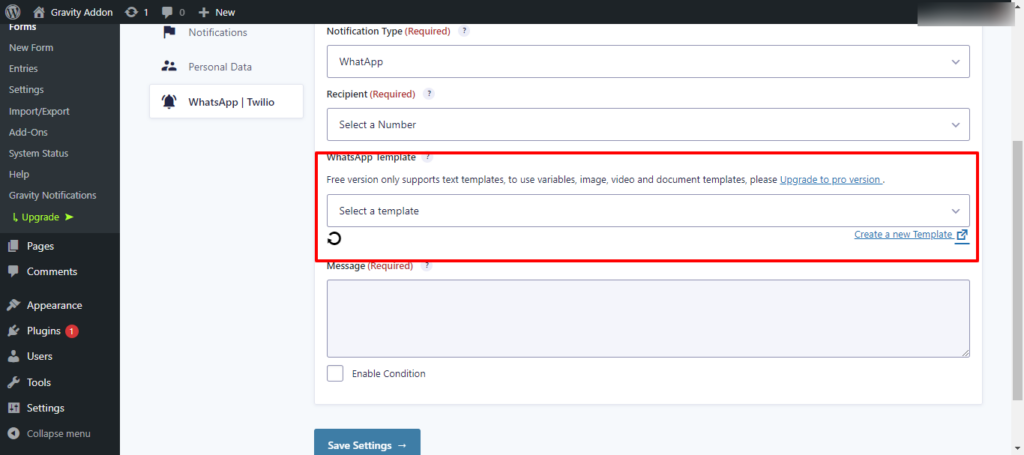
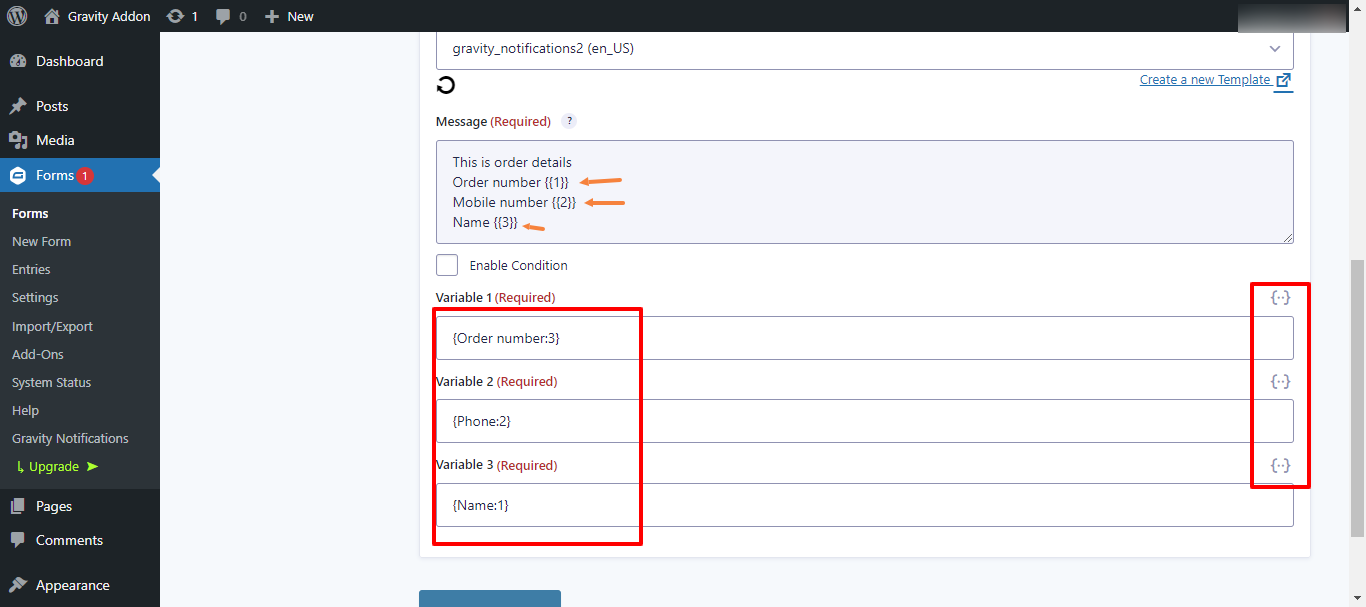
If you have done some changes in your WhatApp templates, please use the reload icon ( under WhatsApp template field) to sync the latest changes in gravity notifications addon.
Usage #
- Create a Gravity form by navigating to Forms -> New Form ( You can also edit an old form).
- Select a appropriate form template.
- Add the Form title and form description.
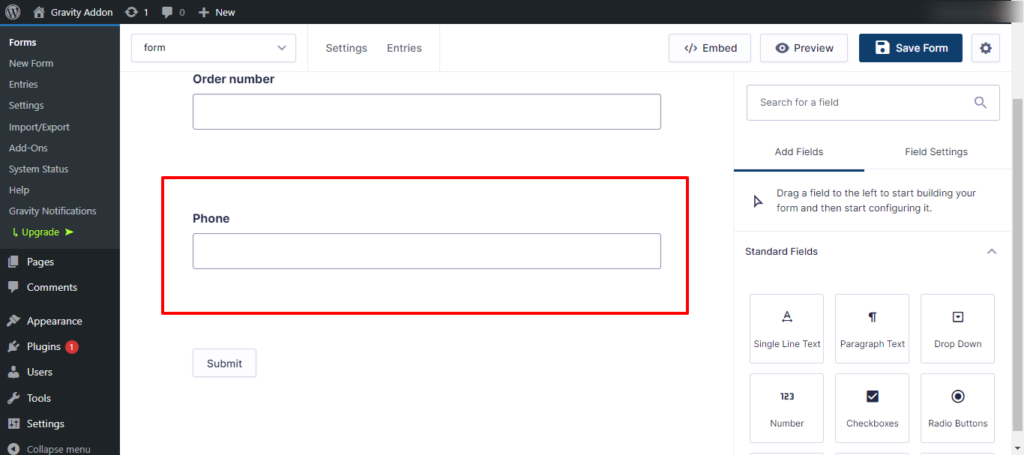
- On form edit page , it is recommeded to add atleast one phone type field. that can be selected on feed settings to select a recipient. but it is not mandatory, as notifications can also be send to custom phone numbers( selected from feed settings).
- Save the form.
- Embed the Gravity form to a post or page or anywhere you want to embed.
- When a form submission occurs, the Gravity notificaitions addon will send Twilio or WhatsApp messages based on the configured settings.
- You can also test the message sending functionality by submitting test entries through the form.
Support and Resources #
- For technical support or questions related to the addon, visit our support page.
- Check out our addon documentation for Twilio and WhatsApp.
Updates and Maintenance #
- Regularly check for addon updates in the WordPress admin dashboard (Plugins > Installed Plugins).
- Keep your WordPress version, Gravity Forms, and other plugins up to date for compatibility.
Troubleshooting #
- Contact our support team for further assistance.


