Creating the Facebook/Meta Developer account #
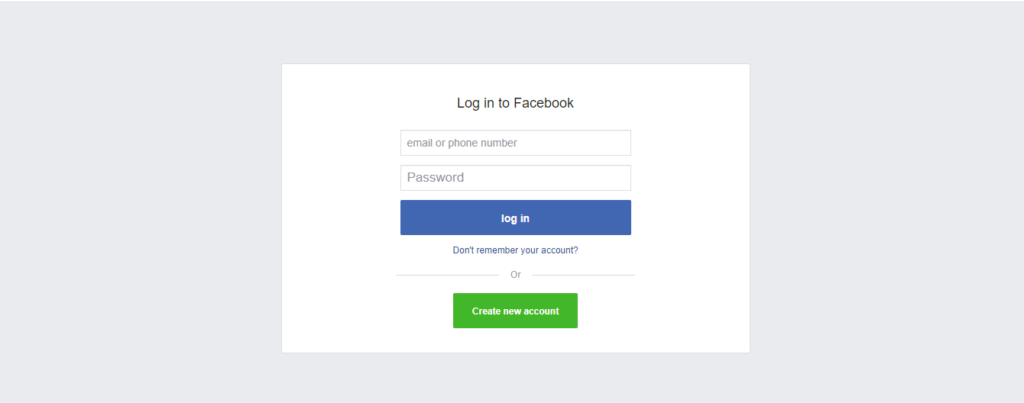
To get WhatsApp API credentials, first we need to have a Facebook developer account. To create it, go to the Facebook developer website and login with your Facebook Account. If you do not have a Facebook account, you will need to create one.
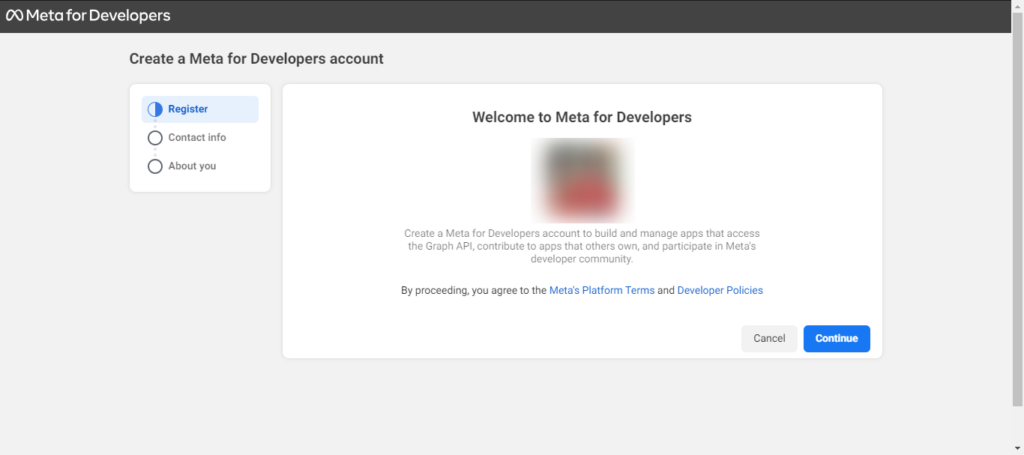
After logging in to the Meta Developers website, you will need to register as a developer. There will be a three-step process that will ask for your details. Follow through the steps.
First you need to enter and confirm your E-mail address.
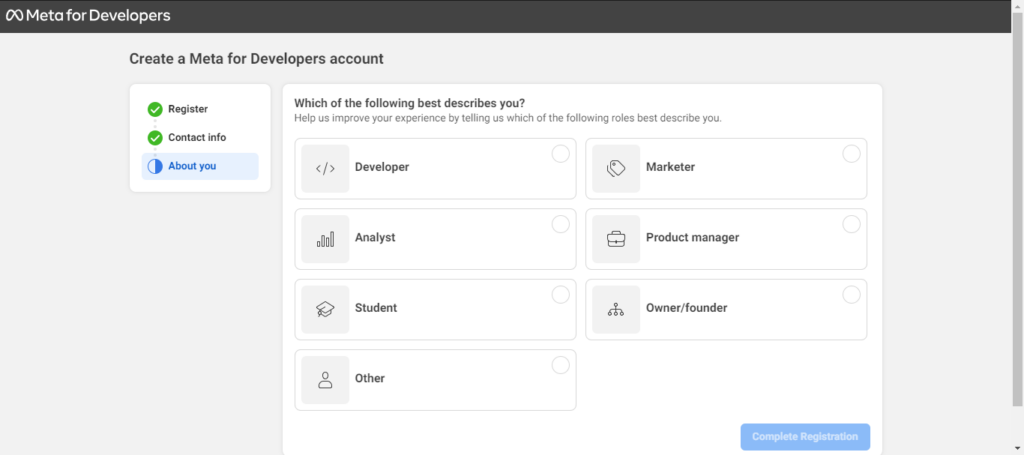
Select a role that best describes you and click on the Complete Registration button.
Creating the App #
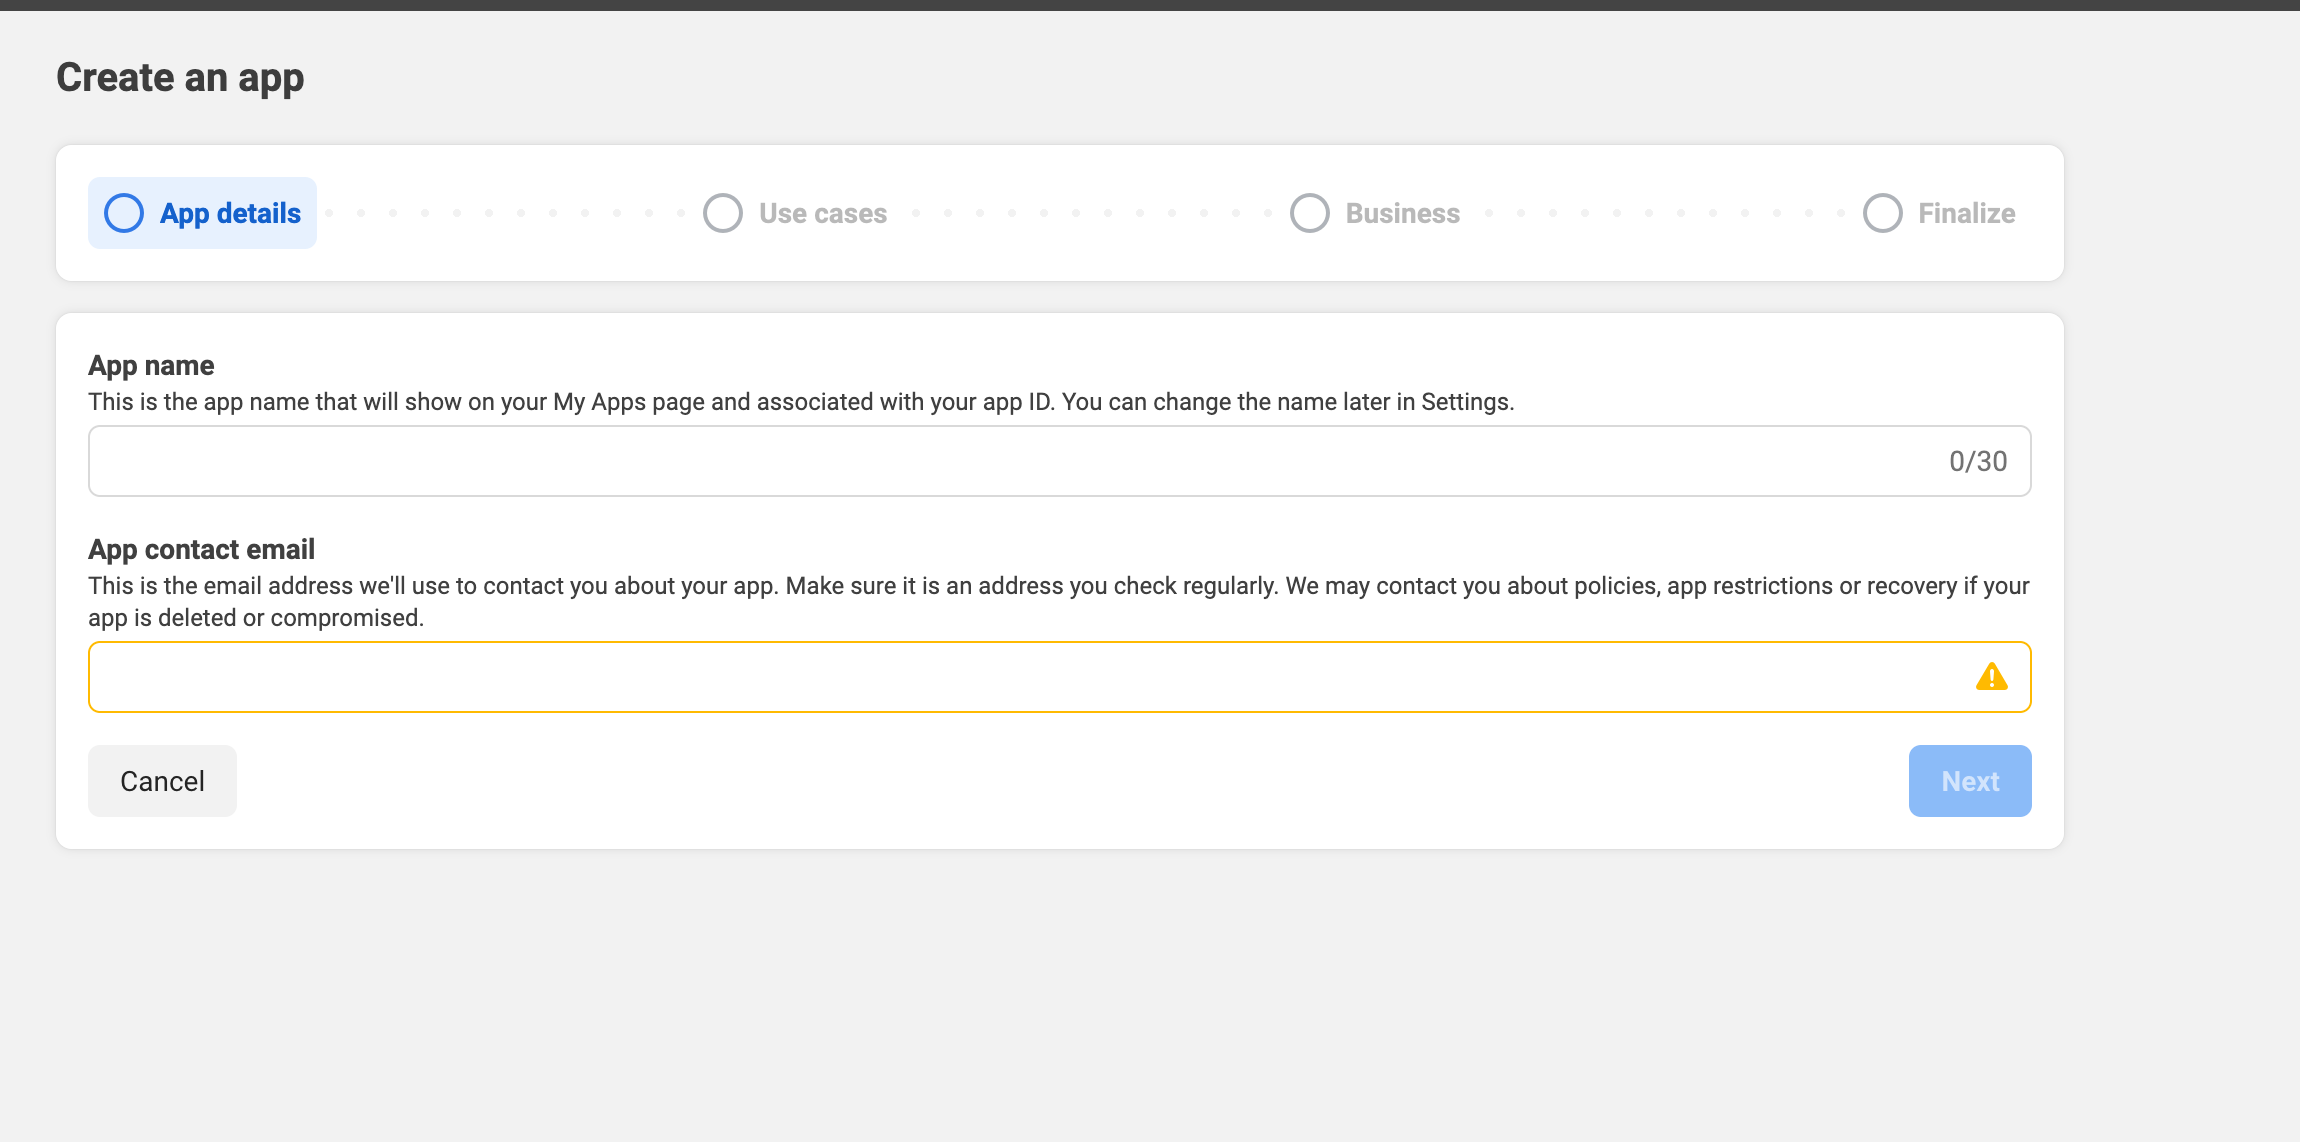
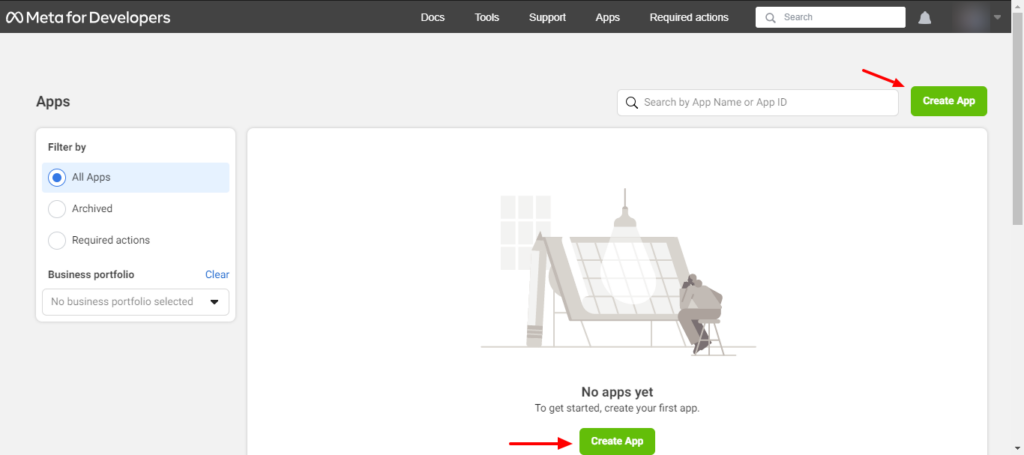
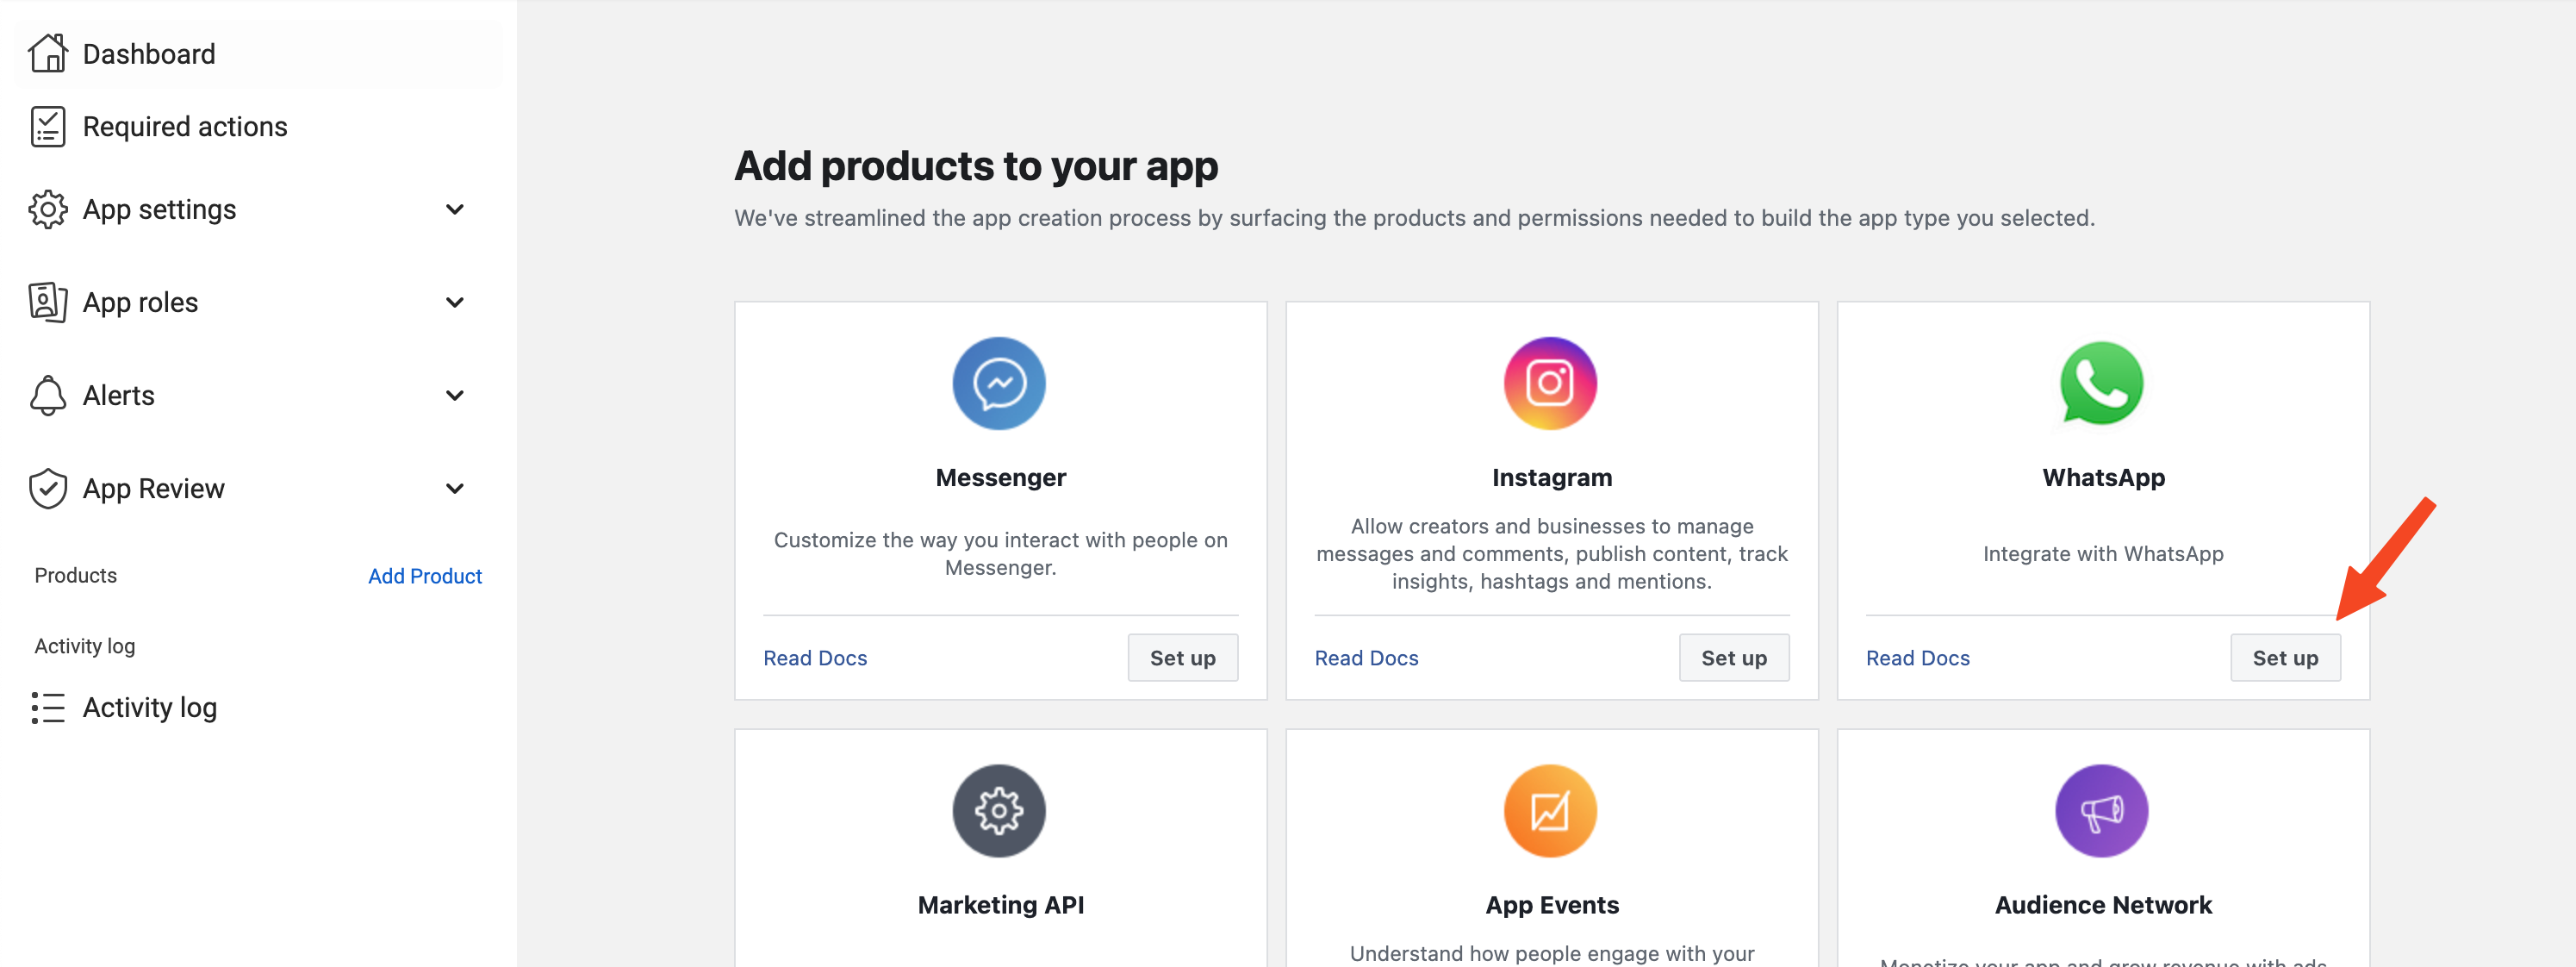
After registration, go to the My Apps page. Create a new app by clicking on the Create App button.
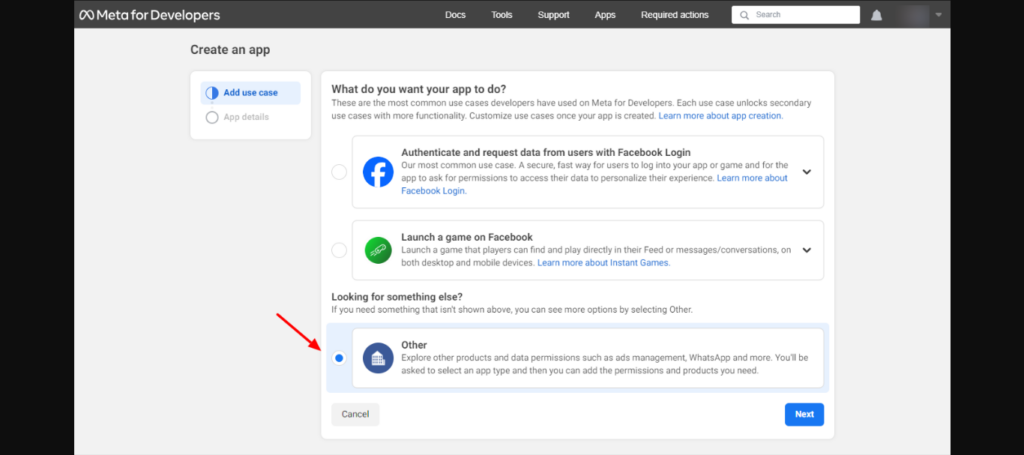
On the next screen select Other and click on the Next button.
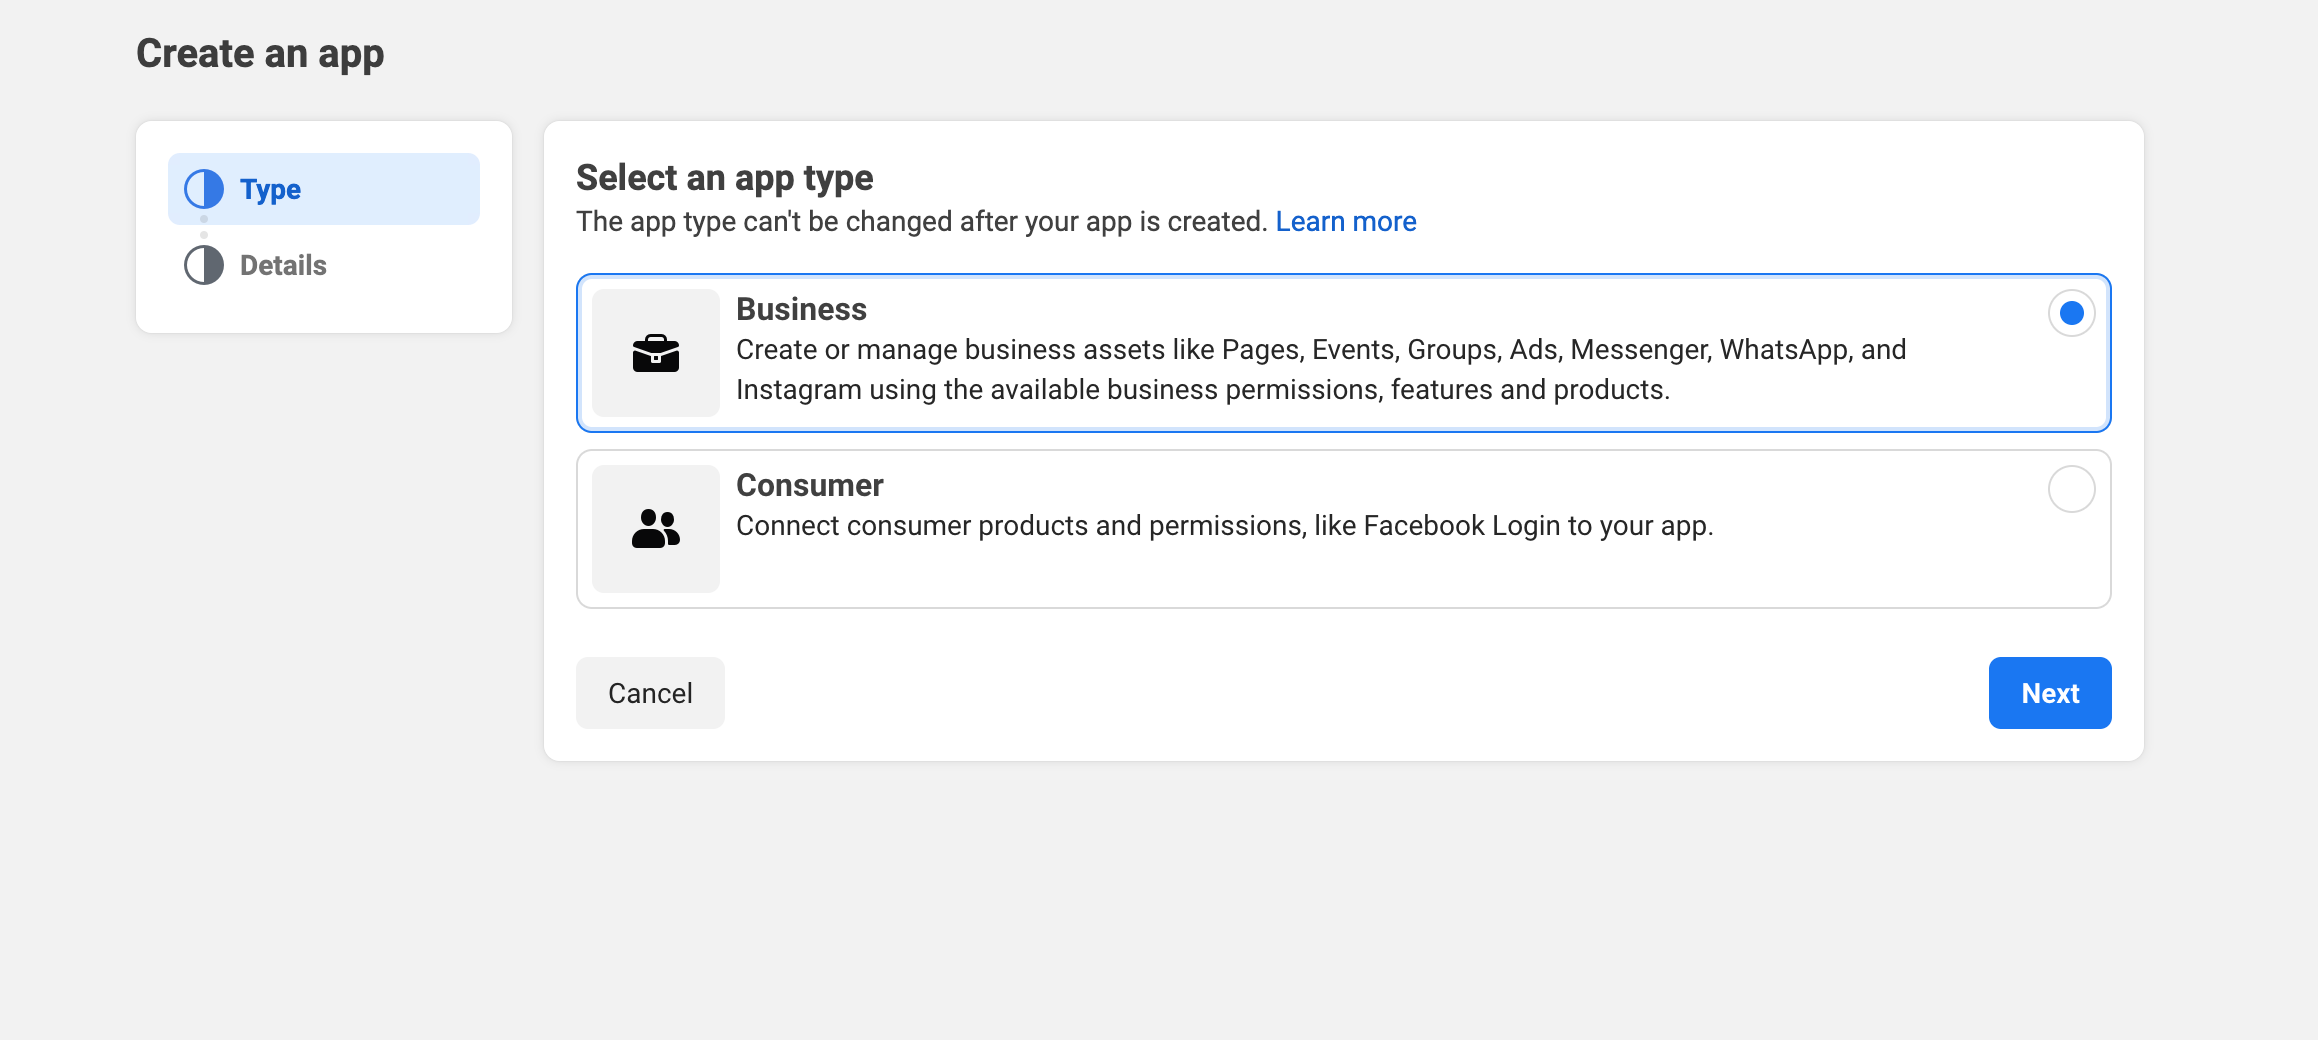
Select App type as Business.
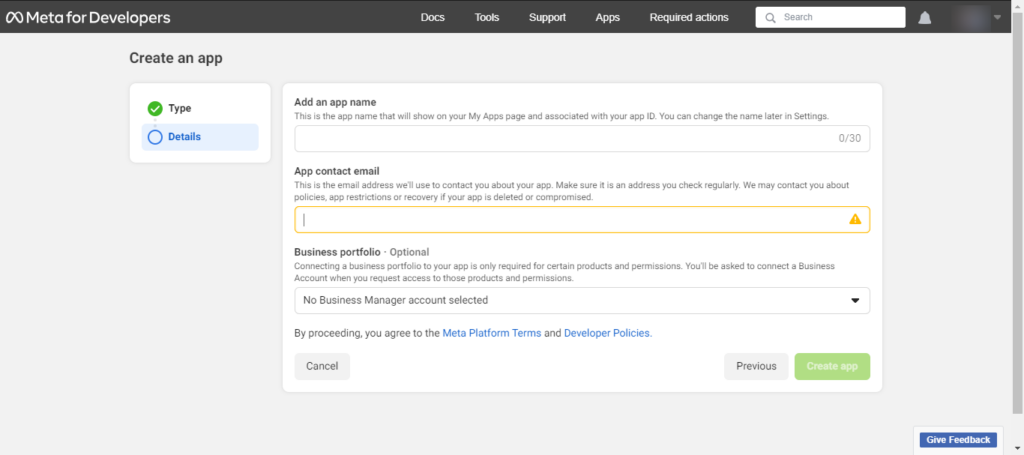
Next it will ask for the App details. Enter name for your app, your email and select a Business portfolio, if you do not have a Business Portfolio, do not select any, we will see how to create that in the next section.
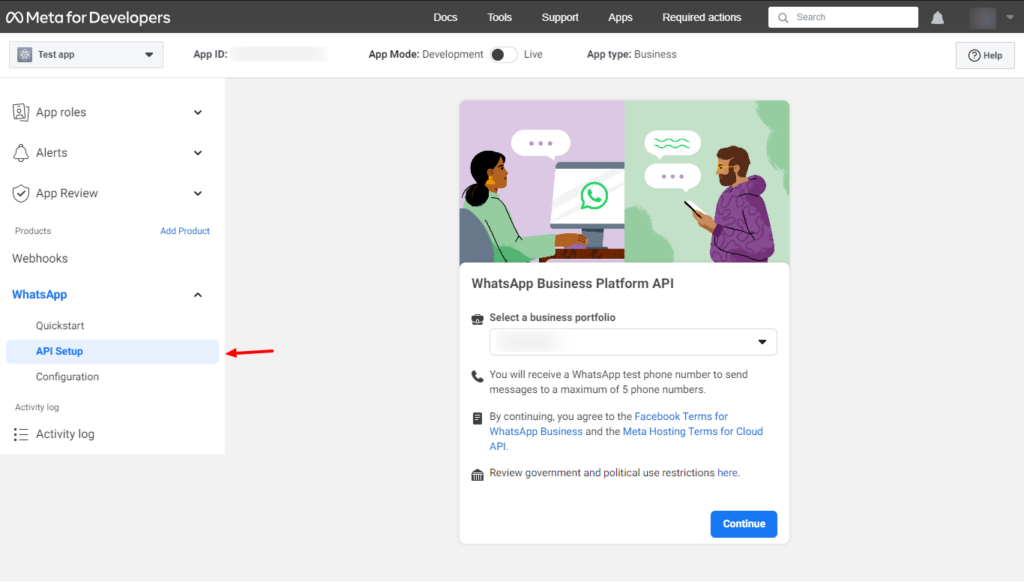
It is the final step to create your Facebook App, click on Create App, and you will be redirected to the App dashboard. Go to WhatsApp section, and click on the Set up button.
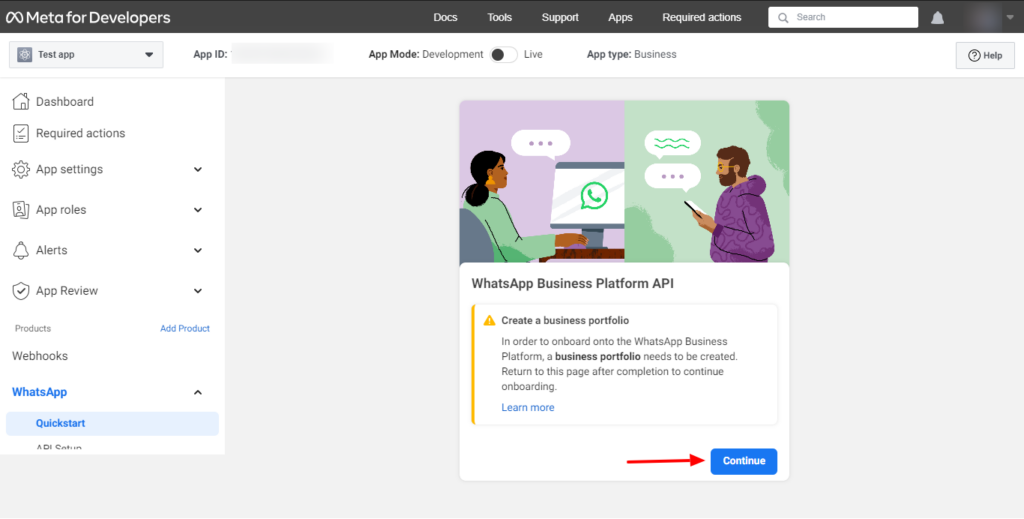
Business portfolio #
On the next page, continue to create a business portfolio.
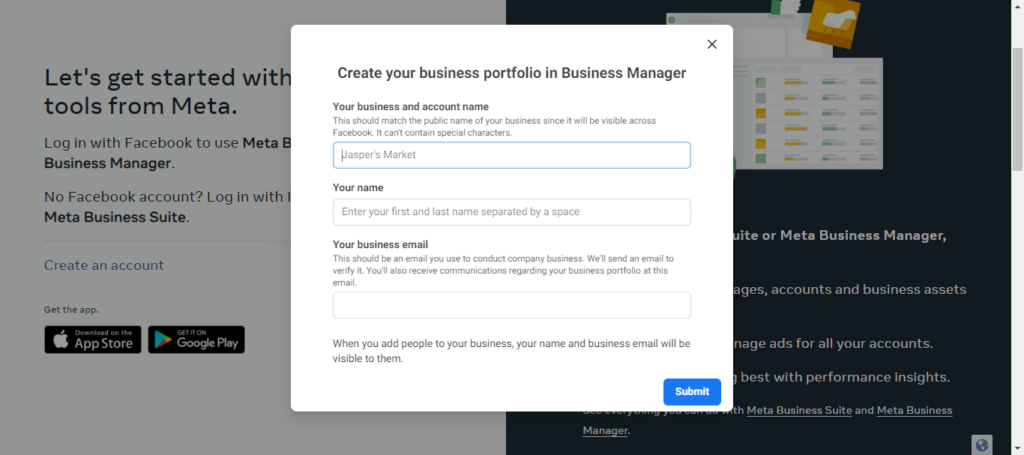
Enter the business details as requested in the popup.
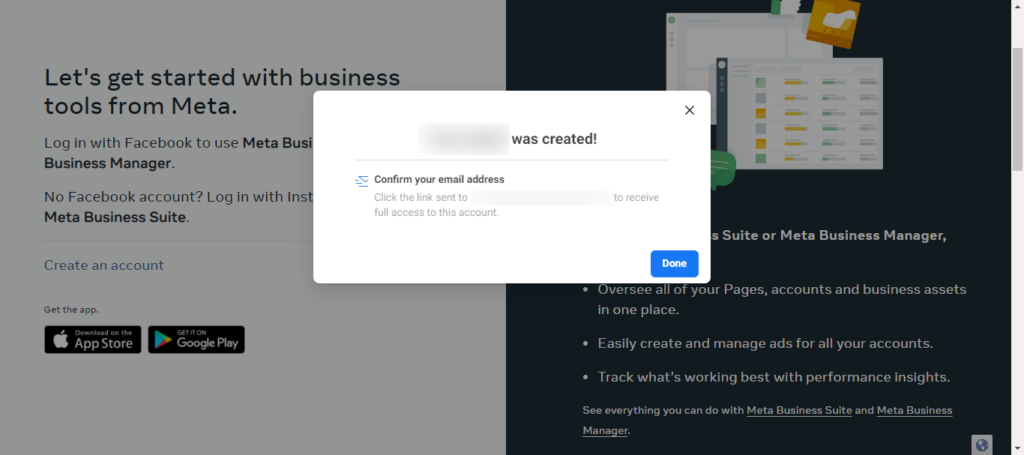
After the business portfolio is created, confirm your Email address.
In the next step, choose the newly created business portfolio and click on Continue.
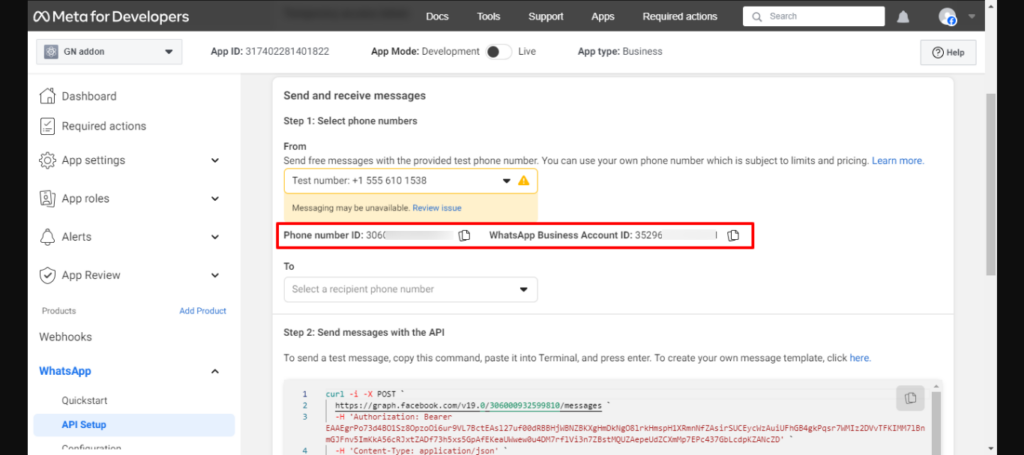
Yu will be redirected to the App dashboard. Here you can find the details that we need, i.e. Phone number, Phone ID and Business Account ID. These details need to be added to the Gravity Notification plugin’s settings in the WordPress dashboard. Take a note of these details.
Get A Permanent token #
Along with Phone ID and Business ID, you will also need a permanent token. These are the steps to get a permanent token.
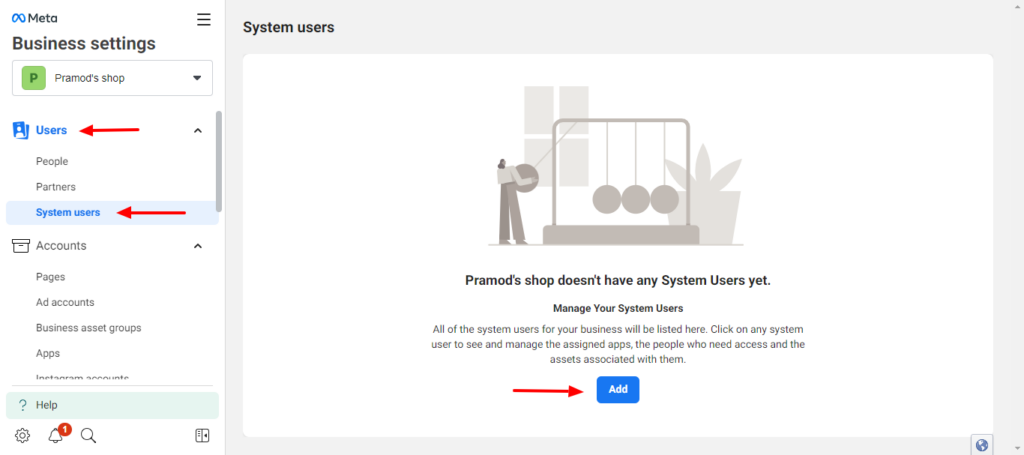
- Go to Business Settings.
- Select the business account your app is associated with.
- On the left section Click on Users to open the dropdown.
- From the dropdown select System Users.
- Click on the Add button.
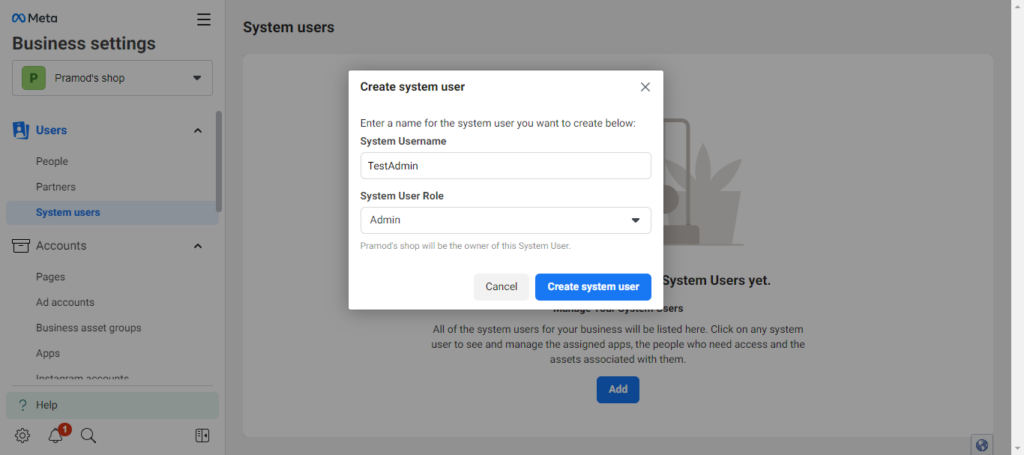
- Enter the name of the system user, choose Admin as the user role, and click on the Create system user button.
- Next, click on the Assign assets button on the right section.
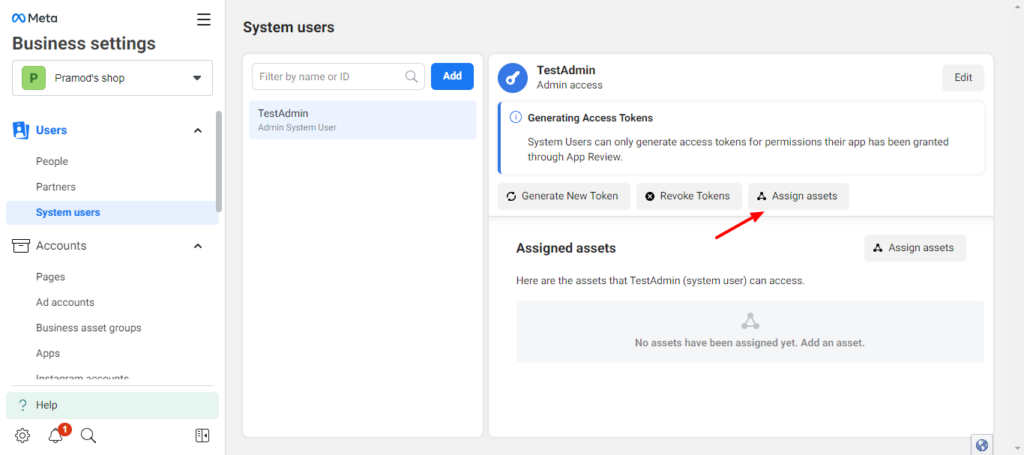
- Select the App we just created and grant access as shown in the screenshot below.
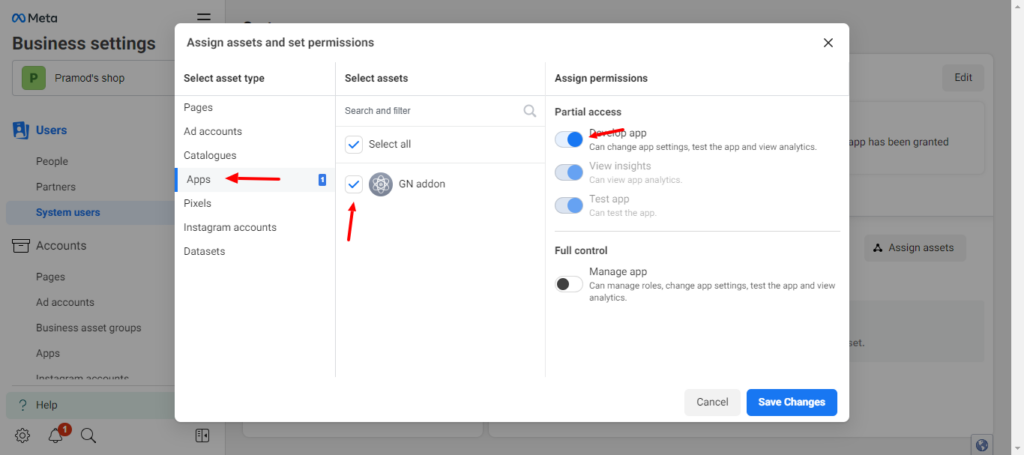
Save changes and click on the Generate New Token button.
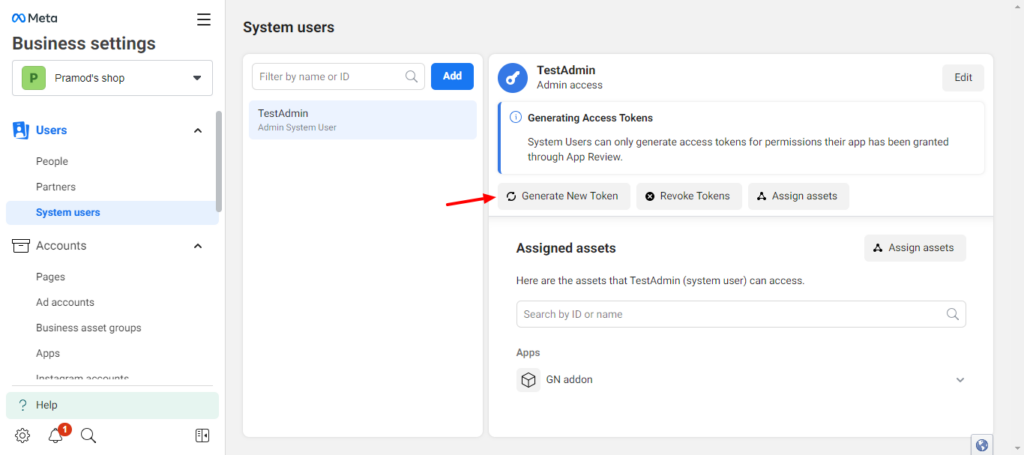
- Front the popup select your app.
- Select Never as the expire option, as it will never expire and you will not need to update the new token in Gravity notifications setting page.
- Select
whatsapp_business_managementandwhatsaapp_business_messengingpermissions.

After generating token, your permanent token will be generated to use in Gravity Notifications WhatsApp API settings.
Save the token in a safe place, it will not be displayed again.

You can get more details about creating App and Access token from the official page also.
Add API details to Gravity Notifications plugin #
Login to your WordPress dashboard and go to Forms > Gravity Notifications.

Scroll down till the WhatsApp section and enter the details that we have generated in the last few steps i.e. WhatsApp Business ID, WhatsApp Phone ID and the Permanent Access token.
Now you should be able to create a new form and set up a WhatsApp notification for each form.


