To enable features such as video calling, screen sharing, and whiteboard functionality in Private Messaging, you must first obtain API credentials from the Agora Console.
Step 1: Create or Access Your Agora Account
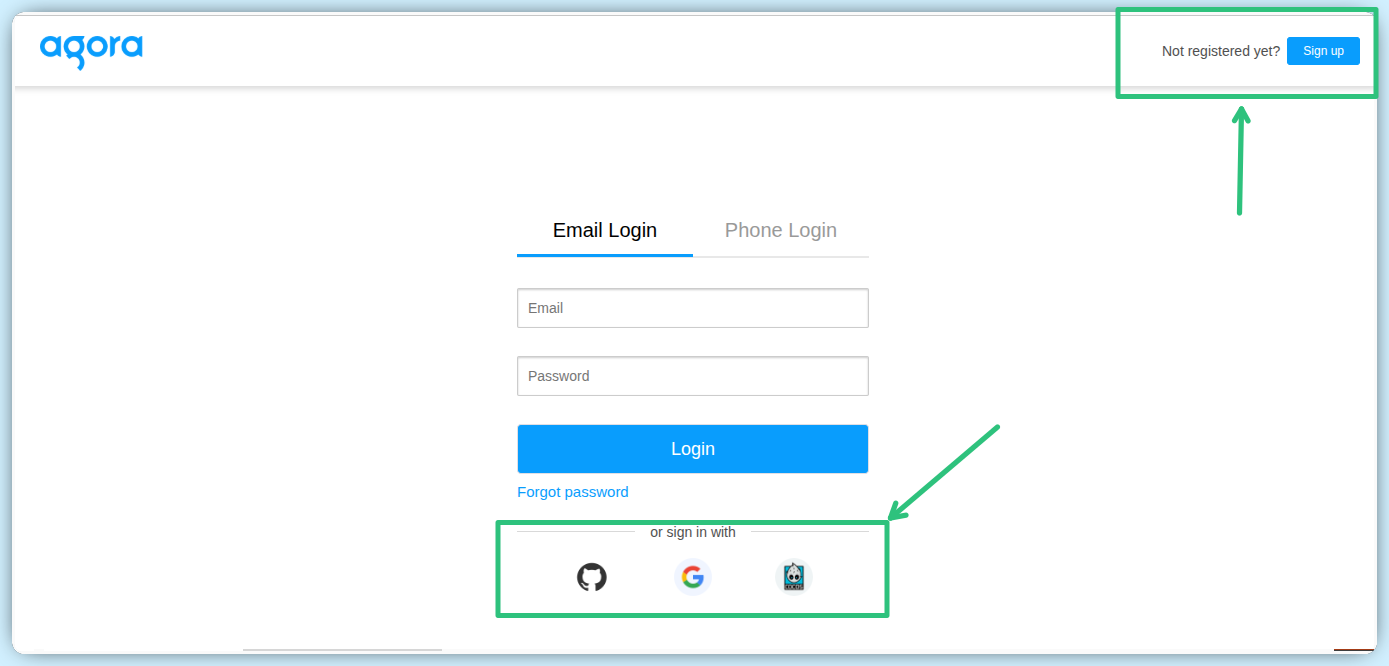
Visit the Agora Console and either log in to your existing account or register for a new one. You can sign in using GitHub, Google, or your email.
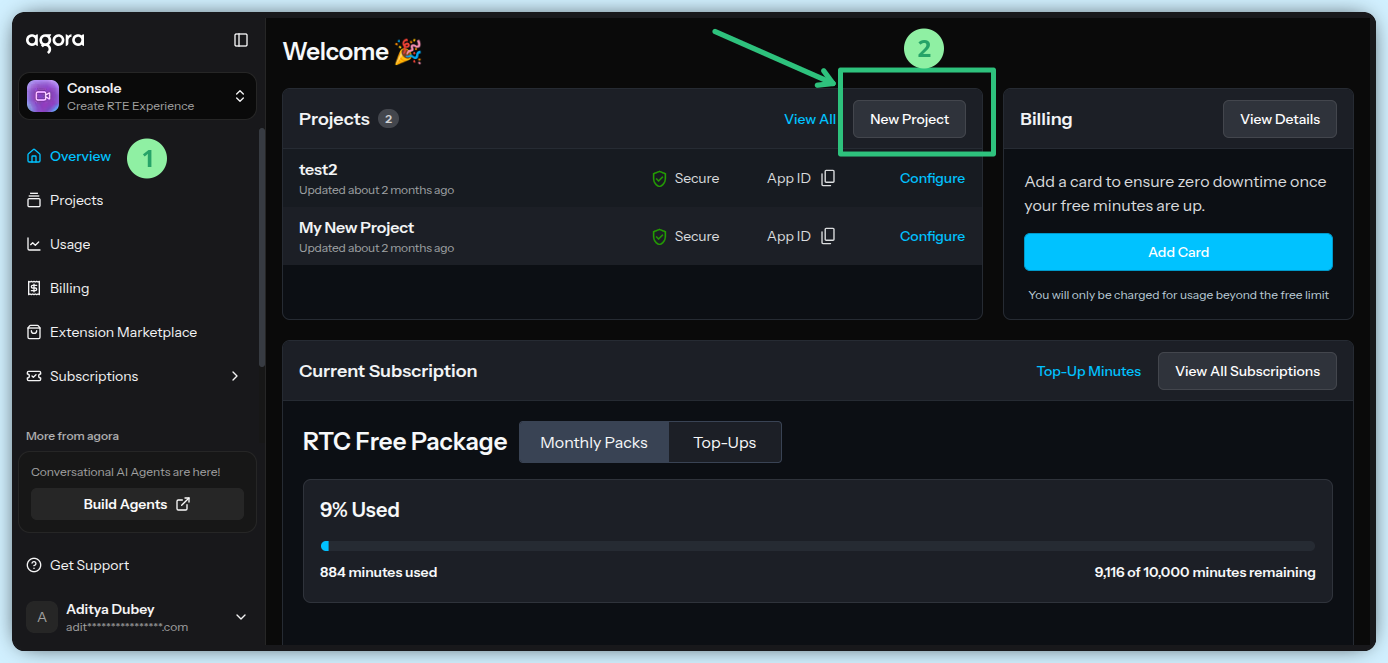
Step 2: Create a New Project
After logging in, you will be directed to the Overview page. Click on “New Project” to begin setting up your project.
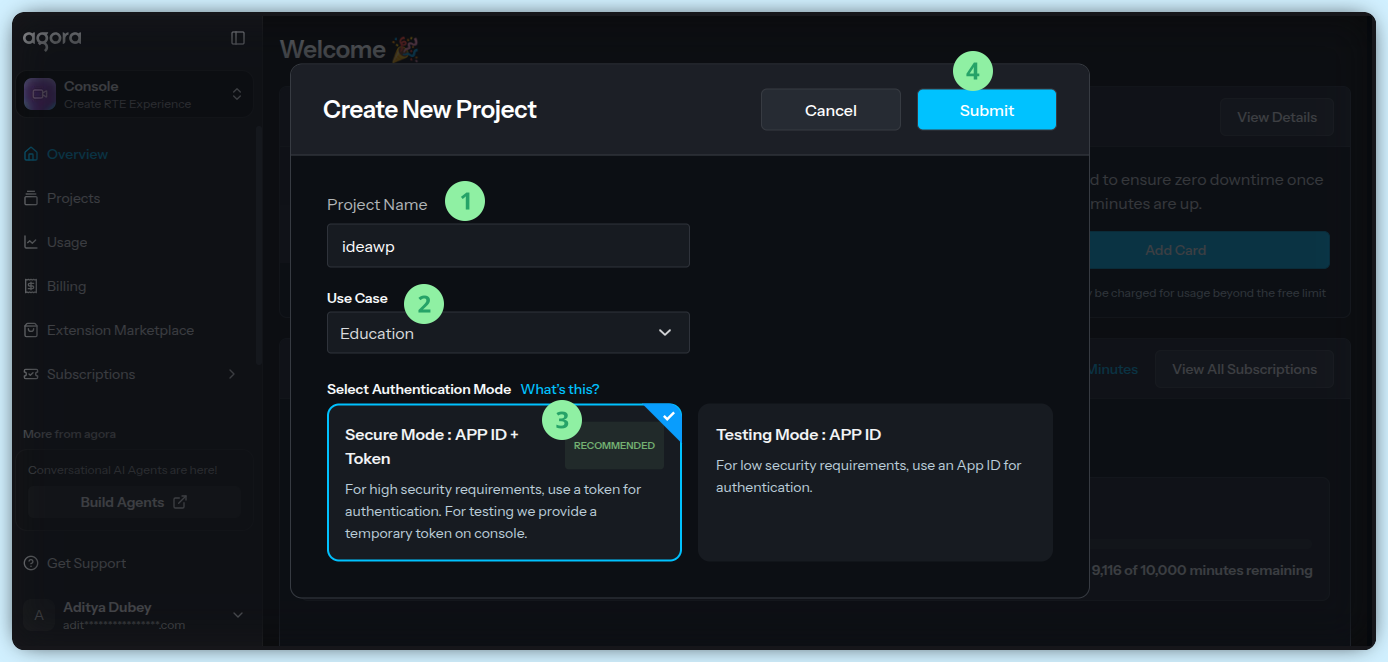
Step 3: Configure Project Details
Enter the required information:
- Project Name (e.g., ideawp)
- Use Case (e.g., Education)
- Authentication Mode: Select Secure Mode (default)
Click Submit to create your project.
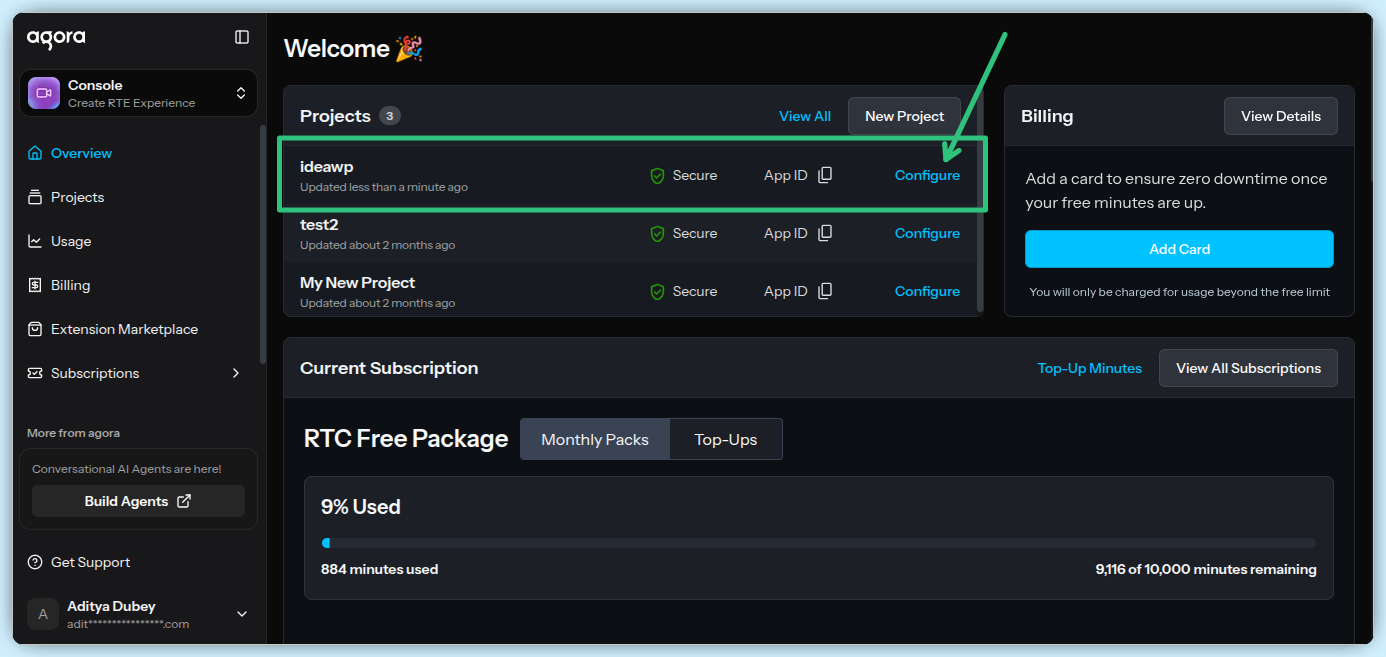
Step 4: Access Project Configuration
Your newly created project will appear in the project list on the Overview page. Click on the “Configure” option to manage its settings.
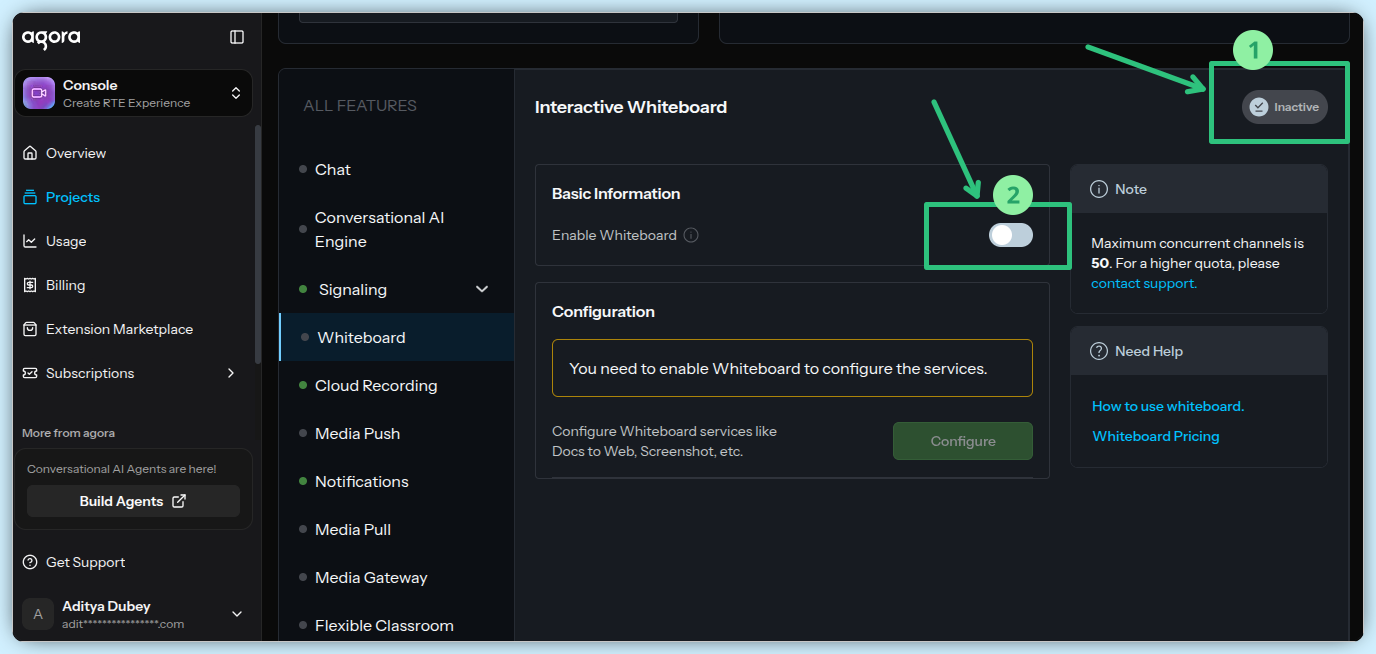
Step 5: Enable Whiteboard Functionality
Go to the Whiteboard section. By default, this feature is disabled. Toggle the switch to activate whiteboard sharing.
Step 6: Retrieve API Credentials
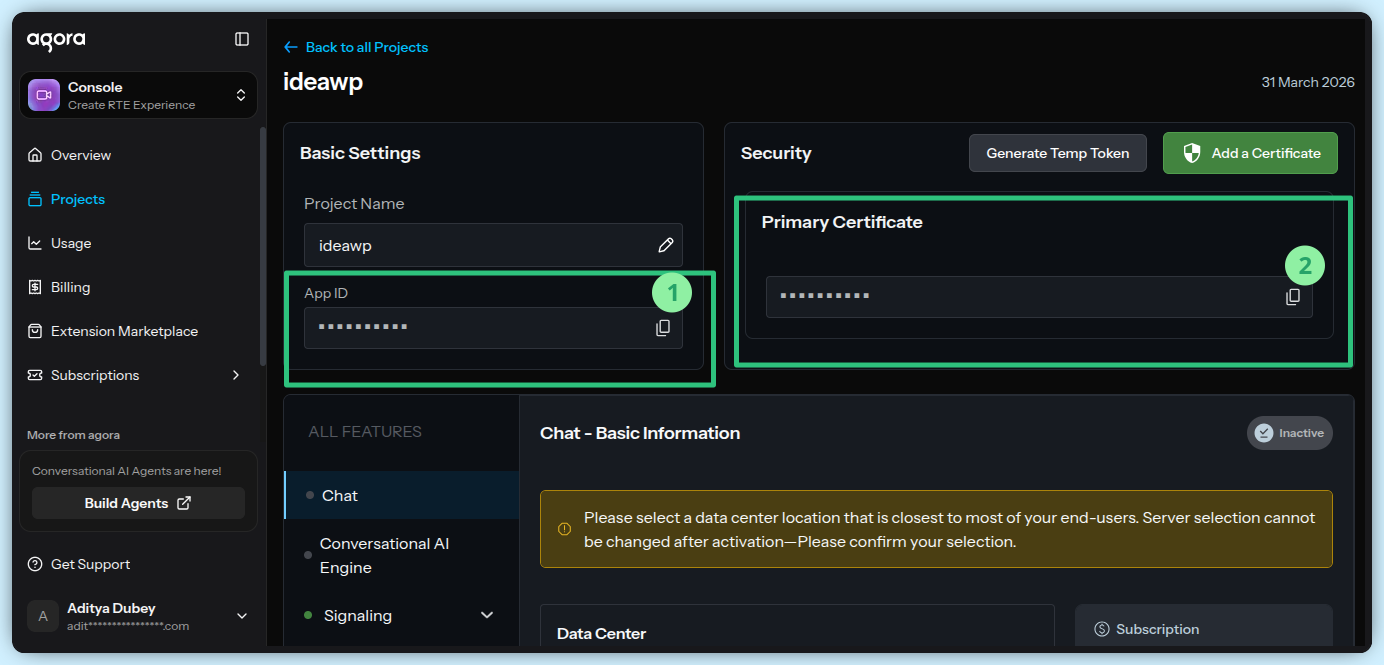
Return to the Basic Settings section.
Copy the following:
- App ID
- Primary Certificate
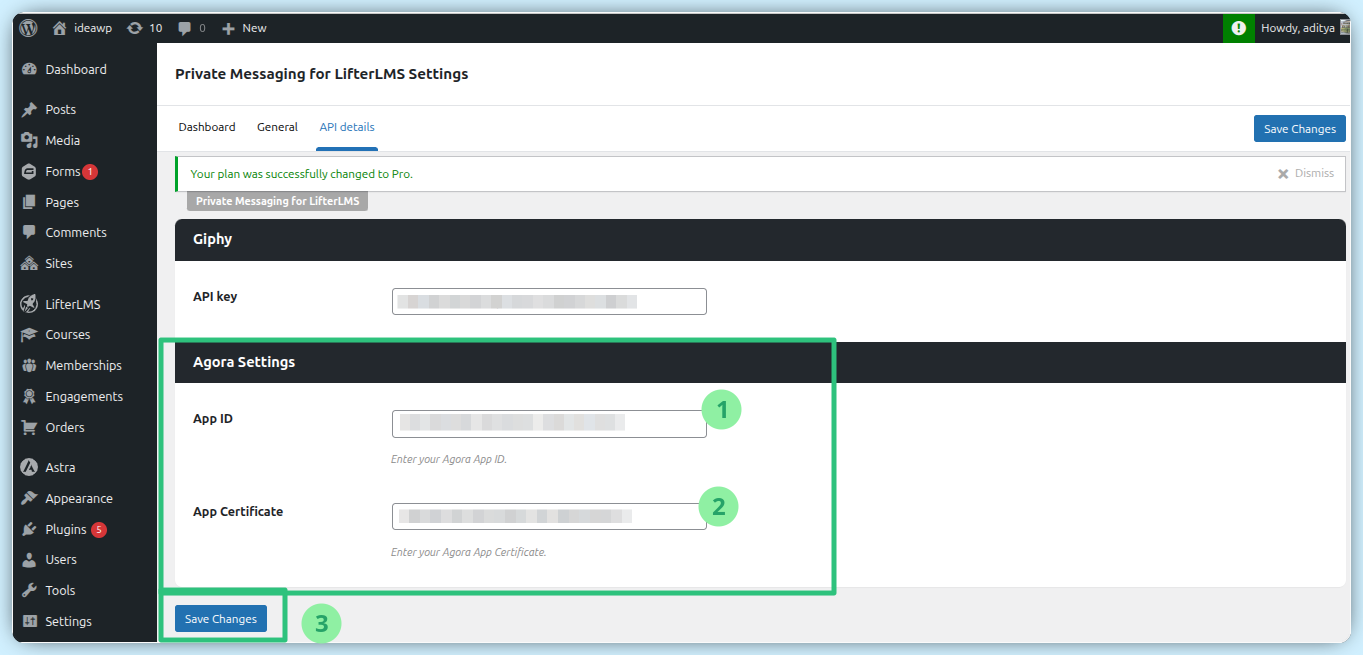
Paste these credentials into the Private Messaging API Details → Agora Settings section:
- App ID → AppID field
- Primary Certificate → Certificate field
Click Save Settings.
Step 7: Enable Video Call & Conversation for Connections
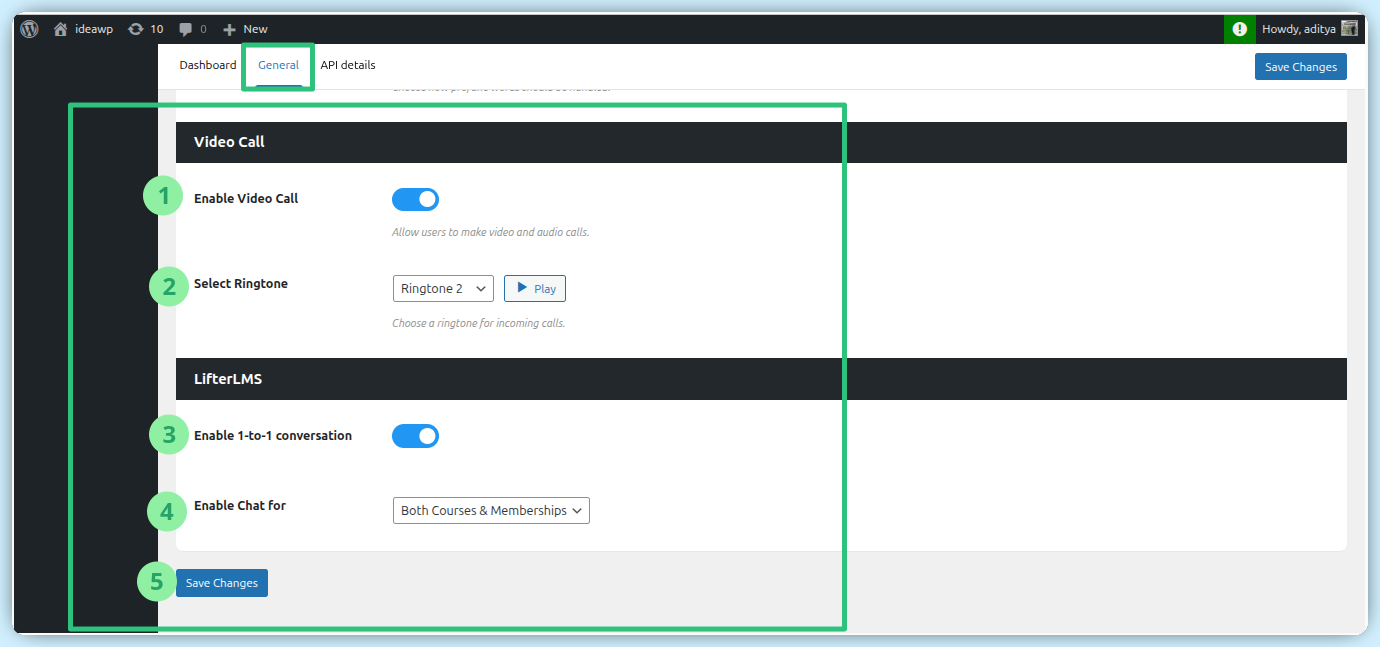
Navigate to the General tab in Private Messaging and configure the following:
- Enable Video Call
- Choose a ringtone
- Enable 1-to-1 conversations
- Enable chat for selected courses or memberships
Save your changes.
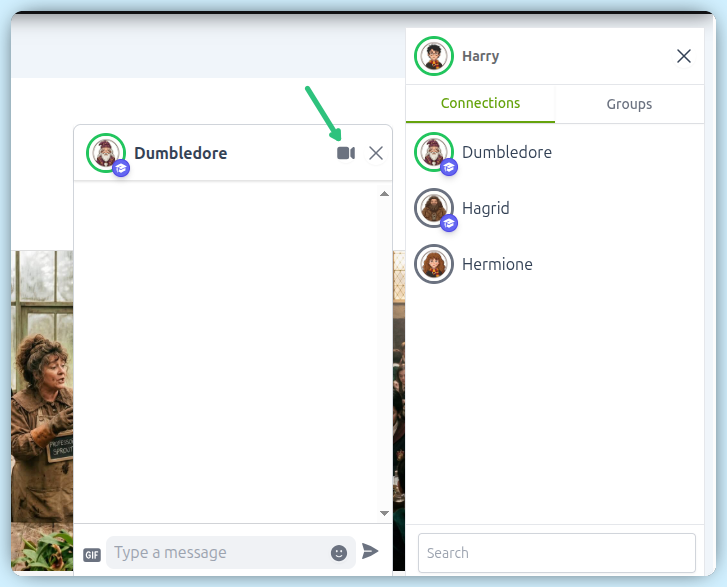
Step 8: Start a Video Call
Open the chat window with any connection. You will see a video call icon—click it to initiate a call.
You’re now ready to use all communication features –
try a demo to experience video calling, screen sharing, and whiteboard collaboration in action