Supercharge Your
WordPress Business.
 WooCommerce
 Gravity Forms
 WordPress
Our Growing Suite of Plugins
Everything you need to build engaging, profitable, and automated websites.
Private messaging for LifterLMS
Lightning-fast private messaging for your LifterLMS site.
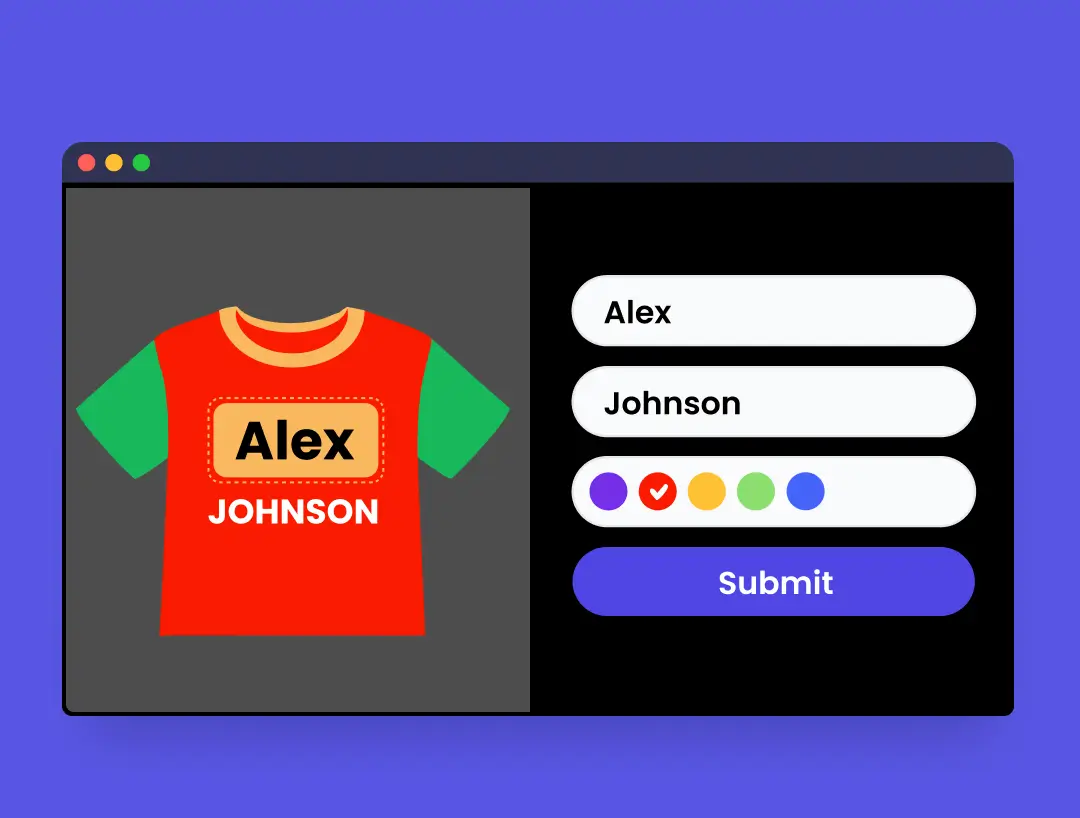
Image Configurator for Gravity Forms
Turn Gravity Forms into a visual product builder. Show real time image previews for custom t shirts, watches, furniture, and more.

Private messaging for LearnDash
Lightning-fast private messaging for your LearnDash site.
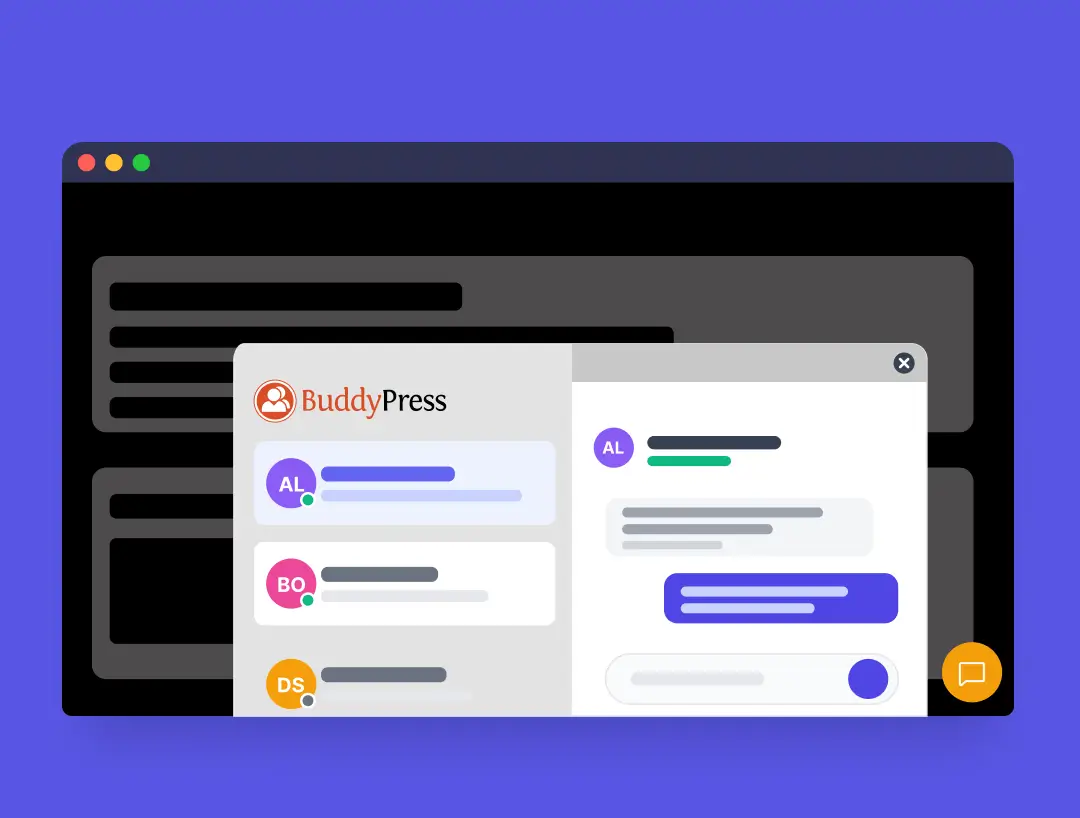
Private messaging for BuddyPress
Lightning-fast private messaging for your BuddyPress site.
Why Choose IdeaWP?
Built for performance, designed for growth, and trusted by communities worldwide.
Designed for Profit
Tools built specifically to increase conversions and revenue for your WordPress site.
Seamless Integration
Works perfectly with your existing tech stack: WooCommerce, Gravity Forms, and more.
Lightning Fast
Optimized code that keeps your site fast. Zero bloat, maximum performance.
Developer Friendly
Clean code, extensive hooks & filters, and comprehensive documentation for seamless customization.
Top-Tier Support
Get help directly from the team that builds the products. We care about your success.
Secure & Reliable
Enterprise-grade security standards and regular updates to keep your site safe.
Ready to transform your website?
Join thousands of website owners who trust IdeaWP for their website needs.